Start with General Shapes, Then Refine
Drawing a captivating portrait or character might seem tricky at first, but there’s a simple, effective method that can help you improve your sketches quickly: start with general shapes and then refine. This technique is a game-changer for both beginners and seasoned artists who want to keep their workflow smooth and their proportions accurate.
In this article, I’ll walk you through my favorite tips on how to use this method to create dynamic and well-structured sketches, just like I do in my daily practice. Plus, I’ll share some friendly insights on making the process enjoyable and effortless.
Why Starting with General Shapes Matters
When you begin a sketch by blocking out basic forms, it’s like laying a solid foundation before building a house. Using simple shapes such as circles, ovals, and boxes helps you visualize the overall volume and proportion without getting lost in details too early. It allows you to quickly see the big picture and make adjustments before committing to finer lines.
This approach also reduces the chances of misproportions, which can be frustrating when you get deeper into detailing your work. Think of it as sketching the skeleton before adding the muscles and skin — it’s all about establishing a strong structure first.
My Step-by-Step Tips for Effective Sketching
Here’s how I like to approach my sketches, inspired by the classic “start broad, refine detailed” method:
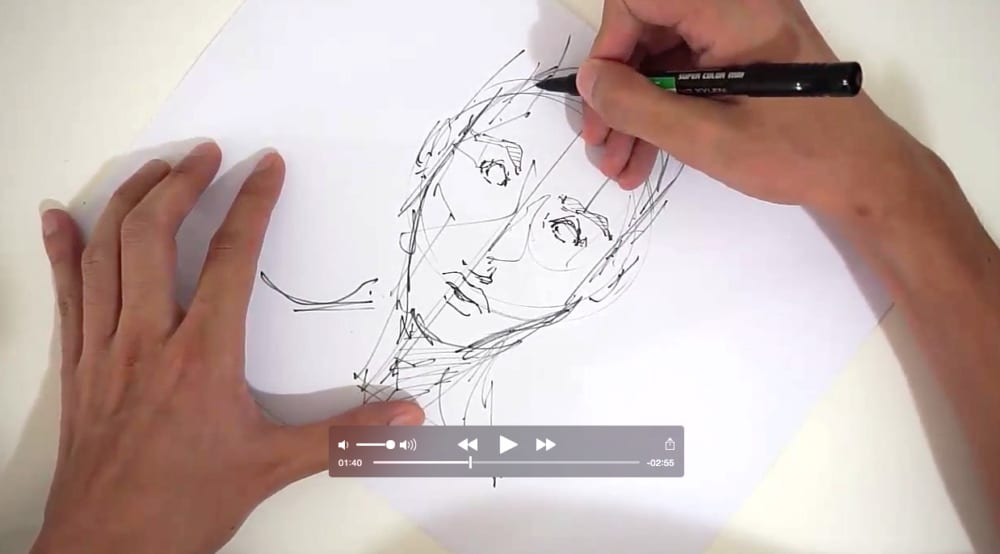
1. Create a Rough Head Sketch with Circles
Begin by drawing a big circle to define the general shape of the head. Add a symmetry axis down the middle to help with facial features later. Lightly sketch the chin and jawline to visualize the overall head proportion.
2. Map Out Facial Elements with Basic Shapes
Place ovals or simple shapes where the eyes, nose, and mouth will go. Draw the eyes as basic outlines first — human faces are not perfectly symmetrical, so don’t worry if one eye seems slightly different; this adds a natural feel.
3. Add Basic Details and Volume Lines
Refine the eyes, eyebrows, and hair with simple lines. Use imaginary lines to visualize the volume of the face, giving your sketch a sense of dynamism and life.
4. Refine and Add Depth
Gradually add reflections in the eyes, refine the chin curves, and soften the overall shapes. Add some shadows or background elements to give your sketch more context.
Practice Tips
- Open a magazine or look around for hairstyles or features you like—they can serve as great inspiration.
- Keep your initial shapes light and loose; don’t worry about perfect lines early on.
- Adjust proportions and features before adding details—this ensures your sketch feels balanced.
Wrapping Up
Starting a sketch with general shapes and refining it step by step keeps your workflow friendly and productive — no more frustration over perfect features from the start! Remember, every great artist began with simple shapes; the secret is to build your masterpiece gradually and confidently.
So grab your pencil, start with those basic shapes, and watch your sketches come alive with volume, proportion, and personality. Happy sketching, friends!
Feel free to leave a comment below or share your own sketching tips!
And don’t forget — the simplest shapes often lead to the most extraordinary artworks.
Chou-Tac
Related Articles


Add comment