- How to Boost Your Industrial Design Sketches Instantly
- Drawing TIP 1:Take inspiration from existing products
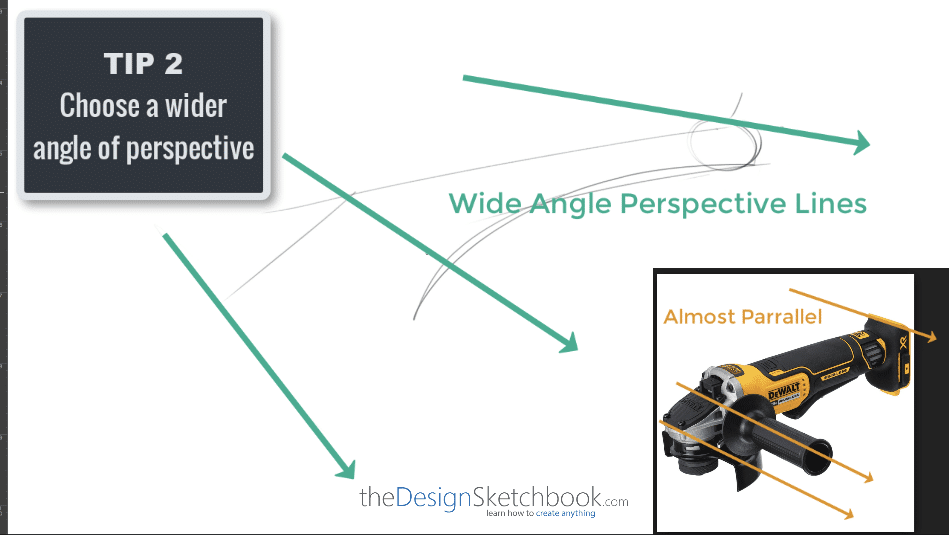
- Drawing TIP 2:Choose a wider angle of perspective
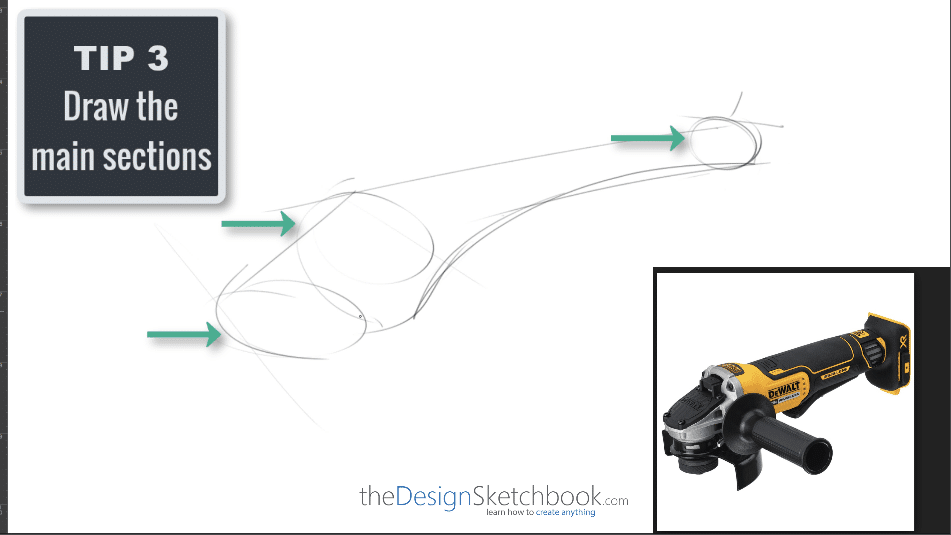
- Drawing TIP 3: Draw the main sections
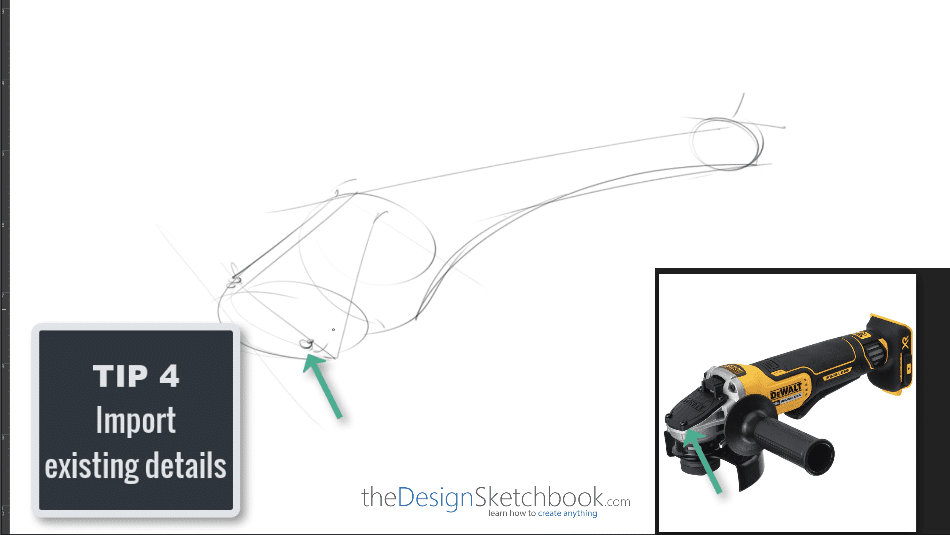
- Drawing TIP 4:Import existing details
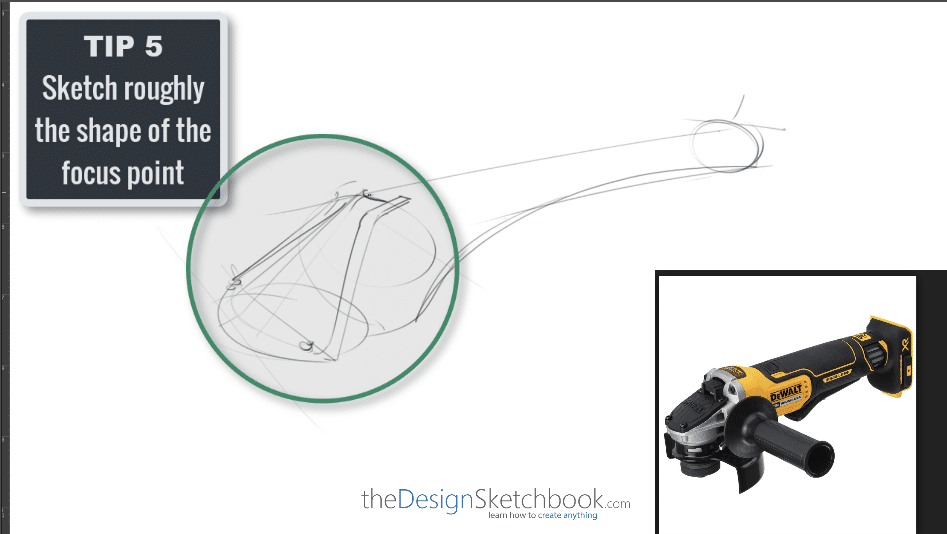
- Drawing TIP 5:Sketch Roughly the shape of the focus point
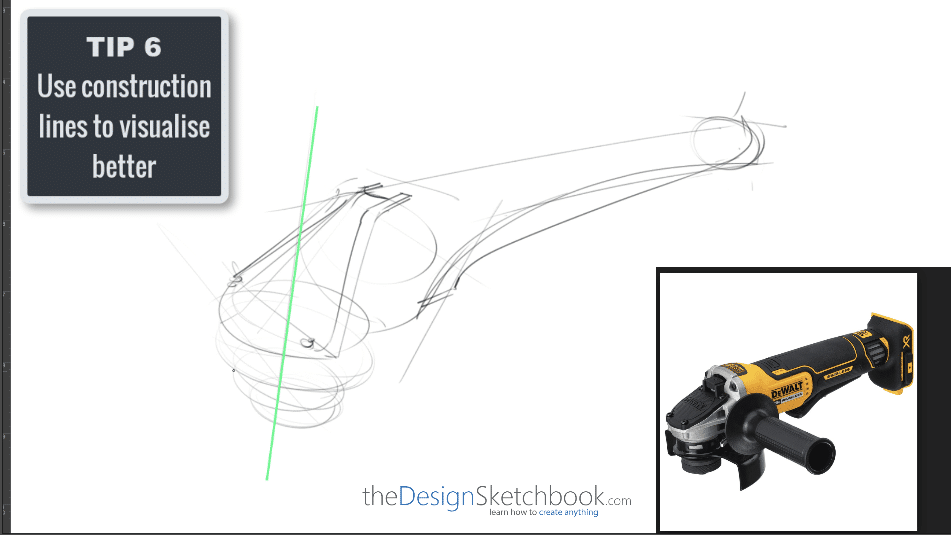
- Drawing TIP 6:Use construction lines to visualize better
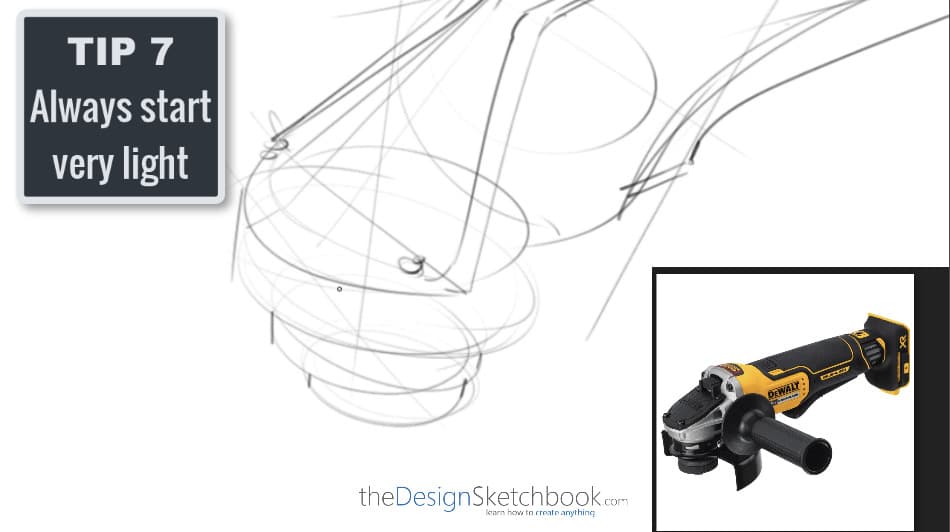
- Drawing TIP 7:Always start with light lines
- Drawing TIP 8:Use bolder lines for the product itself
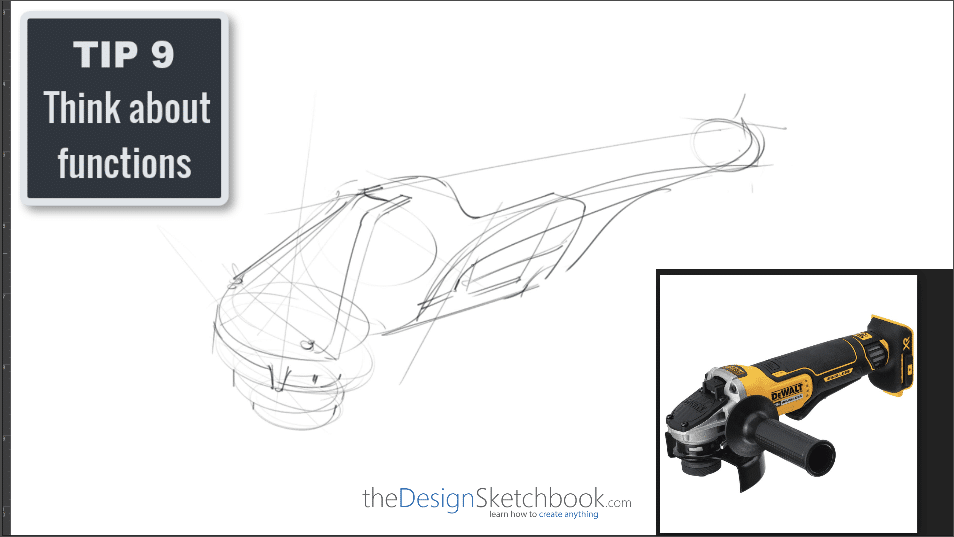
- Sketching TIP 9: Think about functions
- Drawing TIP 10:Draw a minimalist handle to see through it
- Drawing TIP 11:Make sure the handle follows the same perspective
- Drawing TIP 12:Draw by ignoring the handle first
- Drawing TIP 13"Scult" removing or adding material
- Drawing TIP 14:Details follow the perspective of the main volume!
- Drawing TIP 15:Use hatching to block some areas
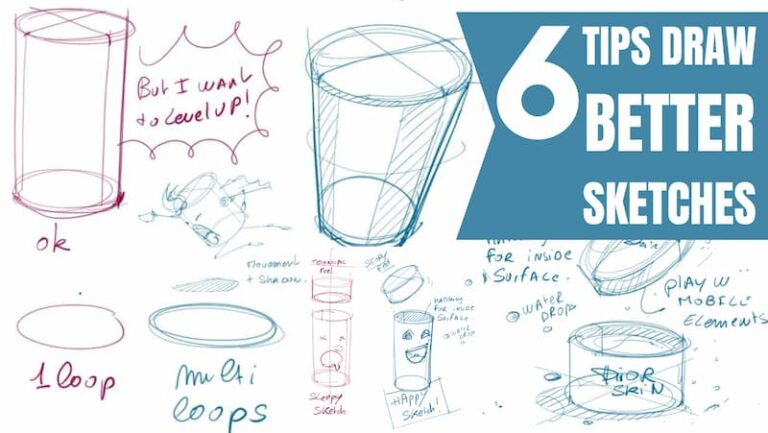
- Sketching TIP 16:Add some writing to space up!
- Sketching TIP 17:Think "inside" the box!
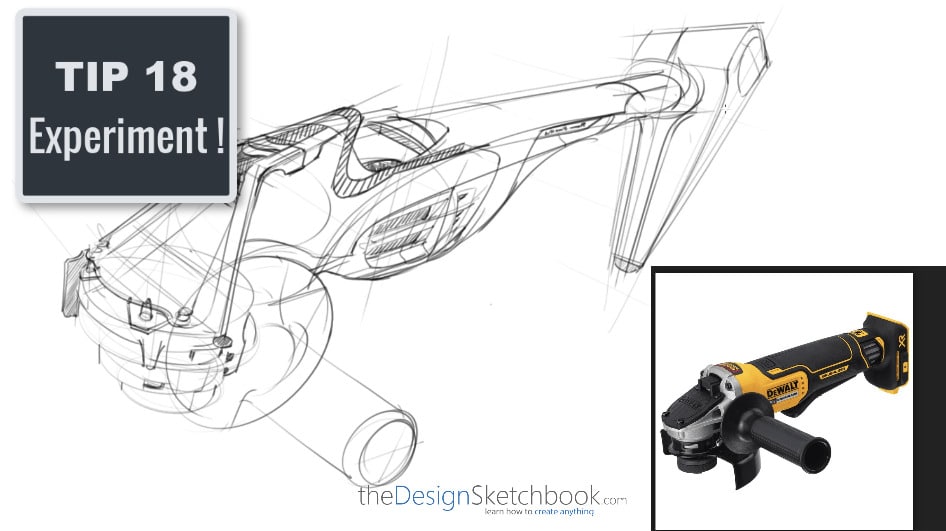
- Sketching TIP 18:Experiment!
- Drawing TIP 19:Think of the user's needs
- Drawing TIP 20:Take your time to refine and relax
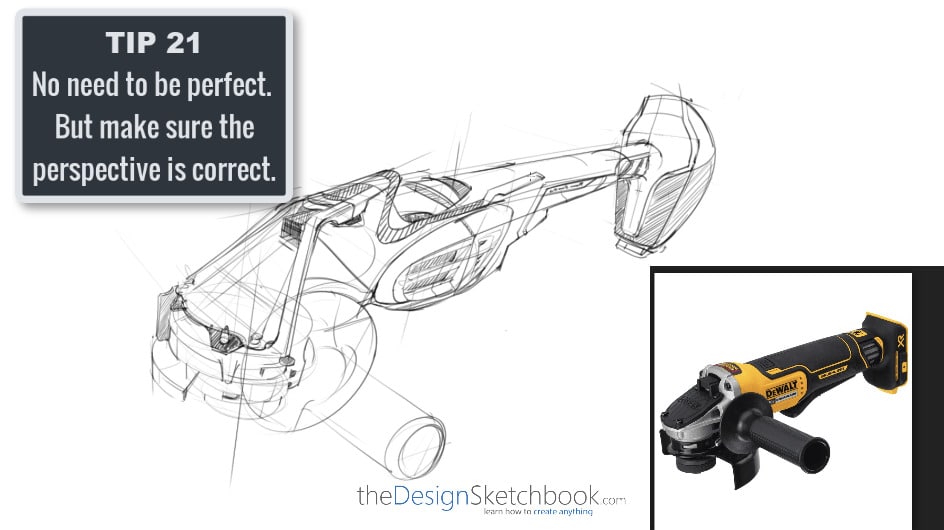
- Drawing TIP 21:No need to be perfect. But make sure the perspective is correct.
- Sketching TIP 22:Add a logo using a frame.
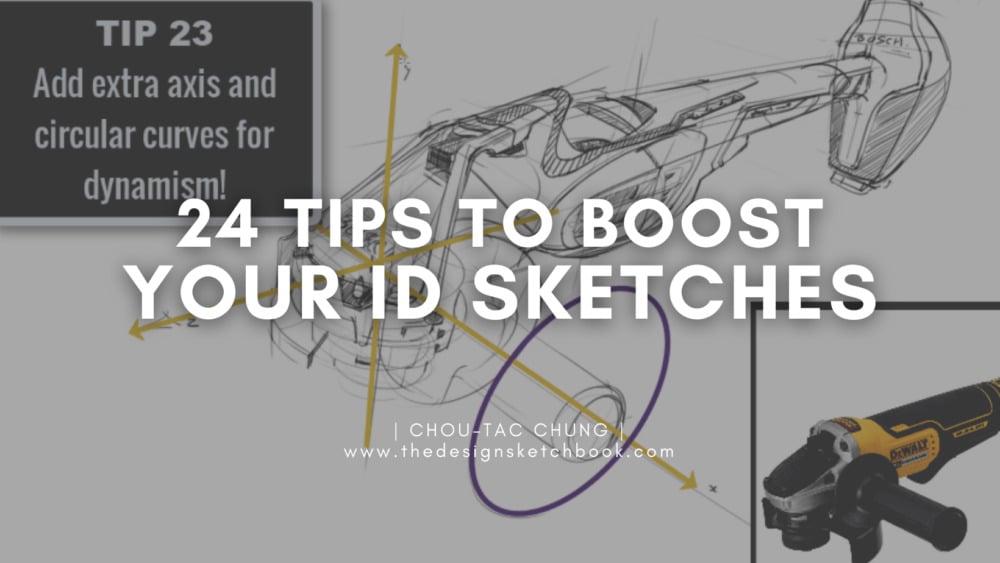
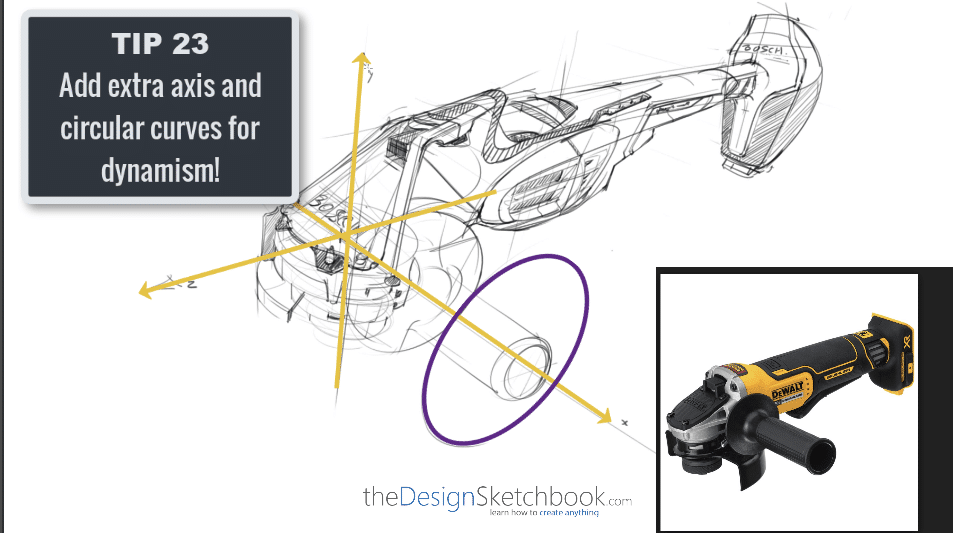
- Sketching TIP 23:Add extra axis and circular curves for dynamism!
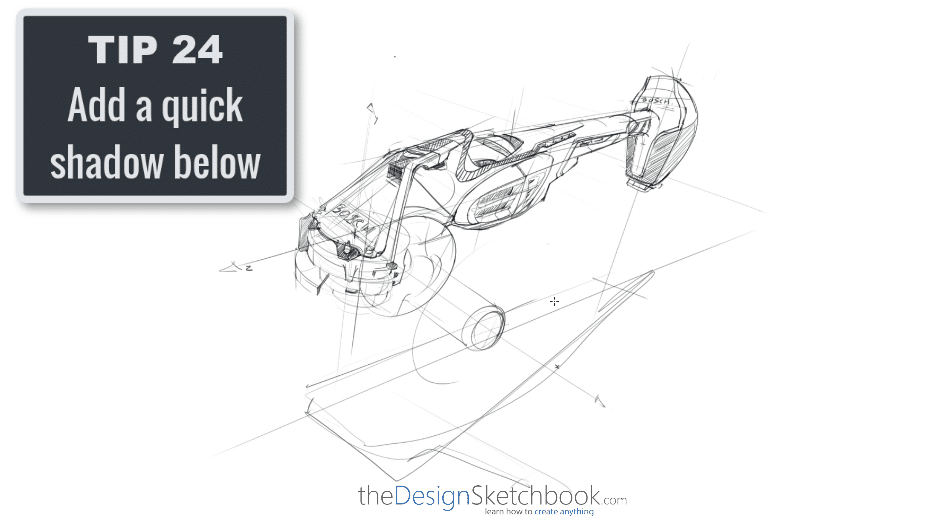
- Drawing TIP 24:Add a quick shadow below
Ready to bring your industrial design sketches to life?
Follow these 24 sketching tips and learn how to start drawing from a reference picture. Check this out!
How to Boost Your Industrial Design Sketches Instantly
Today, I share with you
how to start drawing from a reference picture
and create your own product design!
I started to search on Google pictures for tools and found an interesting cordless grinder.
I like its mechanical features.
I share with you a series of 24 tips to improve your Industrial Design sketching skills!
I took my Wacom Cintiq 22HD tablet to draw with Sketchbook Pro.
It is a very light software with a nice pen tool by default.
I invite you to make it a try, it is free and easy to use. 🙂
When you draw,
remember to set up a strategy to make it easy and logical all along the way for you.
There is no single approach.
But the main rules to remember are:
- Draw light for your construction lines
- Draw loose without looking for perfection
- Draw from general to details (Main body form > handle > buttons > stickers and logo)
- Always visualize your perspective, even for details
Drawing TIP 1:
Take inspiration from existing products

Drawing TIP 2:
Choose a wider angle of perspective
Drawing TIP 3:
Draw the main sections
Drawing TIP 4:
Import existing details
Drawing TIP 5:
Sketch Roughly the shape of the focus point
Drawing TIP 6:
Use construction lines to visualize better
Drawing TIP 7:
Always start with light lines
Drawing TIP 8:
Use bolder lines for the product itself

Sketching TIP 9:
Think about functions
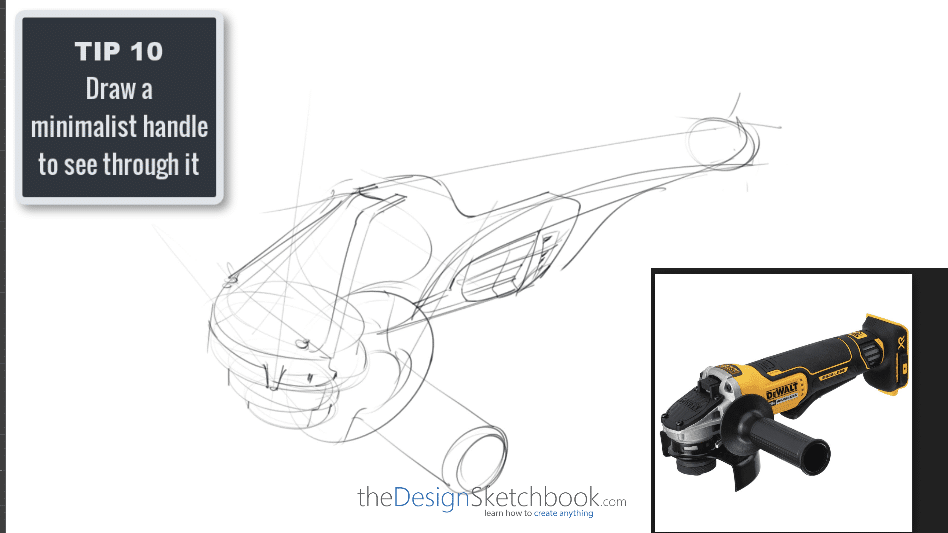
Drawing TIP 10:
Draw a minimalist handle to see through it
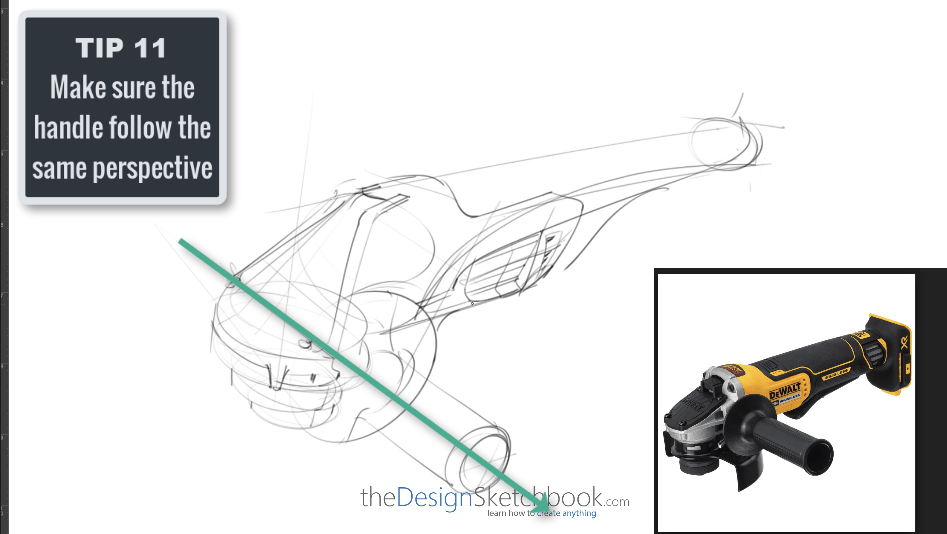
Drawing TIP 11:
Make sure the handle follows the same perspective
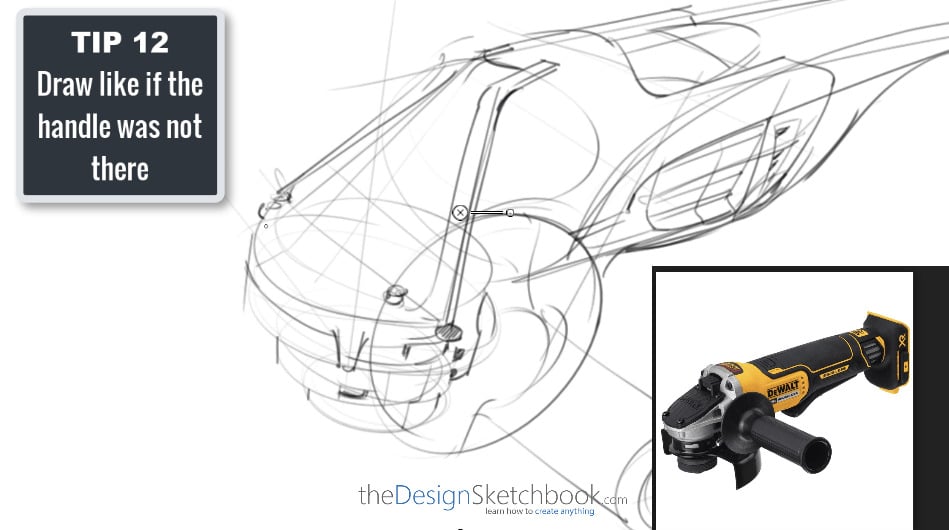
Drawing TIP 12:
Draw by ignoring the handle first
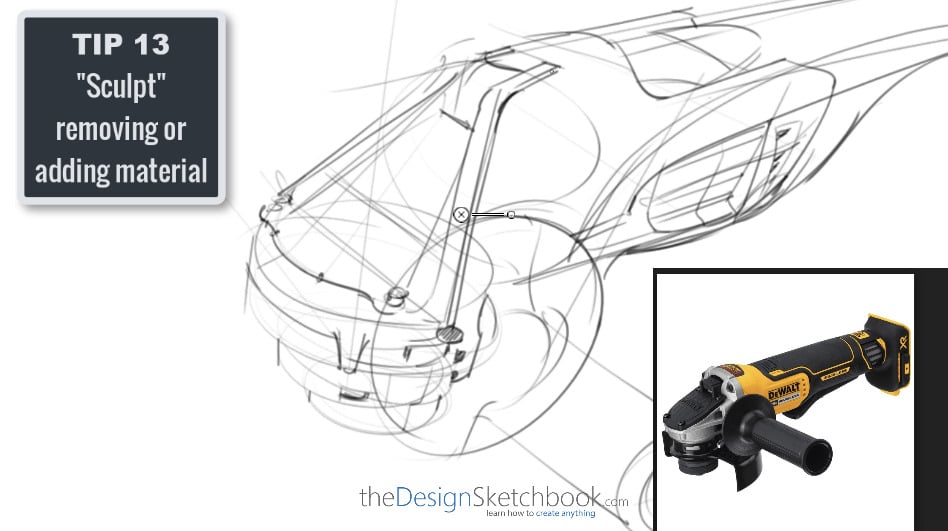
Drawing TIP 13
“Scult” removing or adding material
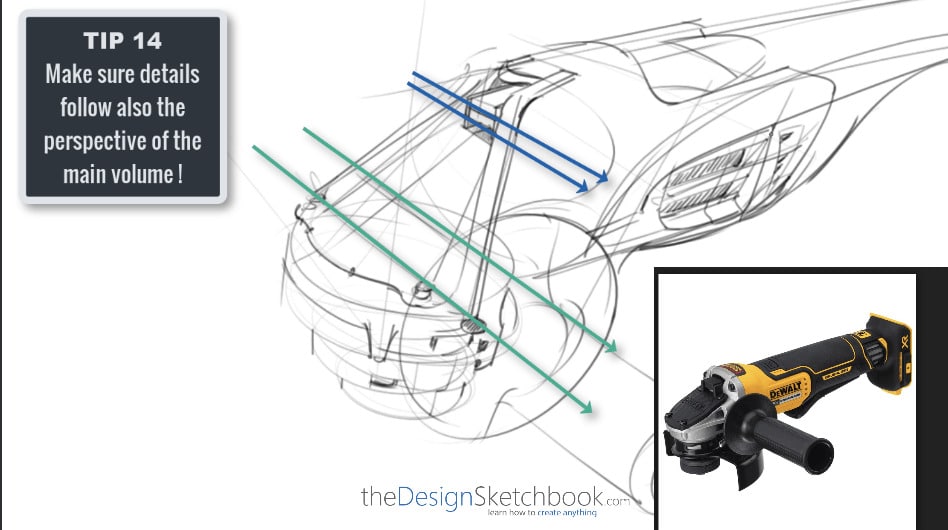
Drawing TIP 14:
Details follow the perspective of the main volume!
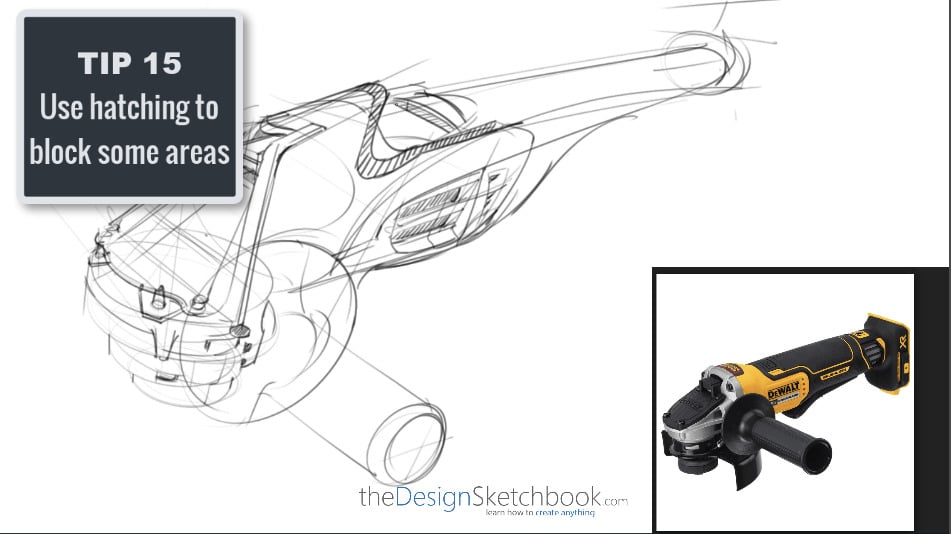
Drawing TIP 15:
Use hatching to block some areas
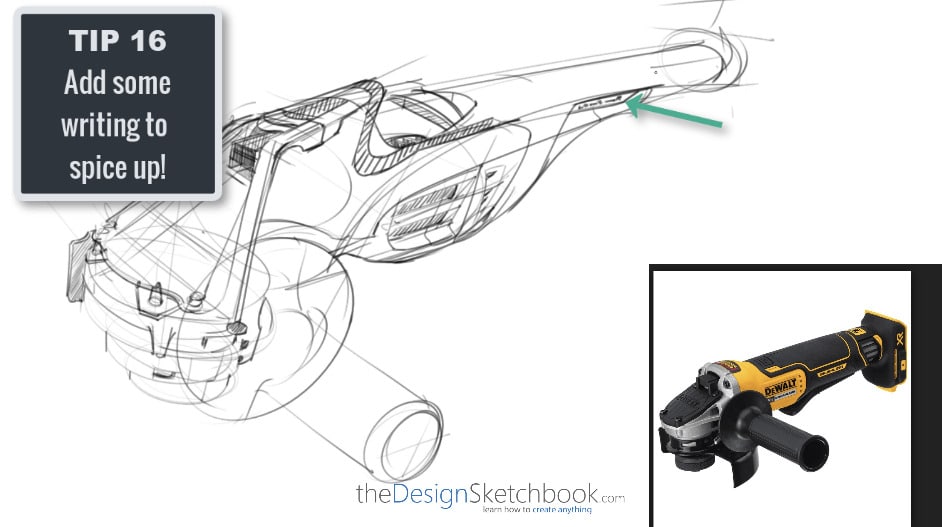
Sketching TIP 16:
Add some writing to space up!
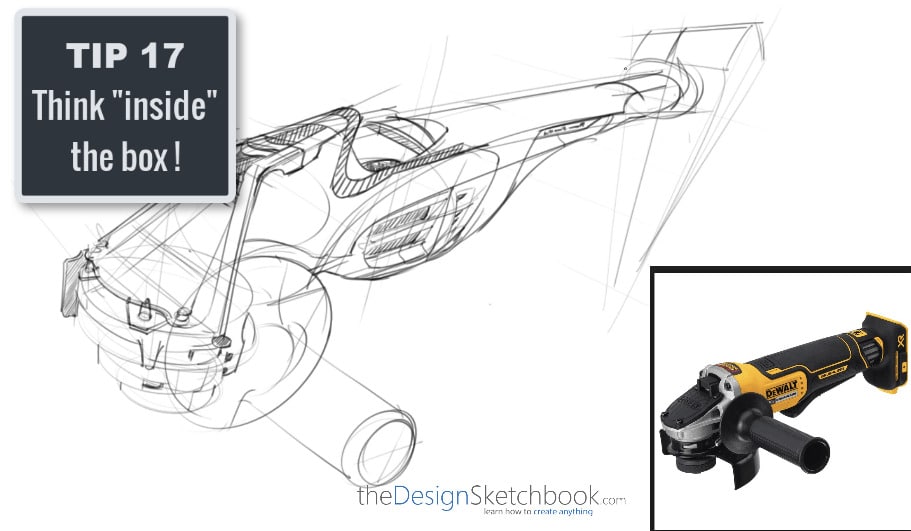
Sketching TIP 17:
Think “inside” the box!
Sketching TIP 18:
Experiment!
Drawing TIP 19:
Think of the user’s needs
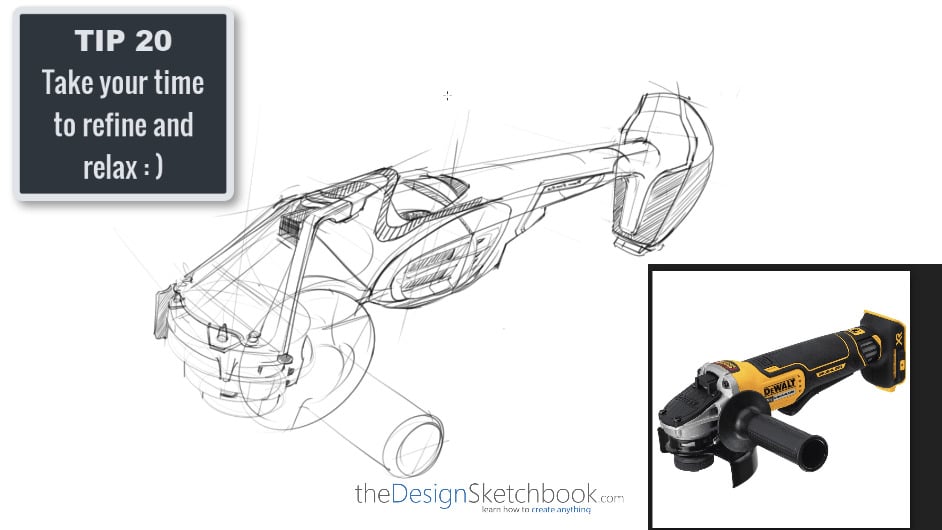
Drawing TIP 20:
Take your time to refine and relax
Drawing TIP 21:
No need to be perfect. But make sure the perspective is correct.
Sketching TIP 22:
Add a logo using a frame.
Sketching TIP 23:
Add extra axis and circular curves for dynamism!
Drawing TIP 24:
Add a quick shadow below
That’s it!
They are plenty of secrets I use and discovered during my school or professional years.
I am happy to share them with you and hope they are helpful to your design journey!
Cheers,
Chou-Tac
Learn more about Product Design Sketching


1 comment