Chou-Tac

Hello! I'm Chou-Tac, a Product Designer from France.

If the sketching methods I’ve acquired aid me in my life and in my industrial design career, I believe that they can also help you reach your dream goal as a student or professional designer.

Leave a comment in the blog or send me an email at choutac@thedesignsketchbook.com : )

Chou-Tac

Latest Comments

  • Chou-Tac: “Hi Gilbert, I have just sent it to you in your email. :)Oct 30, 11:44
  • HOUFFON: “j’ai fait la demande de l’ebook “Get the 37 Secrets of Sneaker Designers (FREE BOOK)” mais je ne reçois pas…Oct 30, 02:52
  • John paul bartholomew Rude: “My name is John. I’m from az, usa. I’ve been a self taught artist for 25 years, I want to…Oct 29, 22:11
  • Heera: “Heera from Malaysia, Just starting my role as student in industrial design with zero knowledge but I’m truly excited to…Oct 29, 17:25
  • James: “From Erie,PA and want to learn to draw my ideas correctlyOct 29, 16:44
  • Chou-Tac: “Hi James, I wrote an article about how Talent is overrated. That may help you keep forward with positivity! :)…Oct 29, 16:37
  • Chou-Tac: “Salut Gilbert, je t’invite a télécharger mon guide gratuit sur les chaussures. Je pense que cela va pouvoir t’aider a…Oct 29, 16:36
  • HOUFFON: “JE suis Gilbert HOUFFON,je suis béninois. Etudiant en droit mais je nourris une passion depuis 4ans pour les chaussures ce…Oct 29, 04:03

Trending

Categories

Discover step-by-step instructions for drawing multiple cylinders on the same scene, mastering ellipses and volume relations in perspective. This tutorial continues the practice started in Part A with architectural inspiration.​

We saw in the Part A how to solve a common mistake about drawing “dual ellipses” – showing the top surface of camera lens for example.

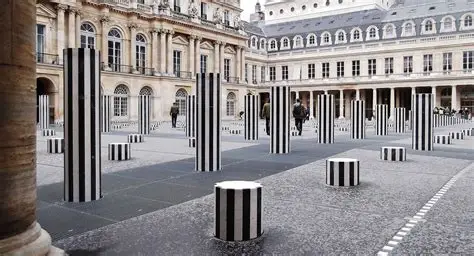
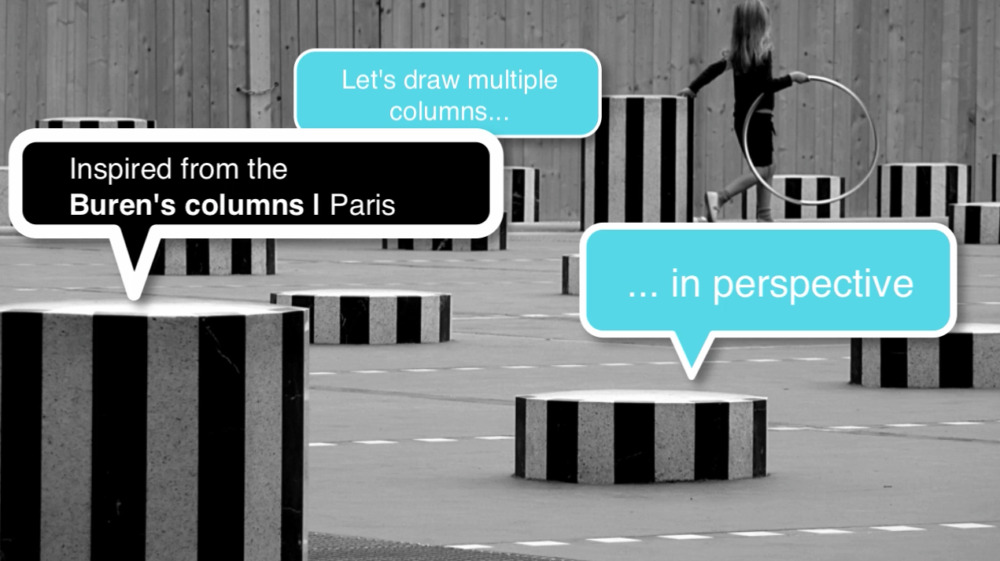
Today, let’s draw multiple cylinders on the same scene, like the Buren’s column in Paris.

Introduction and Overview

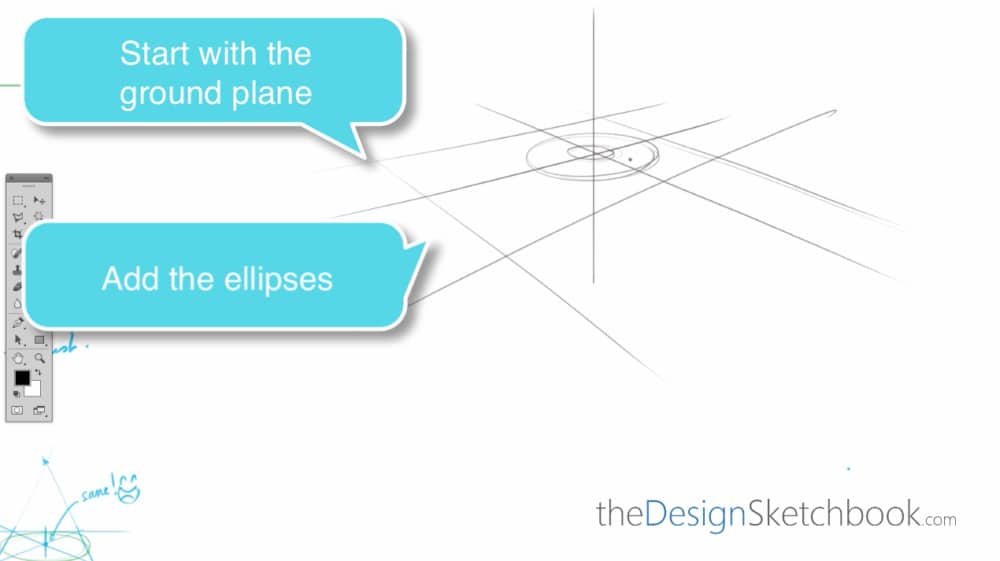
[Music] Hey guys, so let’s see how to do multiple cylinders Part B. First of all, feel free to download the Designer Starter Kit to make your first steps in design sketching such as perspective. Okay, so let’s start. We are going to draw multiple columns in perspective like these pictures inspired from the bar column in Paris.

Drawing the Ground Plane and Ellipses

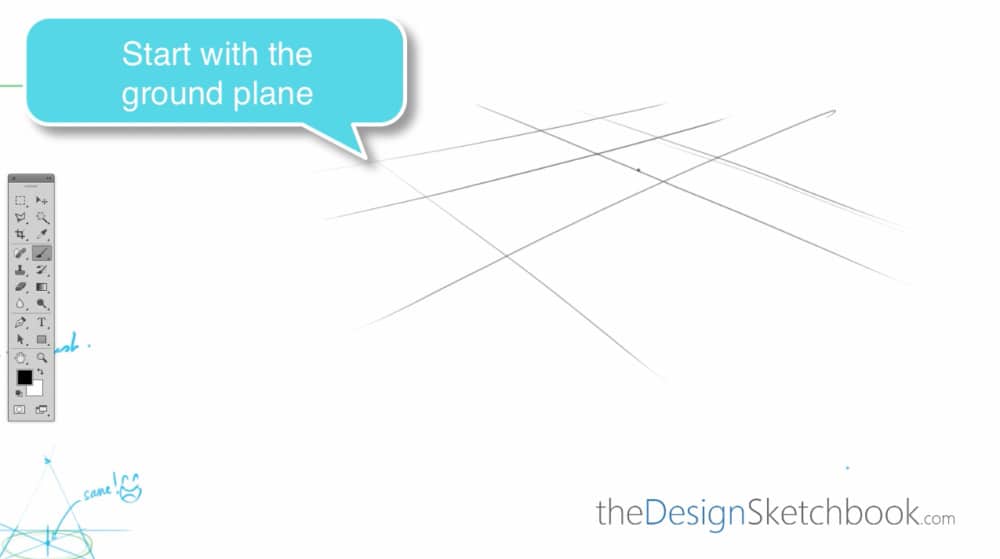
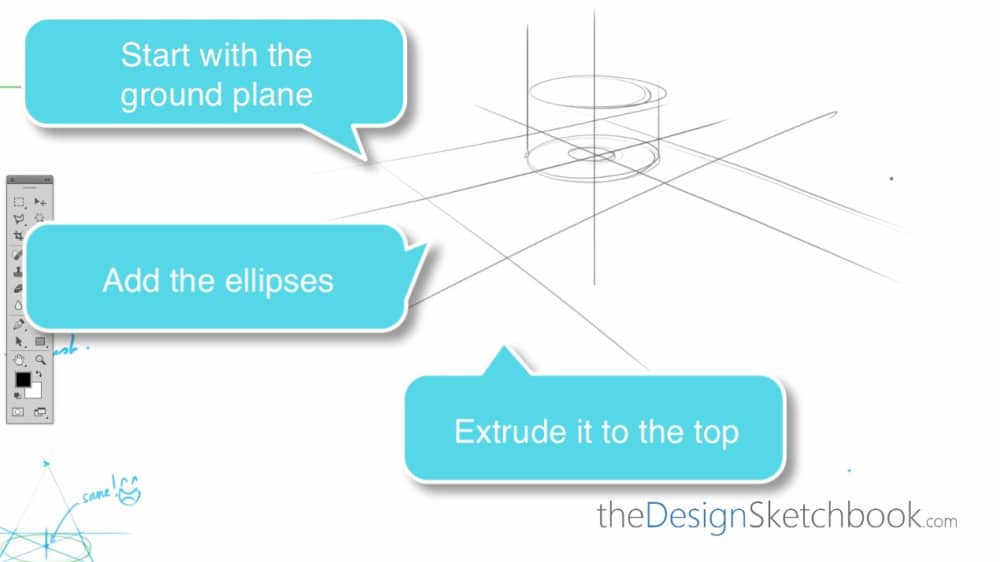
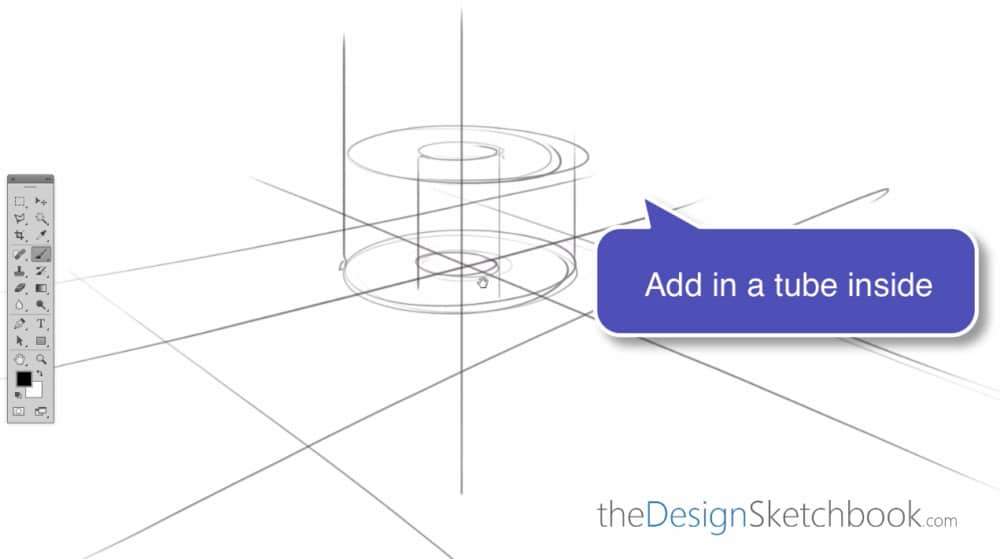
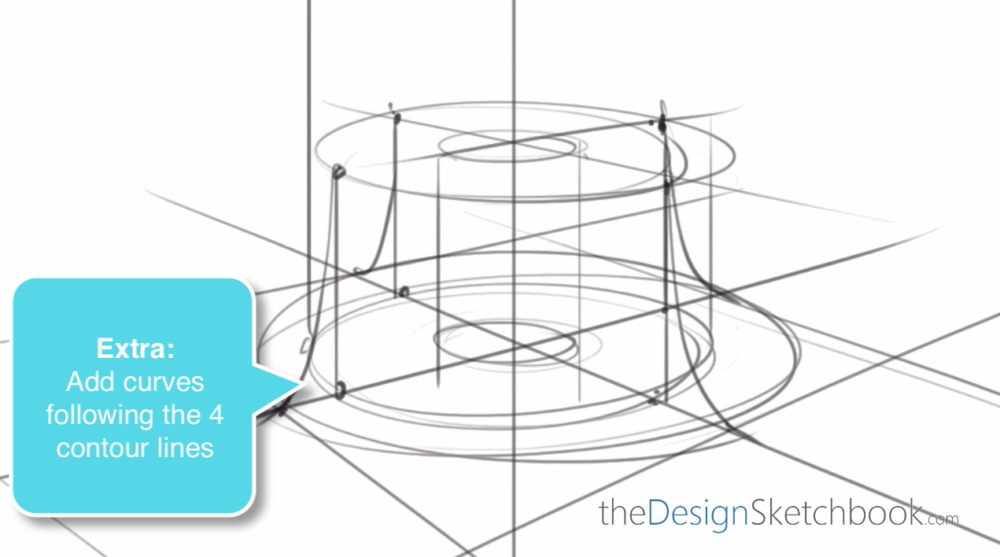
First steps, draw the ground floor, the ground plane, and then add an ellipse on it, plus an extra ellipse in the middle. Then what we want to do is to extrude it to the top. Now with the first ellipse, with the small ellipse in the middle, you can also add a tube inside. Time to add the control lines and make sure they are following well the converging lines of the perspective.

Adding Curves and Tubes for 3D Volume

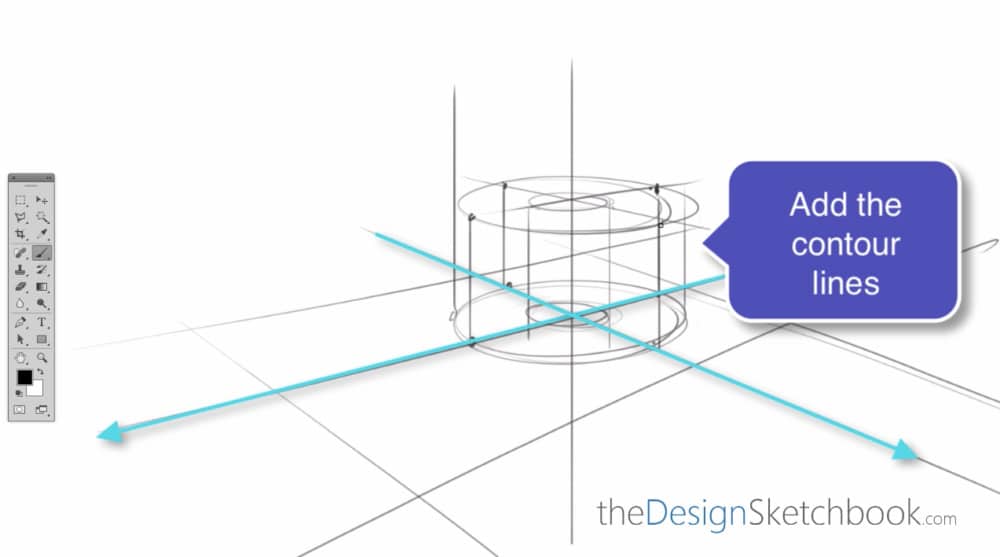
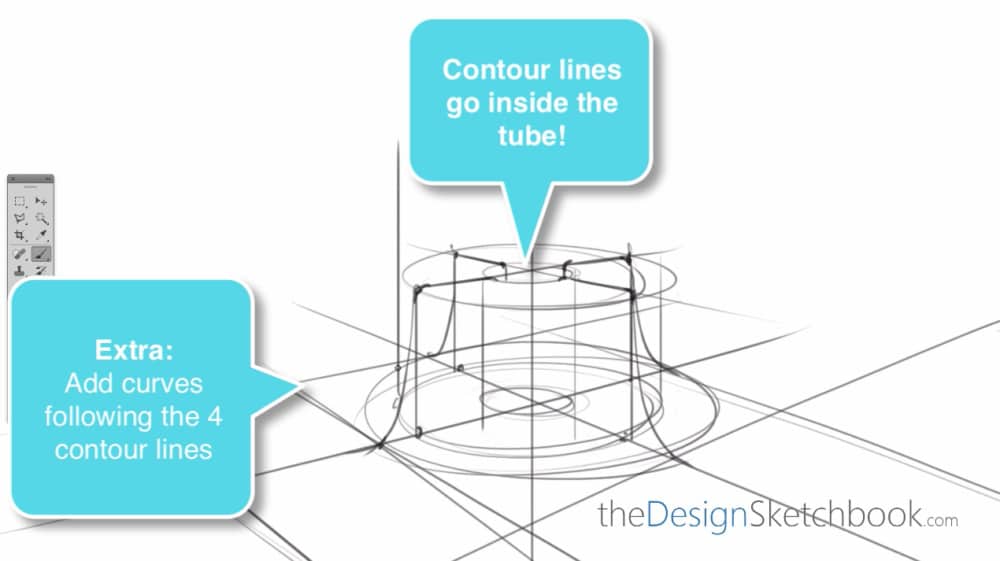
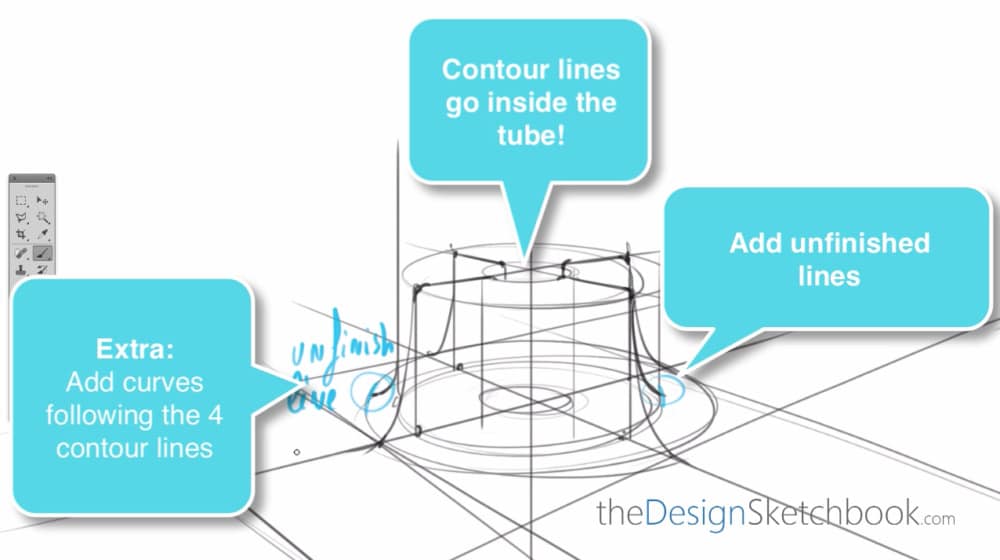
You can also add extra curves following the four contour lines right here. For the tube inside, make sure that your contour lines go inside. This is how you have a well 3D volume. Feel free also to add some unfinished lines on both sides. Now I’m adding some hatching for the shadow inside, so it’s giving even more contrast from what is outside and inside.

Drawing More Columns and Expanding the Ground

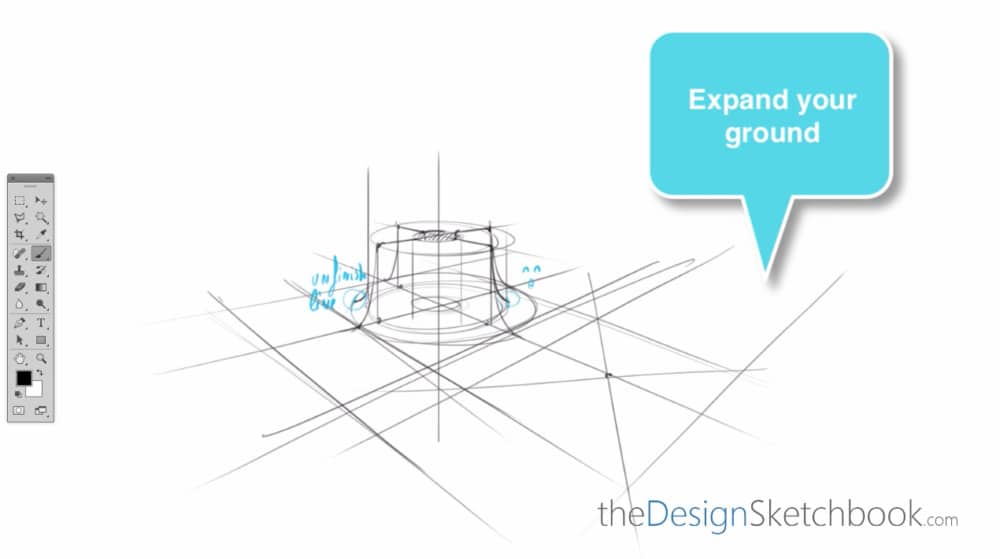
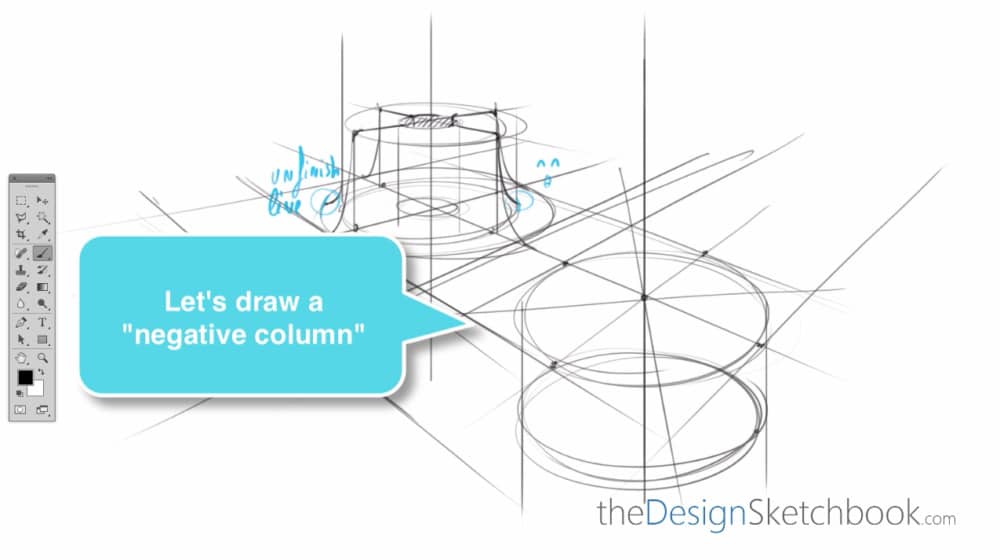
Now I want to draw some more columns around. We need to expand the ground by adding more converging lines. I draw an extra ellipse along my axis, and I want to draw a negative column which is going down this time. How about adding a rounded surface below like this? If you can see, all this extra curves are sections.

Checking Symmetry and Minor Axis

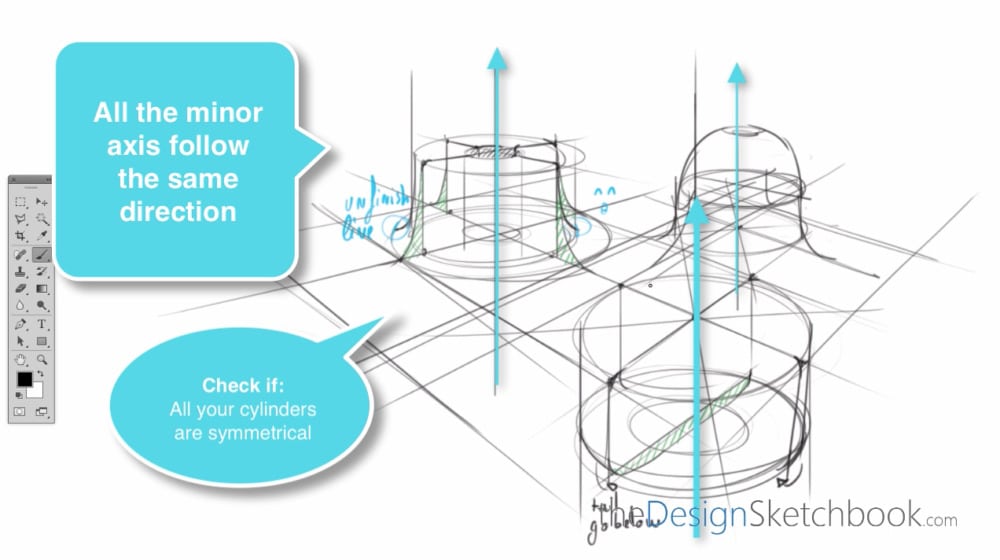
Make sure that your control lines go well below by adding a small tail. Remember you need to see in transparency. Keep going adding some more columns all around, including one behind. The golden rule here is to make sure that all your minor axes go in the same directions and check if all your cylinders are symmetrical. As you saw in part A, your minor axis is also a symmetry axis.

Adding Volume on Top of the Column

Let’s add an extra volume on the top here, like a levitating volume above the column. Add the contour lines, and I’m using the tube as a reference. I join and connect the contour lines which helps simplify the volume and give a good understanding of it.

Final Rough Drawing Practice

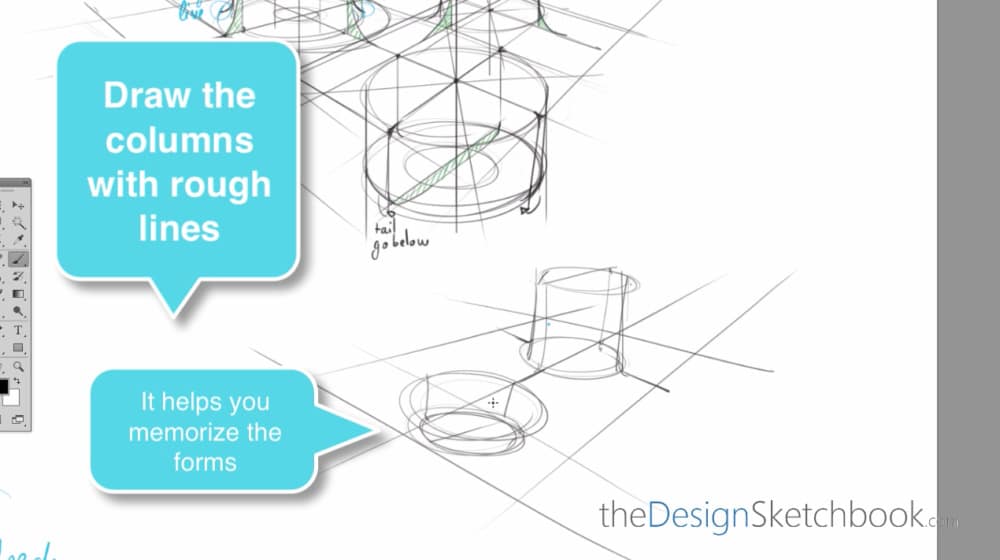
Now it’s time to draw the columns with rough lines, making sure you have memorized the process. You don’t have to be 100% perfect; it’s just for self-practice. That’s it for today, see you for the next tutorial. Bye-bye.


How to draw multiple cylinders- design sketching Part B a
How to draw multiple cylinders- design sketching Part B b
Download the Designer Starter Kit – with basic tutorial about perspective included.
How to draw multiple cylinders- design sketching Part B c
Let’s draw multiple columns in perspective – inspired from the Buren’s column in Paris.
How to draw multiple cylinders- design sketching Part B d
Start with the ground plane adding converging lines.
How to draw multiple cylinders- design sketching Part B e
Add the ellipses with the minor axis as well.
How to draw multiple cylinders- design sketching Part B f
Extrude the ellipse to the top following the minor axis as a guide.
How to draw multiple cylinders- design sketching Part B g
Repeat the operation with the smaller ellipse inside – to get a tube.
How to draw multiple cylinders- design sketching Part B h
Add contour lines. Make sure they follow the converging lines on the ground.
How to draw multiple cylinders- design sketching Part B i
Add curves at the bottom of the cylinder to add extra details.
How to draw multiple cylinders- design sketching Part B j
Repeat the operation for each of the 4 contour lines.
How to draw multiple cylinders- design sketching Part B k
Add unifinished lines as well.
How to draw multiple cylinders- design sketching Part B m
Time to add more cylinders. To do so, expand your ground adding converging lines.
How to draw multiple cylinders- design sketching Part B n
How about drawing a “negative column” going down.
How to draw multiple cylinders- design sketching Part B o
Double check your cylinders. All the minor axis go to the same direction. All the cylinders are symmetrical.
How to draw multiple cylinders- design sketching Part B p
Time for practicing with rough lines! It will help you memorize the process and the forms.

Related Articles

TIP 198 Why Starting Design School as a Beginner Can Be Your Greatest Advantage
Being a beginner at design school means you have an empty slate ready to absorb new knowledge. Embrace your passion, …
TIP 322 How to Draw Cylindrical Forms Easily (for Product Design)
Boost your product design skills with simple steps to draw cylinders accurately. Discover how to use symmetry axes, contour lines, …
TIP 107 How to Draw Arrows in 1-Point and 2-Point Perspective: Step-by-Step Tutorial Part 2
Today, a tutorial on How to draw arrows using 1 and 2-point perspective. With practice, you will be able to …
Designer - Talent is overrated
Talent alone won’t make you a successful designer. This article dives into the power of perseverance, having a “no excuse” …
TIP 183 How to Draw a Cube Fast and Easy From Imagination
Discover the fast technique for drawing cubes from imagination: master the XYZ axis, try both plane-first and axis-first approaches, and …
STEP 2 | How to Draw Cubes Like Tetris in Perspective
In the second part of the Cube Mania Challenge, discover how to draw connected cubes like Tetris in perspective. Practice …

Add comment

Your email address will not be published. Required fields are marked *

close-link
Start Sketching Today Step-by-step!

GET YOUR DESIGNER STARTER KIT NOW!

The
close-link
The
YES! SEND ME THE BOOK!
Send me The Book
close-image

Don't Miss New SKetching Tutorials!

Subscribe
LEARN 1-TIP-A-DAY TO BOOST YOUR LEVEL!
SUBSCRIBE!
Yes! I want to follow
The Design Sketchbook Youtube CHannel!
close-link
Click Me

Did you like it?

Share this with your friends.