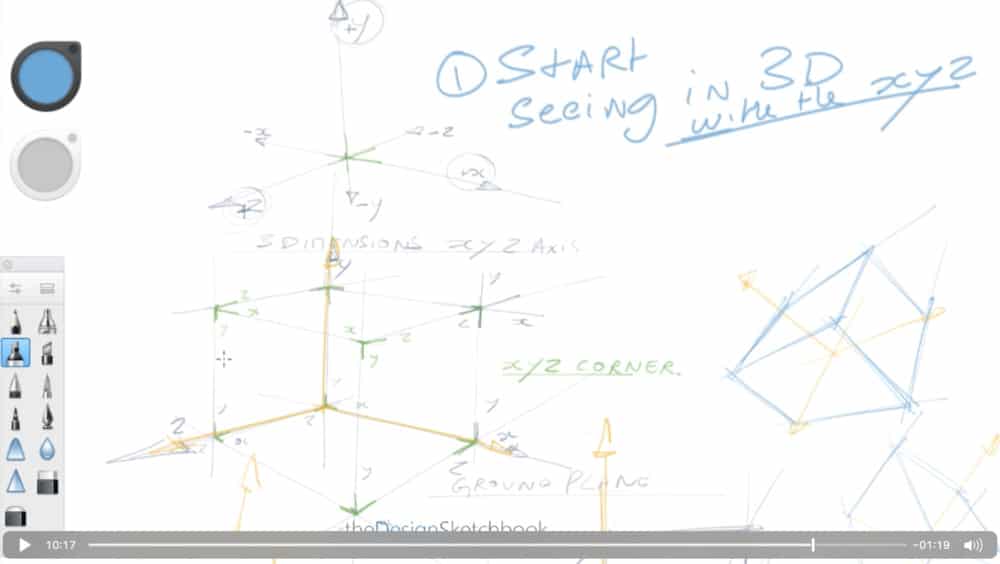
Transcript: Let’s draw cubes with the XYZ axis!
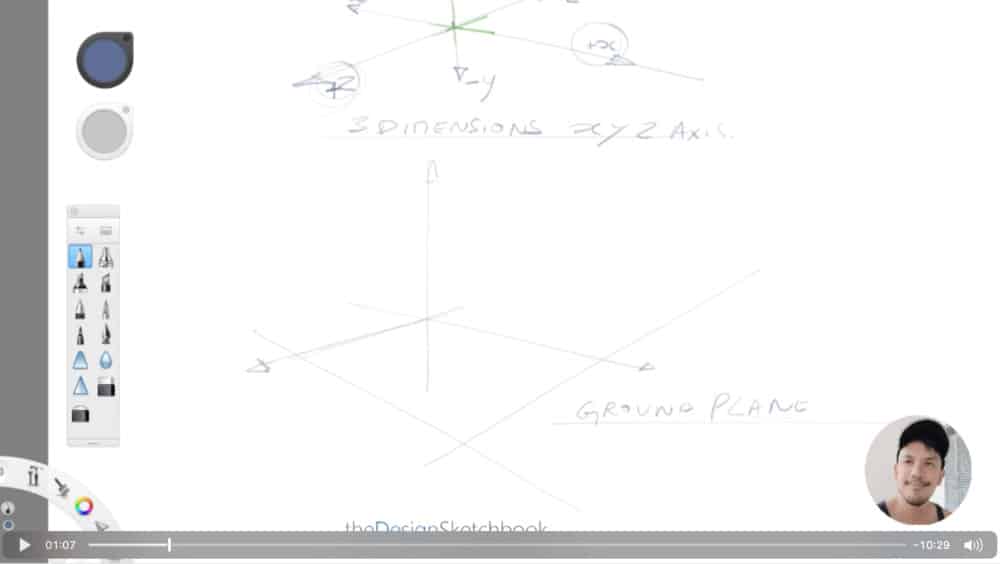
x y z axis helps you visualize in 3 dimensions fast and easy.
You will draw cubes from any viewpoint and from any direction and we are going to get this x y z axis to help you to better visualize.
So, you can see also some -x, -y, and -z which is going to opposite directions. But this is just a detail just remember the x y z.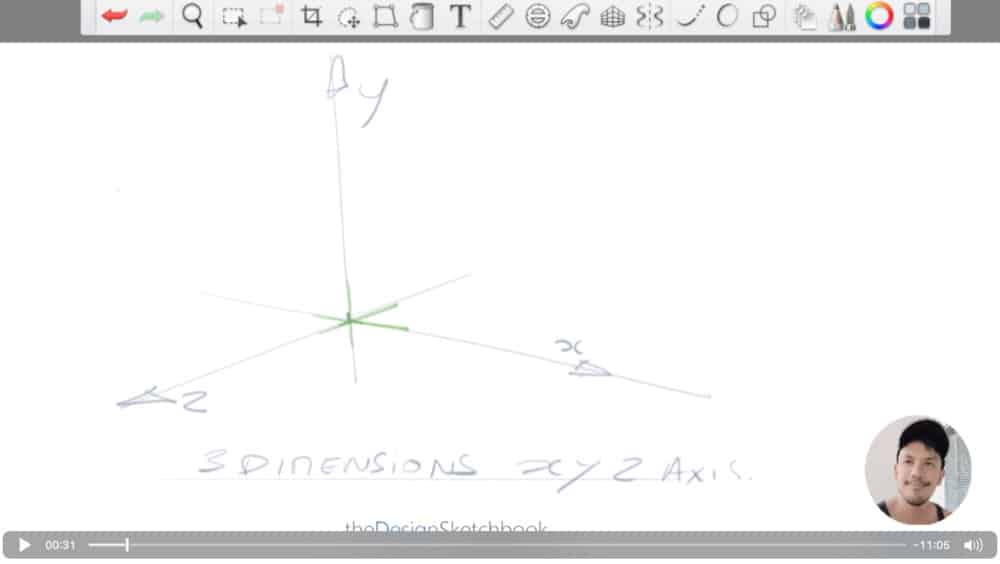
And before getting started I invite you to download the Designer Starter Kit.
It is free.
STEP1 Draw The Ground Plane
What we can do with the x y z axis at the beginning is to start to draw the ground plane is like… Basically, imagine:
- If you have a product, this is a table plane.
- Or if you have something at a human scale like a motorbike or a car, the plane is the ground plane itself.
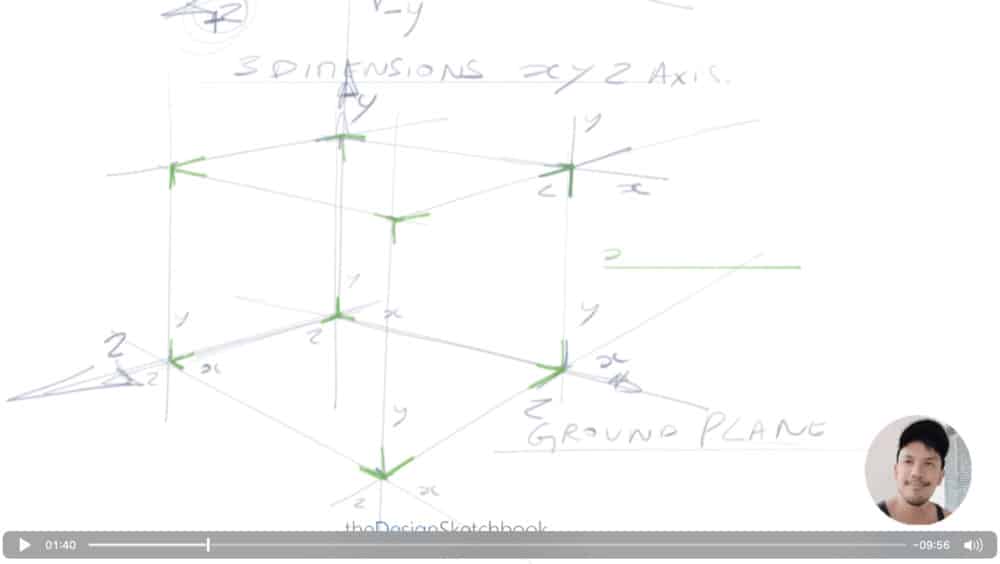
STEP 2 Elevate Each Corner
And then what you want to do is to elevate on each corner with vertical lines.
Make sure all the vertical lines are parallels.

STEP 3 Reconstitute the top surface of the cube
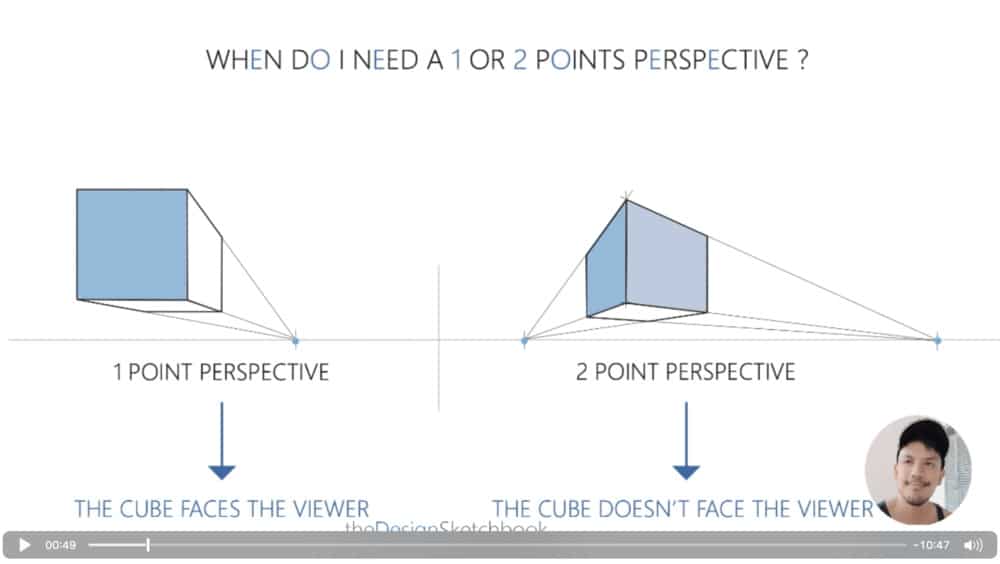
Use the 2-point perspective rules to draw the top surface of the cube.
In case that this step looks too advanced for you, so I invite you to download the Designer Starter Kit, where you will get all the basics to draw in 1 and two 2 point perspective, which is going to be really necessary for this tutorial of the day.

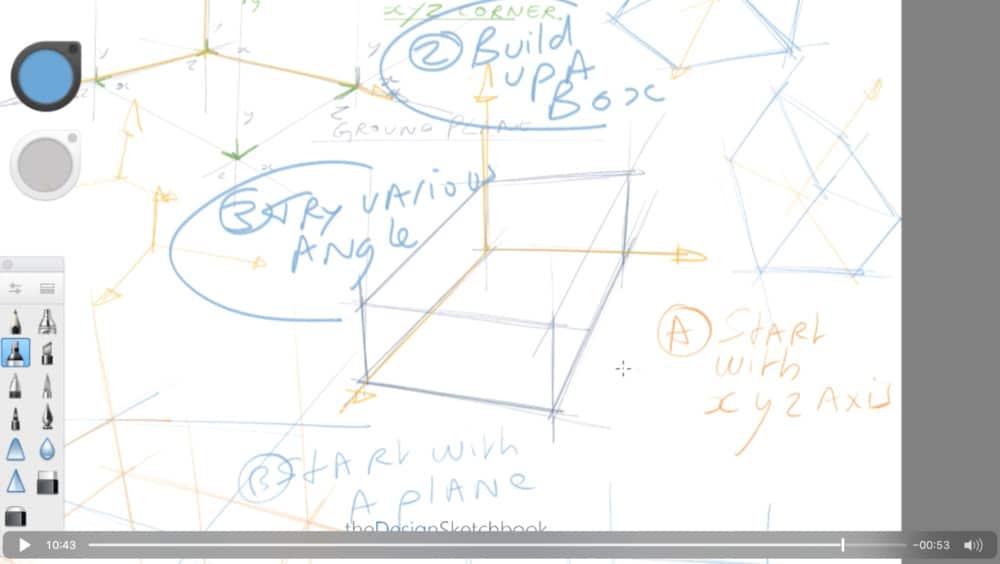
STEP 4 Spot the XYZ axis at each corner
So as you can see here, for each corner of this box, you will see some mini x y z axis. So I invite you to always visualize them. And I like to call them the “x-y-z Corner”.
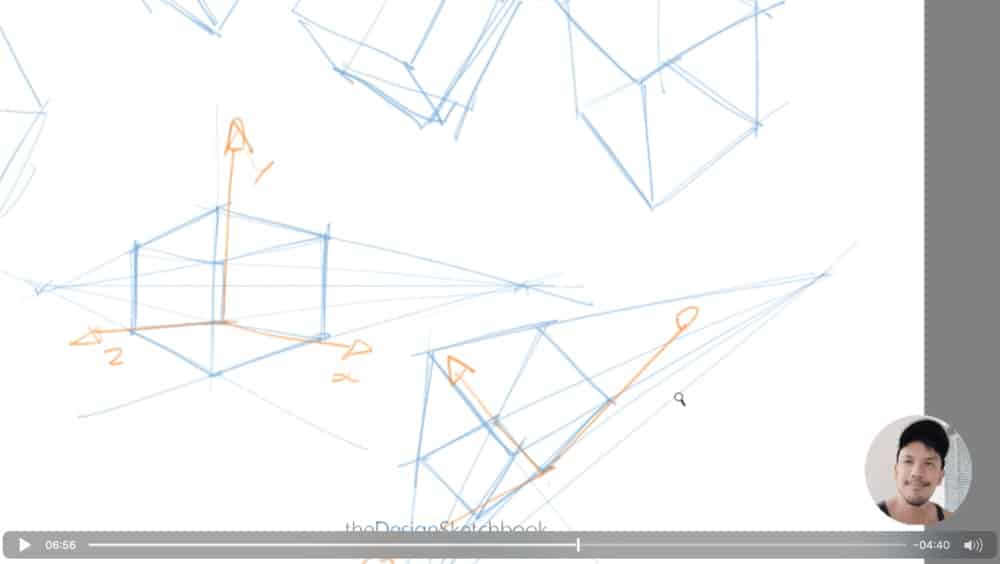
STEP 5 “Elevate the way down”
Let’s carry on by not elevating up but “elevating down”.
It helps you practice your 3D vision.
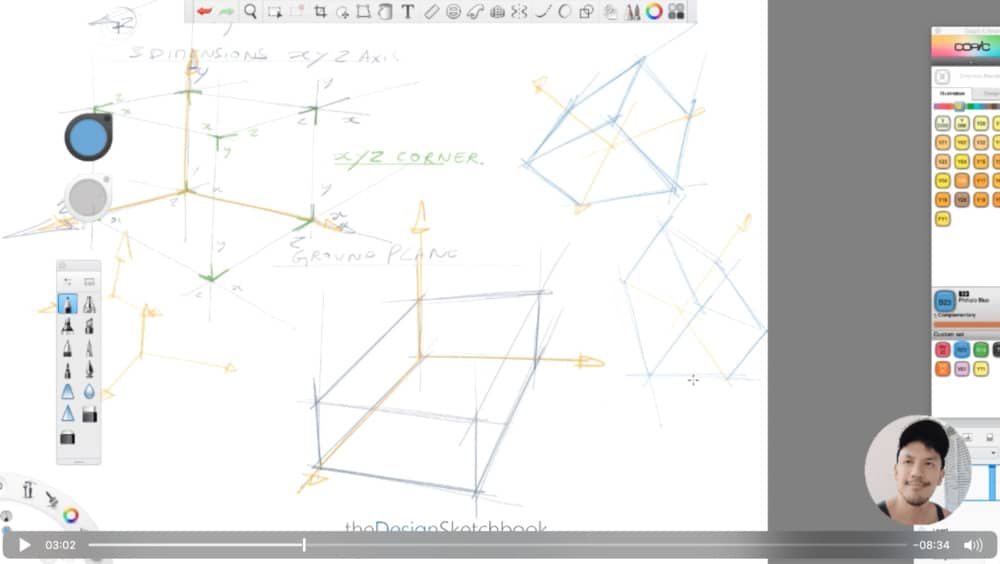
So I invite you to make some tests by drawing one plane of the box first and then reconstitute all of it. And you see in orange the main x y z axis that helped me to visualize my viewpoint.
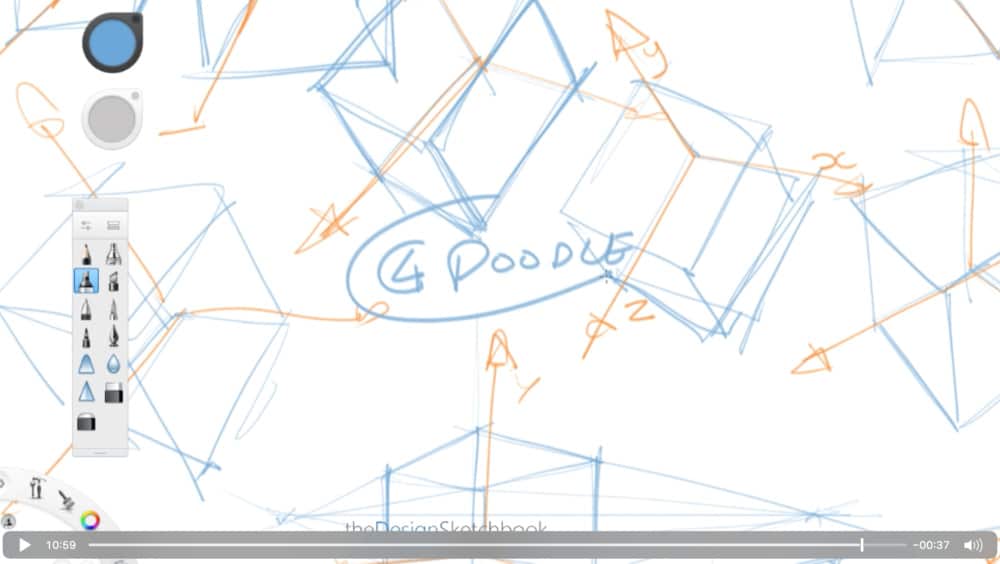
So I invite you to draw on the side some a quick doodle of the x, y, z axis. And you can train to try to bend them as well. Like, so you’re going to get some slanted. And when you understand how does it works, you have to train by doodling.
It means that don’t really bother on how perfect is going to be your lines. Just quick doodle so you can test the maximum number of pieces in the quickest time, the number of angles, just experiment okay.
When you’re discovering a new rule a new technique, first you try to understand all of it step-by-step. And after you have to doodle to experiment, trying to apply it, so you will remember by as well as your brain will remember it, but also, the muscles of your arm is going to be more automatic.
So don’t try to get perfect yet.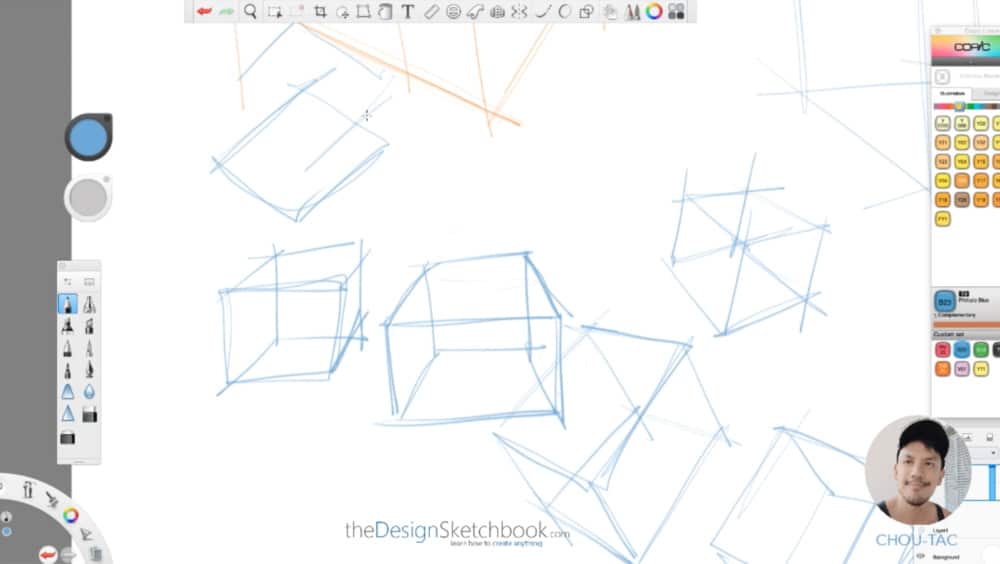
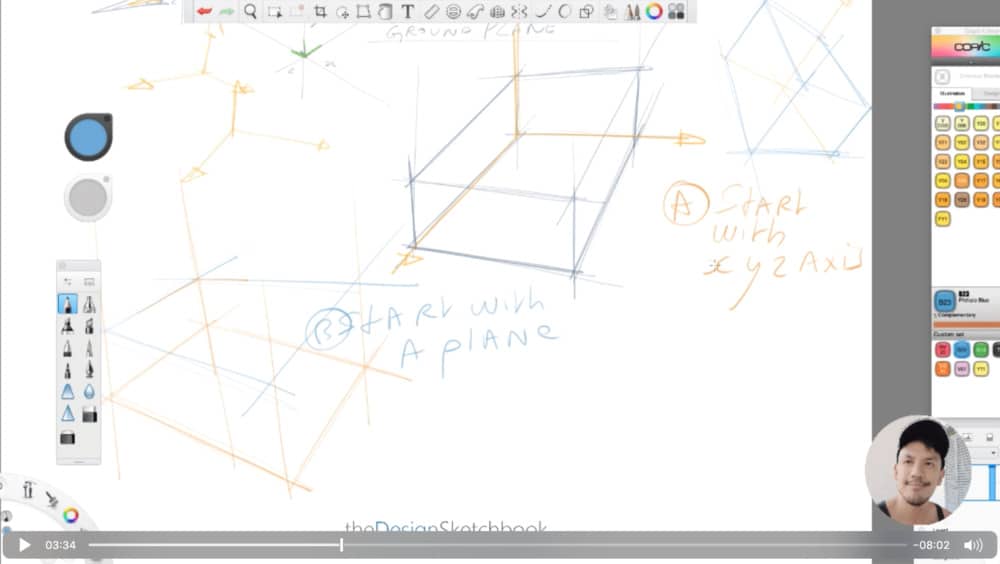
So on the one side on the right, we started with it like the XYZ axis, and here on the left, we started with the plane. So this is two different approaches that you can get.
I invite you to draw with me. You can pause this video anytime. Rewind it. Make it interactive and focus on the music as well. Which is pretty relaxing. I try to choose one that makes you feel comfortable when you draw.
Take it as a game.
Yeah, I’ve got draw one plane then another one and I got connected them.
Being able to draw cubes from different angles is what is going to help you to draw faster and start any shape because the cube, the box is the basics of everything. Because this is from where you will be able to draw more complex forms in the future.
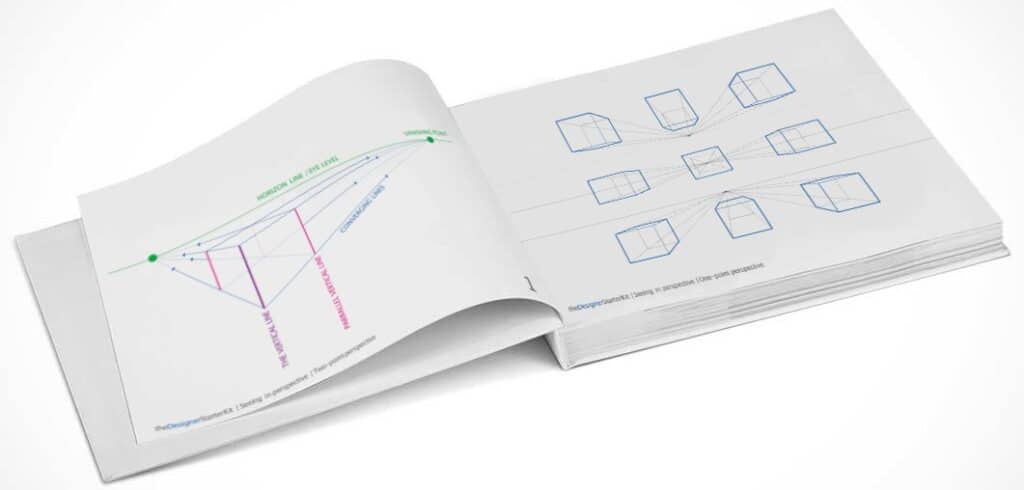
So, here is just a quick recap on the basics that you can find in the Designer Starter Kit right here. So, we are using the construction lines of the perspective lines, the horizontal line, the vanishing points, and so on.
Okay?
 And this is from what you need to train first and then you can go on the cubes above. Okay?
So once again if you want to have all this step-by-step, the link is in the description.
Here is going to be the bend version, you just need to tilt the horizon line.
So we have a cube which is going to be tilted as well.
Here we go. x y, z axis here.
So we will learn from the repetition as soon as you got the technique, repeat as many times as as you can. No need to rush. Doodle them you need to be perfect. Being imperfect, carry on. Do as many as you want.
Take it as a game. Have fun.
Bold the cube here to make it more contrasted with the construction lines.
Here go for the x y z axis.
So you can train in feel free to send me by email (choutac@thedesignsketchbook.com), your some of your sketches if you want to show me. I’m pretty curious to see your progress of you guys.
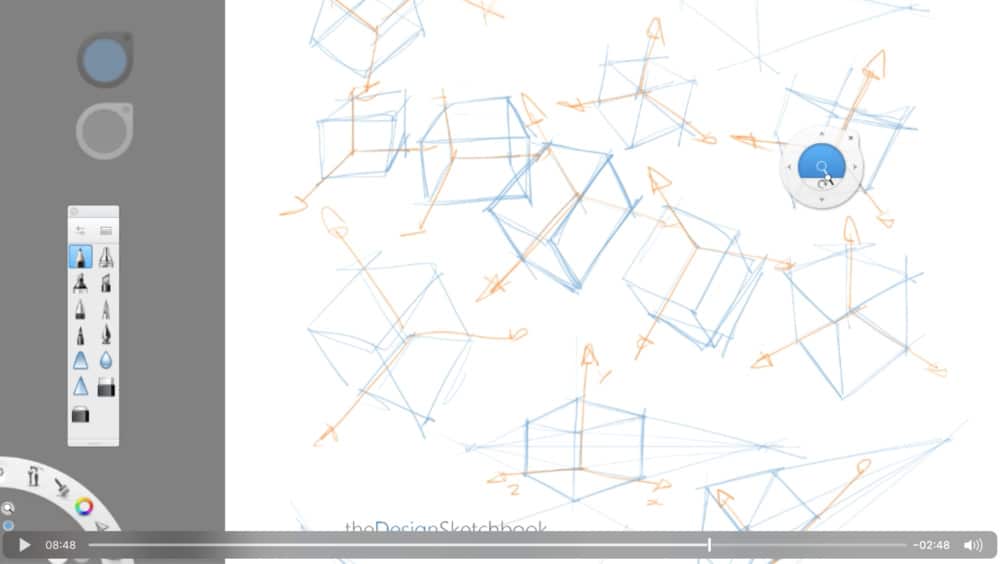
Here we are going to recap all the x y z axes that we have drawn from the previous cubes from different viewpoints and angles. Okay?
Try to draw some cubes from different sizes some will be bigger than others, some will be more doodled, I would say rougher than others.
And if you can see, actually the cube that looks nicer to me is the one who has the roughest feeling. Because it gives more life to the sketches instead of trying to get everything perfect with neat lines. Can you feel the difference between the first step and the main phase, the first phase on the top, and the middle one?
So x y, z basically but you could just remember it as X as the width, Y at the height, and Z as a deepness. Okay? X is a width Y is a height Z is a deepness.
Here I bold with hatching on the below to emphasize that this box is seen from the bottom. Okay?
Okay, let’s do a quick recap.
Let’s change a pen to have something bolder.
Okay, so, the first phase, what did we do? We start by seeing in three dimensions the X Y Z axis, okay? So more you will train the following stages, more, this one would be more intuitive.
So second you build up a box from this x, y z axis. Okay?
So you start with simple viewpoints first. And on the three, try different angles, try various angles, you’re going to challenge yourself.
And you can start with the XYZ axis on A or the second meter B start with a plane. You have two main methods. That’s not the only two but that’s the two main ones.
And then I would like to invite you to doodle them.
The last one, whenever as you feel, anytime go back to the basics. Because learning how to draw, learning how to sketch for product designers is a journey. Okay?
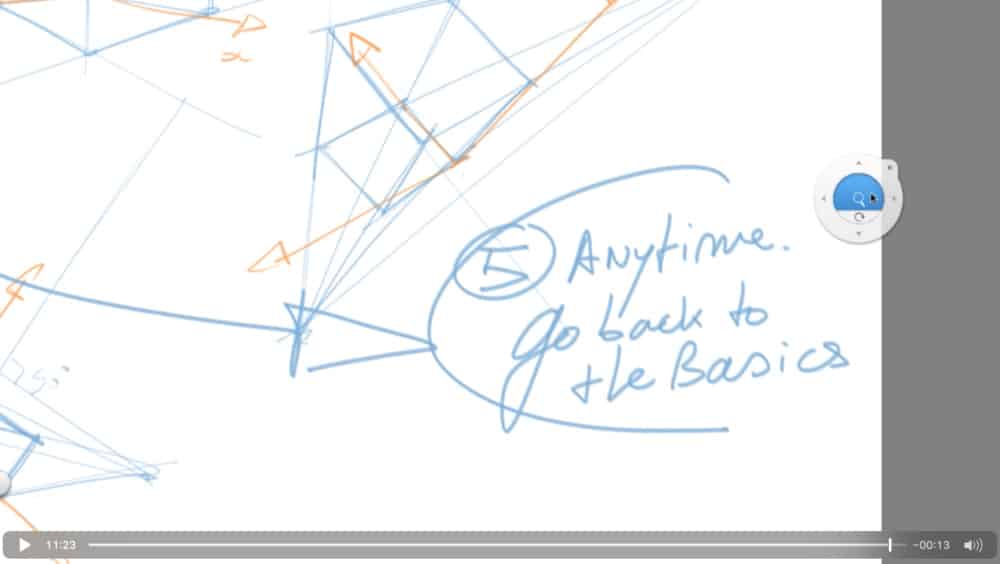
So go through all these five steps.
Go back to the basics anytime if you need to.
There is only progress. And this is what we love it.
To explore further on How to draw cubes,
I invite you to Practice the Cube Mania Challenge!


[…] Drawing a perspective plane. […]