If you pay attention around you,
most industrial products have round edges. Don’t mss drawing them to make your sketches look realistic products!
Look at your Apple Macbook, phone, markers, camera, television…
all have rounded borders.

Today,
I give you an easy tutorial in a video on how to draw them in perspective,
so you can already start drawing so many products!
It’s so simple!
It all starts from looking at things flat in 2D.
How to Draw the Round Edges for Realistic Products!
STEP 1 / Flat Study
So I start by drawing a square.
I’ve got the horizontal and vertical and I got the center.
Quick tip:
If you want to get the center, you start with the diagonals, so I got the center to draw a circle inside.

And as you can see here, the circle touches
the square at these four places here.
Touch, touch, touch, touch.
I can get four equal quarters from the circle to represent the round corner.
So I got four roundings in a circle.
What if I got a rectangle right here?
So what we are going to do here is to get one-quarter at each corner of this rectangle.
It’s like I have expanded the space between each corner, each quarter of the circle.
Think of a corner like this roundness as the quarter of a circle.
You have to make sure that this corner is like inside the square,
Not inside the rectangle.
It is a square base.
You can get the corner of the perfect circle.
If you want to play with the rectangle base, it’s possible but just make sure you do it on purpose. So the quarter of a square is also a square for the basis because we have divided it into four.
I give you a tip right here.
When you draw, this roundness of the corner, just feels like there is 2/3 and 1/3.
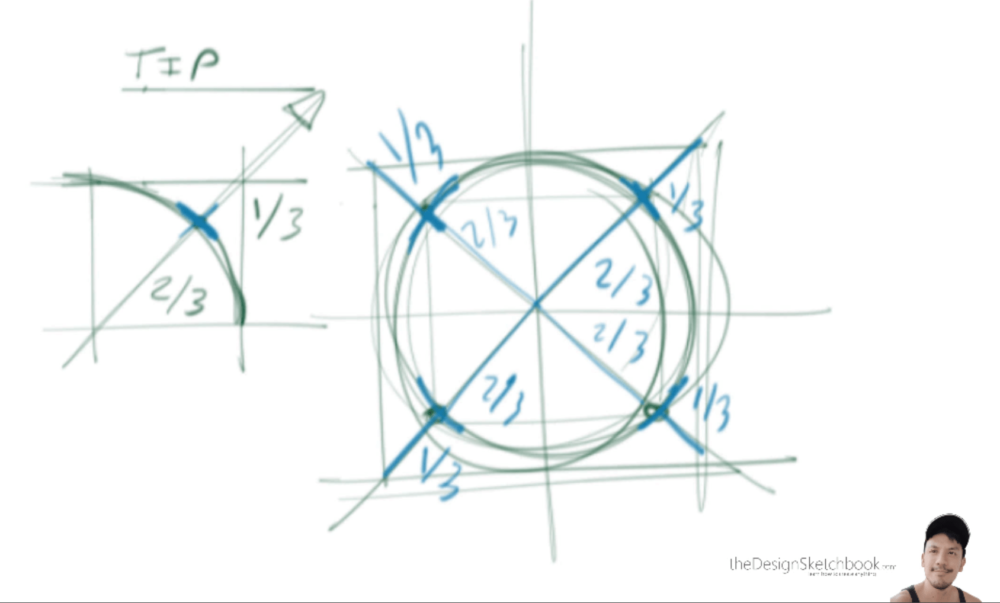
So let’s take it here for the full one.
Let’s get right here. Can you see the distance and you can make another inside square?
Just keep this in mind. It is going to be quite convenient for the next steps.
Round edges doodle training time!
So now it’s the stage of Doodle Training Time!
What I would like you guys to do is to repeat the steps that you have just seen.
It doesn’t matter to make it perfect, just make it imperfect as a doodle note.
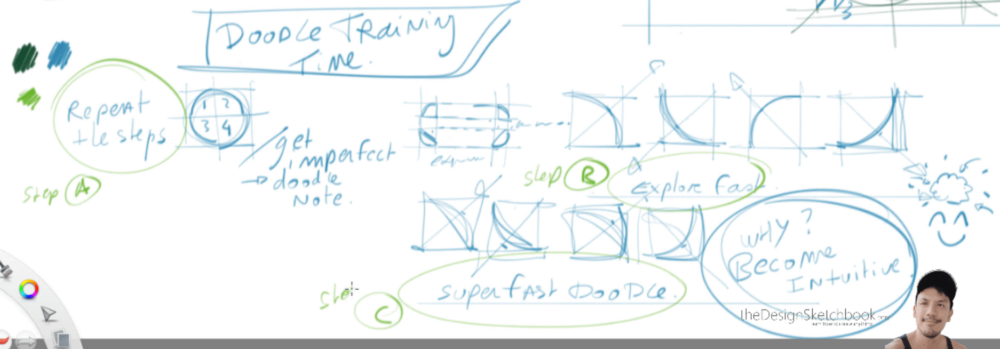
What I would like you guys to do is focus on acquiring the knowledge that you have just seen. By just repeating all these steps, you will better integrate and memorize them.
Then feel free also to explore.
As you can see, you have four corners of this circle, so you can also train on them individually.
My sketch has a very doodle format,
you explore very fast, and you keep going even faster.
Why?
Because it’s becoming more and more intuitive.
You force your brain actually to not think too much about what you have seen, right?
By this time, you’re just implementing what you have learned and acquired.
I want you guys to make it intuitive.
So you acquire, your practice, and then you do it super fast.
And this is how your brain will be agitated:
- Repeat the steps.
- Explore fast
- Doodle very fast, super fast. (Super fast Doodle)
STEP 2 / Perspective study
Now it’s time for the perspective study!
We have a 2d and then we make it in 3d.
Flat to perspective.
You can see all the steps for how to draw a cube in perspective in the Designer Starter Kit, so I’m doing here a very quick preview and you can get the guides to get all step-by-step.
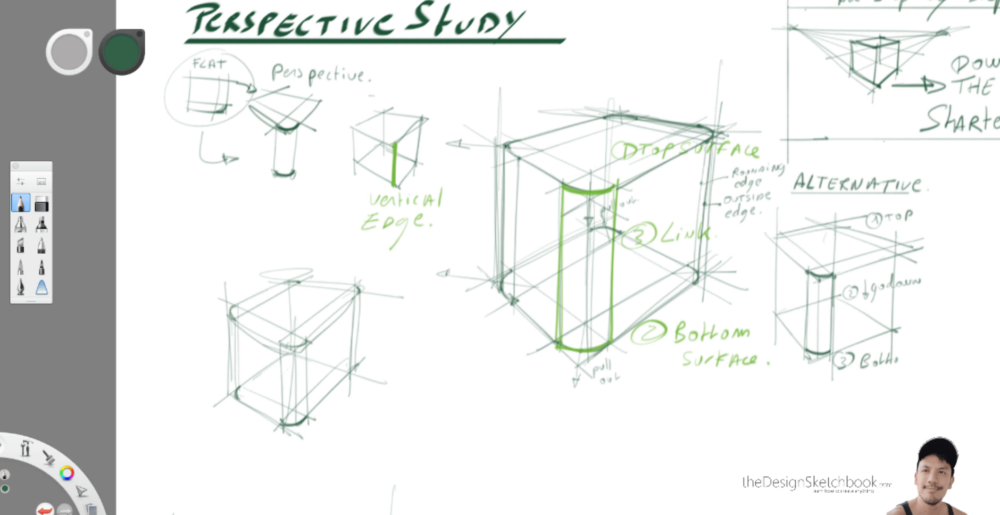
Today, you will see a shortcut to directly draw a cube without all these perspective lines.
So, the link is in the description.
It is for free and you can learn how to draw the cube in perspective from different angles both step by step with the guide and also some videos to accompany you on your journey.
Alright, so we saw on this little thumbnail the flat two perspective to the vertical edge that will transform into the roundness. I draw a cube here.
How we got this base and as you see on the top surface, I added two extra lines in perspective but from a small square.
I draw the corners which I repeat on the bottom surface and then remember that you can pull out the curve to make it 2/3, 1/3.
So remember on the corner you want to find a smaller square there you can find your round corner by doing these extra lines of perspective.
So first, top surface.
Bottom surface for the two and then I link.
So I got just prolongated into the perspective,
some extra lines that allow me to have this square shape in perspective in the corner.
And let’s do an alternative right here.
So I take the first surface first, I got these two little dots that I prolongate to the bottom and from this little extra information that I got below at the bottom, that allows me to create an extra round corner.
First to the top.
Second I go down and three, I got this extra roundness all along the edge.
This is very convenient to have this first technique and the alternative because this is something you can mix up.
And then I could complete the other corner of the cube right here with the same techniques.
And you can also notice that you have rounded edges and outside edges.
The outside edge is very close to the cube one. It is a little bit inside. Here we go, I’m completing all the corners and you have to remember to always draw in transparency.
So once again, if you need more training in perspective, you can get all these things in the Designer Starter Kit.
It’s now Fast Doodle Time!
You just draw really fast what you have just learned, making it super fast to make sure that you have understood the process, and feel free to mix up both techniques.
The most important thing is that even though you’re learning step by step is to understand how it works. And then you can by yourself reproduce all of the techniques.
The most important is that they make sense to you.
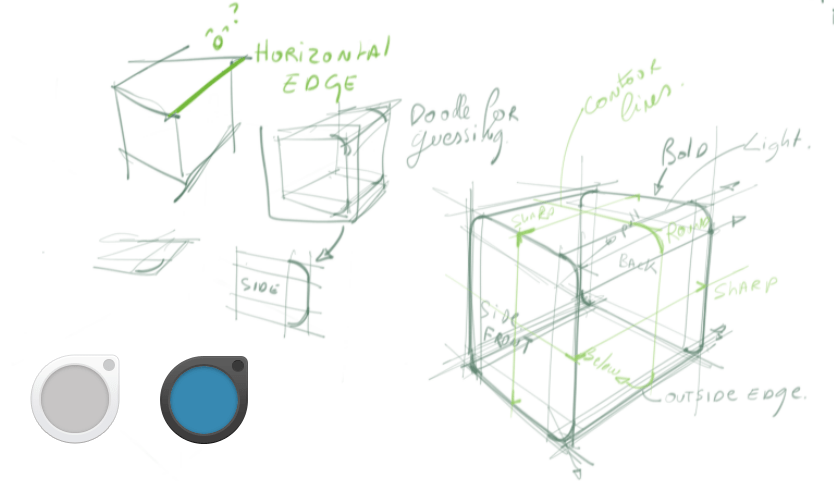
Now we are going to see above the horizontal edge.
I let you guess, how can we handle this horizontal edge.
Now I’m doodling for guessing, to explore.
And now, we have virtually the verticals of your face, where we apply the roundness that we are going to expand to behind, to the deepness of this cube.
Okay, you feel it like an extrusion.
Before we extruded vertically. Now for his horizontal edge, we will extrude horizontally.
All right, so we got the cube right here.
So I start the cube, very light then I bold a bit more.
We got the side right. I prolongate some extra lines, and we got this square shape on the corner and then I draw this roundness with the two-third, one-third feeling.
This is what we have on the side, which we could call it the front as well. And now I prolongate it to the back surface so that I can have the extra corner.
We do it again,
I prolongate these dots to the back surface, and I got this extra dot and I do the round corner.
It’s all about projection from the front to the back.
See here you had the outside edge.
Now I’m doing it again, for the back.
Then I prolongate the surface from number one to the opposite one.
And now I got bold the line to complete the new form.
So I got the bold line and light line.
What I like to play in product design is to play with contour lines.
Contour lines are invisible lines that allow you to better understand your form.
Some of my corners are round and some are very sharp.
Most of the time, the contour lines are the center lines. Like if you divided your volume in two.
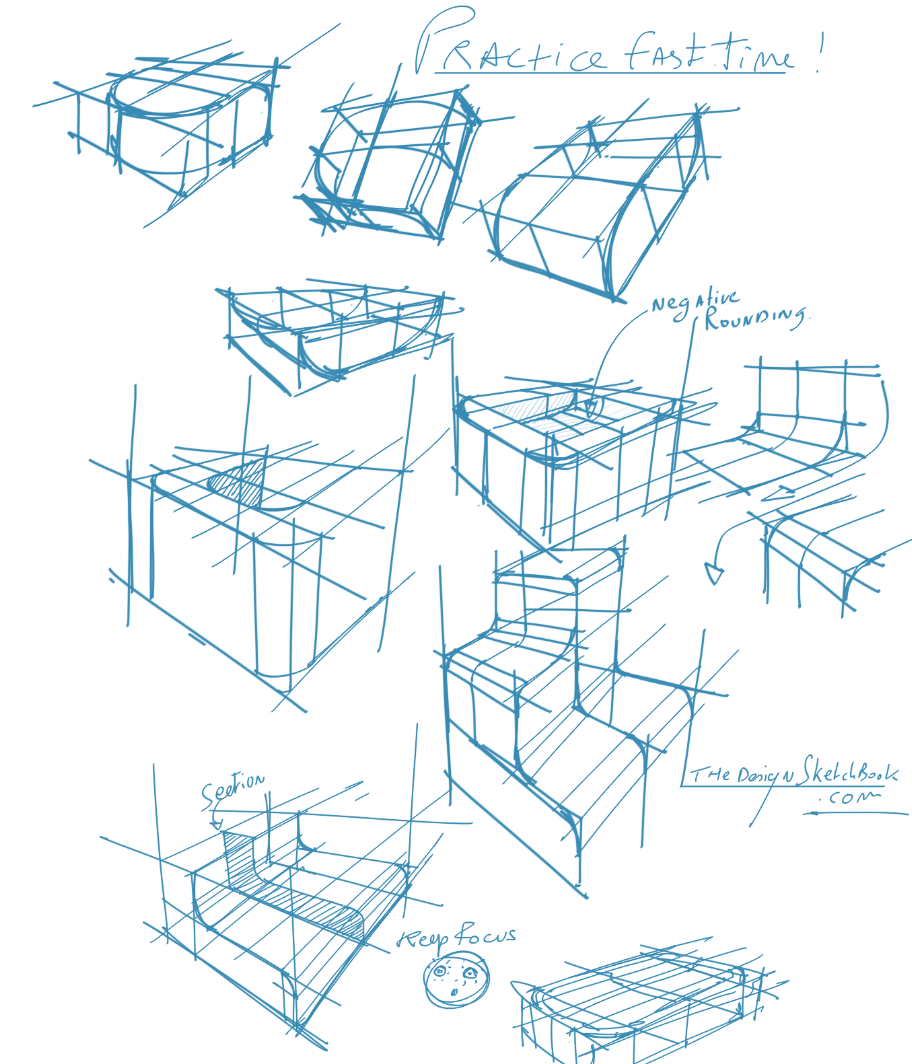
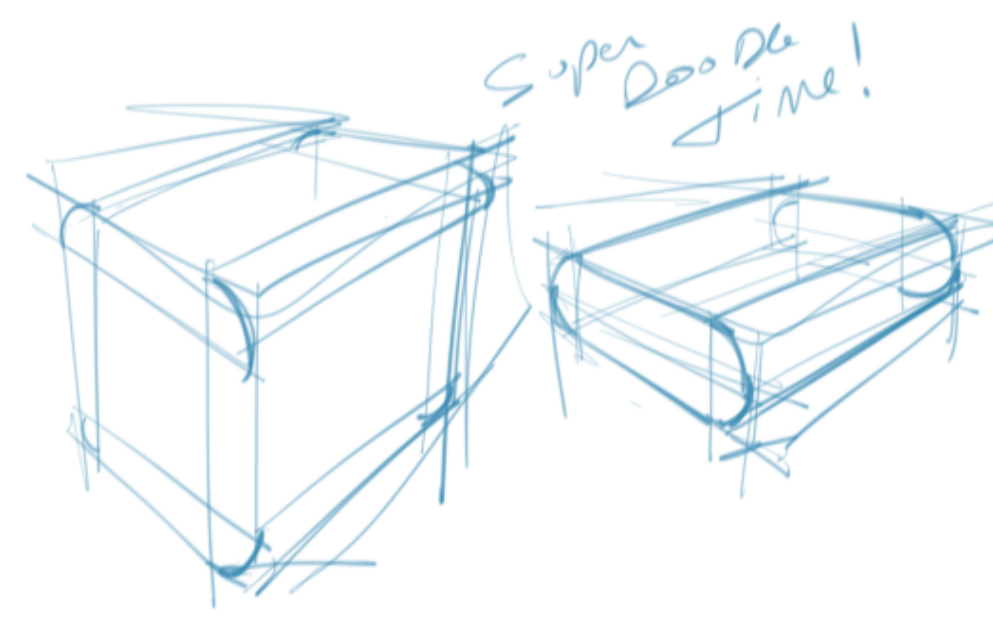
Time to draw the round edges faster!
Now is “Fast doodle time!”
Now you can try also different sizes of the main volume to explore even more.
The quarter and a quarter, are creating a half-moon.
So you’ve got the flat study here and so was drawing the circle inside, we divided by four to get four quarters distinct.
So remember the two-thirds that we pull out the curve and then we get the same thing in perspective.
Remember the square base.
So now we are going to explore even more. So we are going to take our time I do invite you to take a piece of paper and practice with me.
The round edges will help you to make more realistic sketches.
So explore different volumes and try to be creative, because this is how you can play the game of exploring this round-corner application.
As soon as you understand how it works, you can draw at any angle.
Take this as a game, make it fun.
This is how you will even better memorize it.
PS: In case you may wonder which software I use, this is one of my favorites for many years I use for digital sketching: Sketchbook Pro.
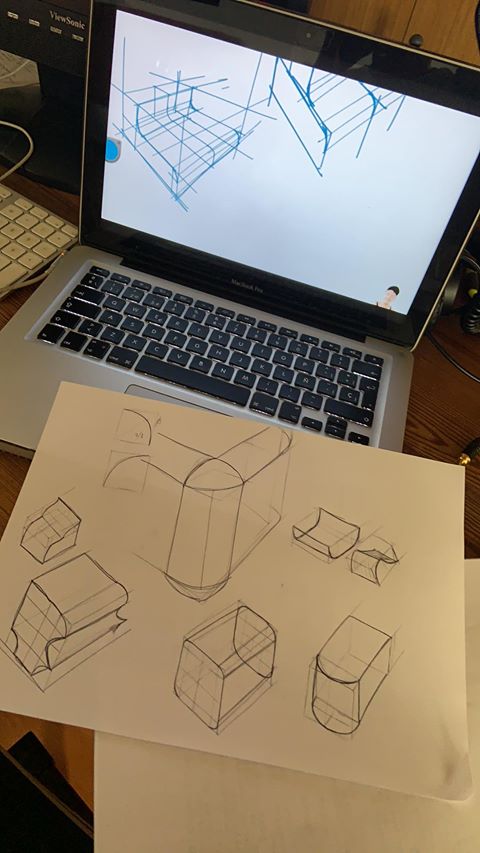
PPS: A sketch from Armpi practicing the round edges.


Add comment