Last month in Penang, Malaysia, I took my sketchbook outdoors to capture the scenes around me. This week, I decided to challenge myself: instead of simply copying reality, I want to create my own environments using perspective.
1. Gathering Inspiration from Travels
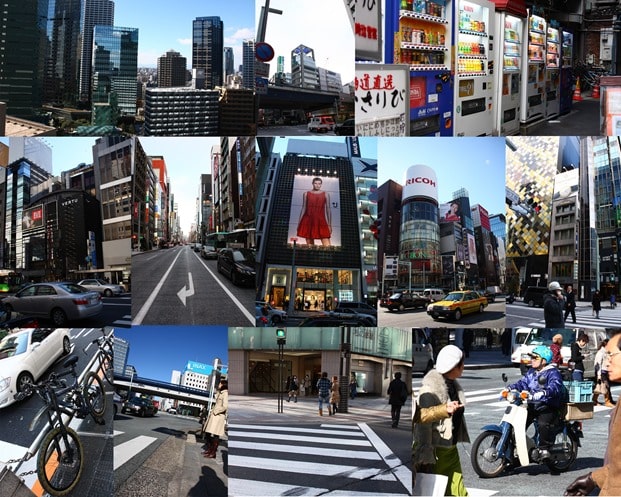
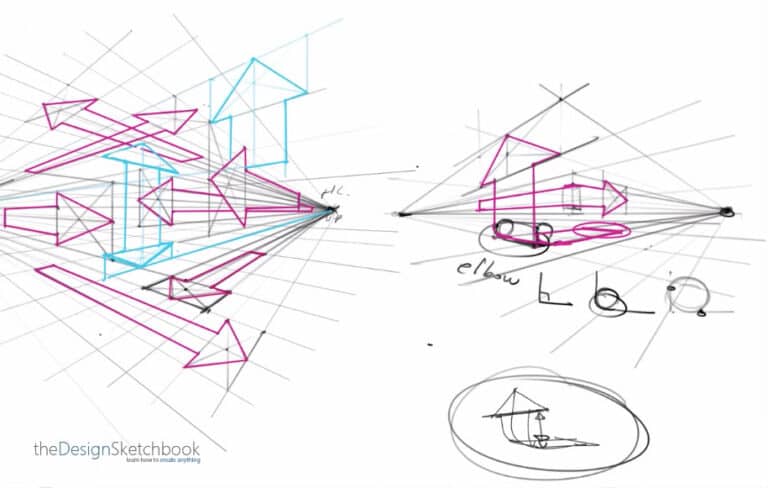
To prepare, I collected images from various trips—above are some from Tokyo, Japan. I focus on interesting architectural and urban elements that I want to play with and merge in my sketches. Exploring different viewpoints like bird’s-eye (sky view) or low-angle (mouse view) adds excitement and depth to my work.
2. Why Perspective Lines Matter
Perspective lines may seem tedious, but don’t skip them—even if you’re no longer a beginner.
Taking just a couple of minutes to establish your perspective lines:
- Boosts your sketch’s accuracy
- Makes drawing easier and faster
- Simplifies the entire sketching process
3. Examples of Perspective Views
From the Top of Tall Buildings
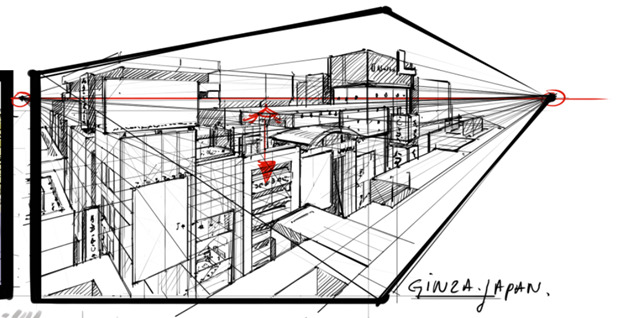
Standing high above, the horizon line matches your eye level and is very high on your drawing. You can include rooftops, distant elements, and the cityscape below with realistic proportion.
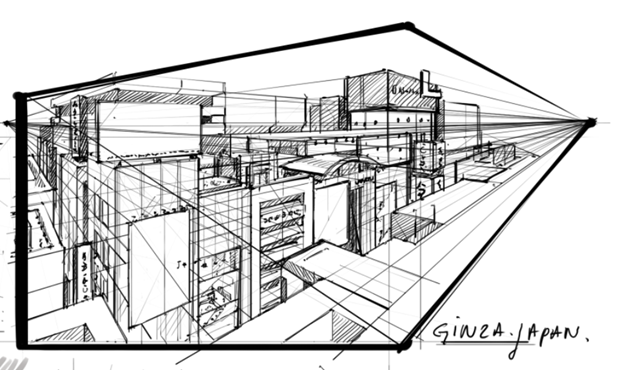
Can you recognize some elements I imported from the above mood board? 🙂

I am standing on the top of one of these building!
Remember that the horizon line is your eye level. In that situation, the line is very high being at the top of the thumbnail. I am looking down to admire the city view.
4. Final thought
Knowing the fundamentals help you to reach results so much faster and gives you the freedom to create by yourself. I warmly recommend you to use the perspective lines to set up your scene. Spend a couple of minutes to think about the scene you want, draw the lines and 50% of the job is done!
To get an introduction to perspective, feel free to subscribe to the newsletter. I will send you a free Ebook about how to start sketching. [theDesignerStarterKit].
If this quick tutorial is helpful, or if you have any question, feel free to leave a comment !
See you guys !
Cheers,
Chou-Tac
Related Articles


i want the Designer Starter Kit, please
Hello Hollman, have you sign up in the form already ? 🙂 If yes, please drop me an email at choutac@thedesignsketchbook.com and I will resend to you.
Really a great reminder, thanks for sharing this 😀
You welcome Brian. Thanks for reading 😉
The perspective lines are important, but how do you draw them without getting stuck between all the lines you already drew before you make the rest?
If I do the perspective lines, my drawing always ends up just looking like a bunch of perspective lines in stead of whatever it should be.
Hi Mirjam, do you mean that adding so many lines your vision end up kind of blurred? The trick is to use different level or pen pressure. Start drawing with a light one. Then bold the lines you are confident with.
If you work on Photoshop, you can draw the lines in a separate layer and play with opacity. + when your sketch is finished, you can save it hiding all these lines.