


There is common mistakes that everybody do as a beginner. The flat sketch. We draw what we see and it’s obvious there is something wrong. But we can’t figure out how to solve it. If you are today at this stage, no panic. It’s nothing related to having talent or not. The solution is actually pretty simple.
It’s all about seeing things in transparency.
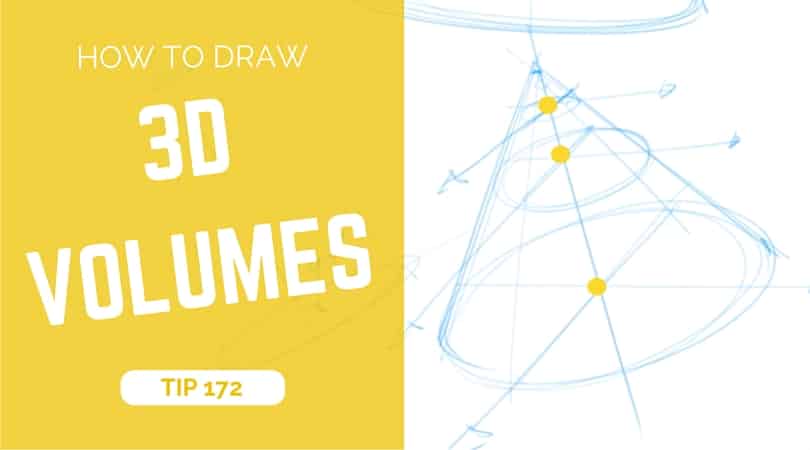
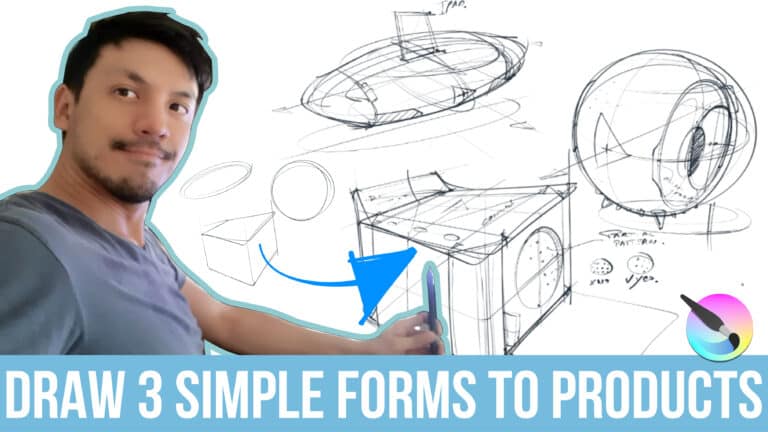
In this video, you will learn how to draw basic 3d volumes such as the cone, the cylinder and the cube. I will also show why following perspective is essential. Once again, if you are new at design sketching, I recommend you to get the Designer Starter Kit to make your first steps in good condition.
Hey Sketchers!
I’m Chou-Tac from The Design Sketchbook. Today, we’re going to learn how to draw simple 3D volumes like cones, cylinders, and cubes. If you’re just starting out, you can also download my Designer Starter Kit, which will help you get comfortable with design sketching and perspective.
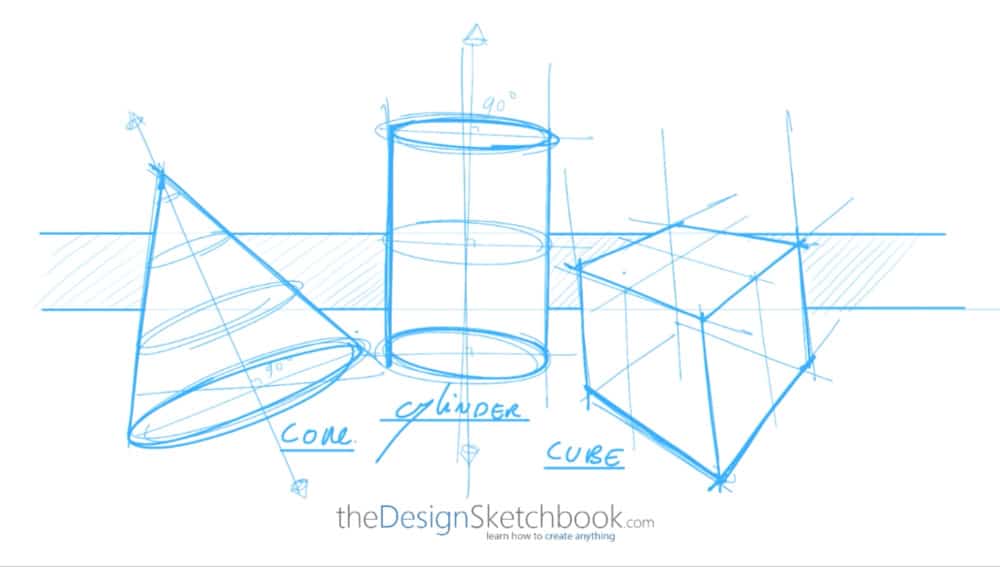

Drawing a Cone
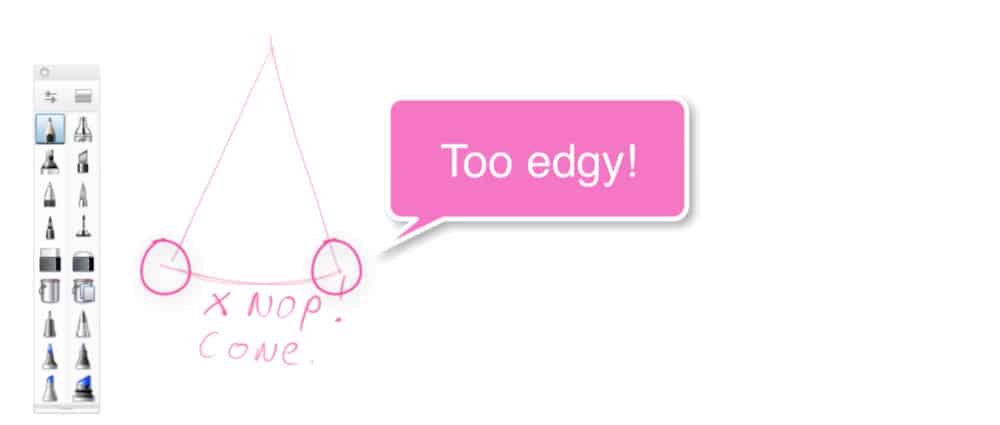
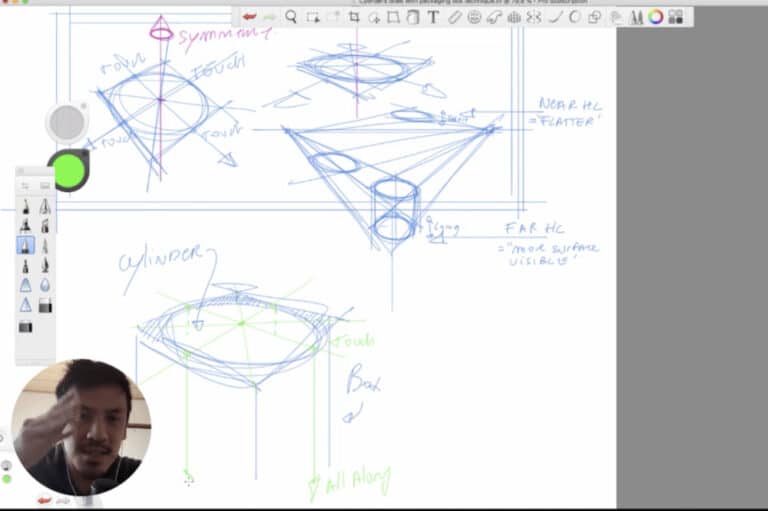
Let’s start with the cone. A common mistake beginners make is drawing it too flat or with edges that are too sharp. The trick to fixing this is to imagine your volume as transparent. Draw the bottom of the cone as an ellipse (which is a circle in perspective), then connect it to the top point of the cone.
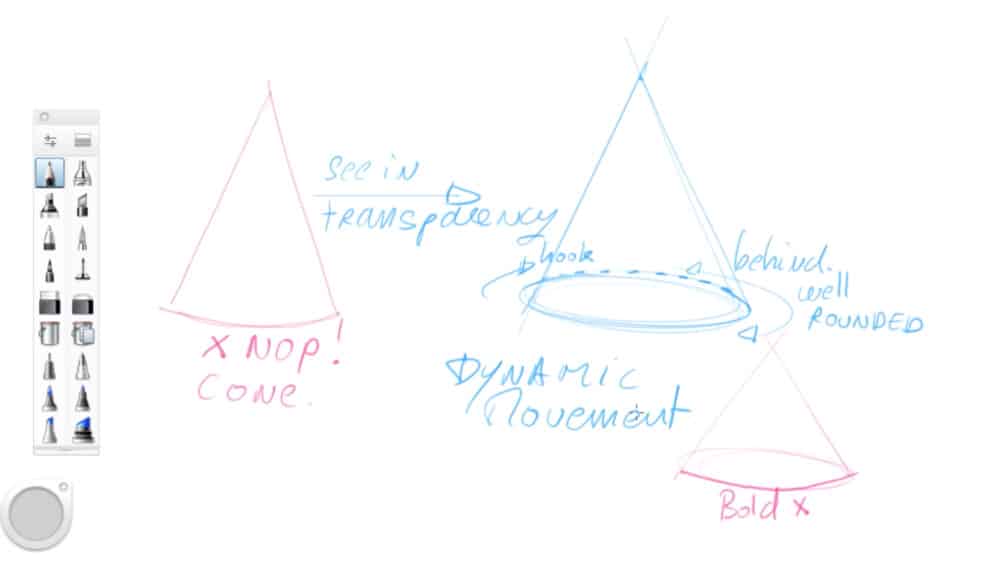
Make sure the bottom ellipse looks rounded and smooth, not edgy. Also, when you bold your lines later on, keep that smooth curve going all around—don’t make it sharp. One neat trick is to add a little hook behind the cone to emphasize the roundness around 360°. This not only makes your drawing look better but helps your hand move smoothly when sketching.
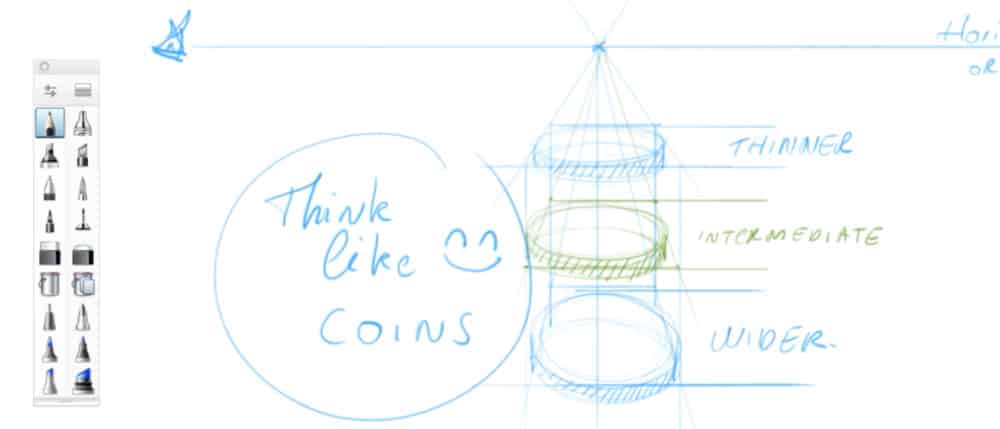
Drawing a Cylinder
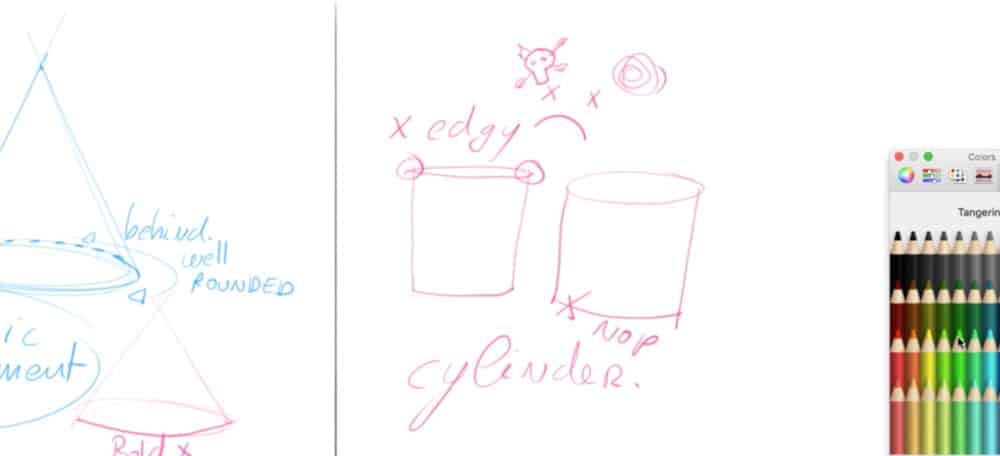
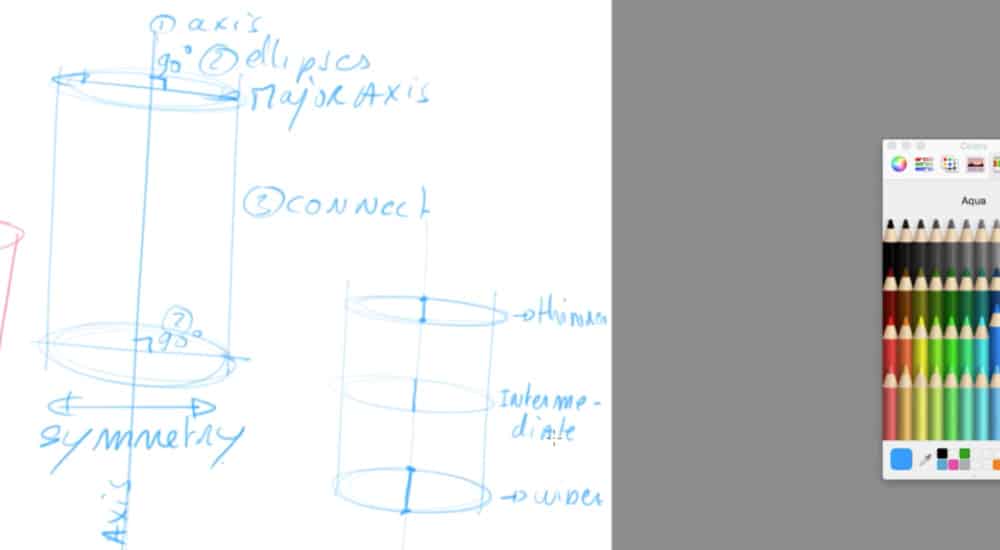
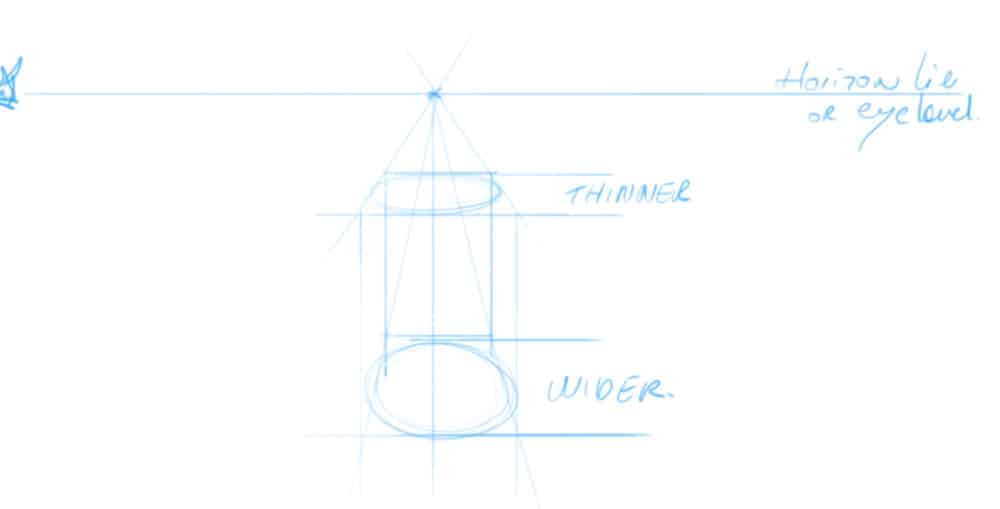
Next, let’s tackle the cylinder. Again, beginners often draw the corners too sharp or forget to draw the bottom ellipse, which makes the cylinder look flat and strange. The step-by-step method is to draw an axis first, then the top ellipse, and the bottom ellipse. Connect them and make sure everything is symmetrical along the axis.
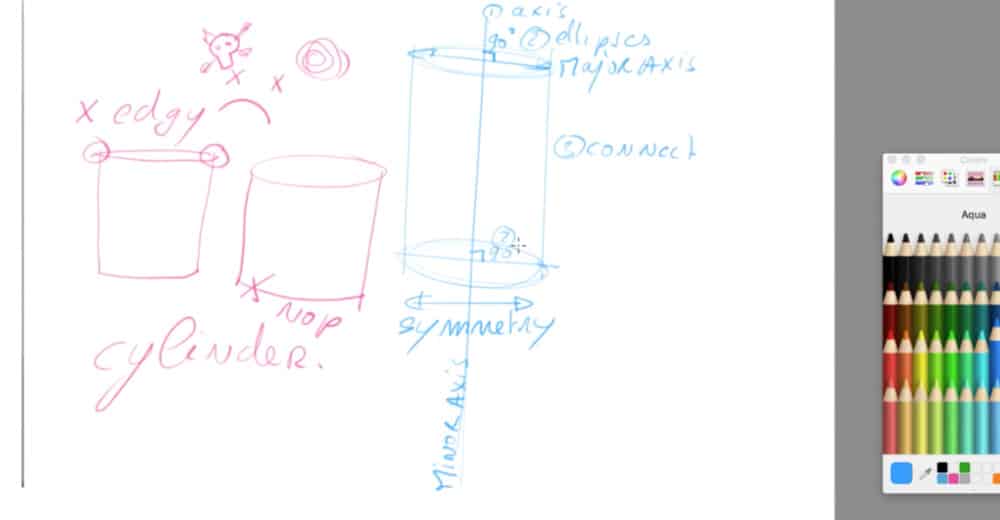
Here’s a cool tip: the top ellipse is usually narrower than the bottom one because of perspective—you’re seeing the cylinder from an angle. Imagine your ellipses like coins stacked on top of each other, getting wider as they go down. This “coin trick” helps you get the proportions right as you move down your cylinder in space.
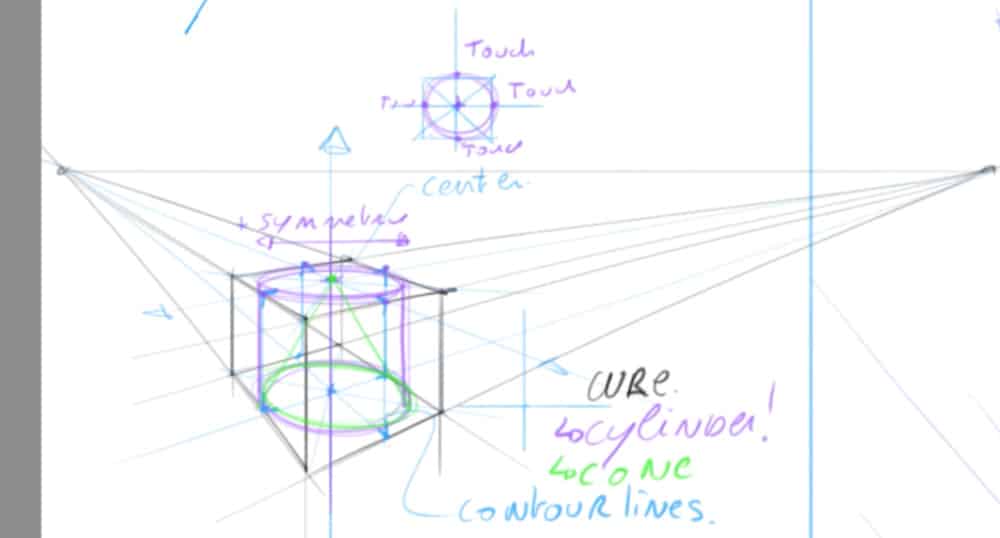
Inside the cylinder, you can even draw a cone if you want to add more detail later.
Advanced Cone Views
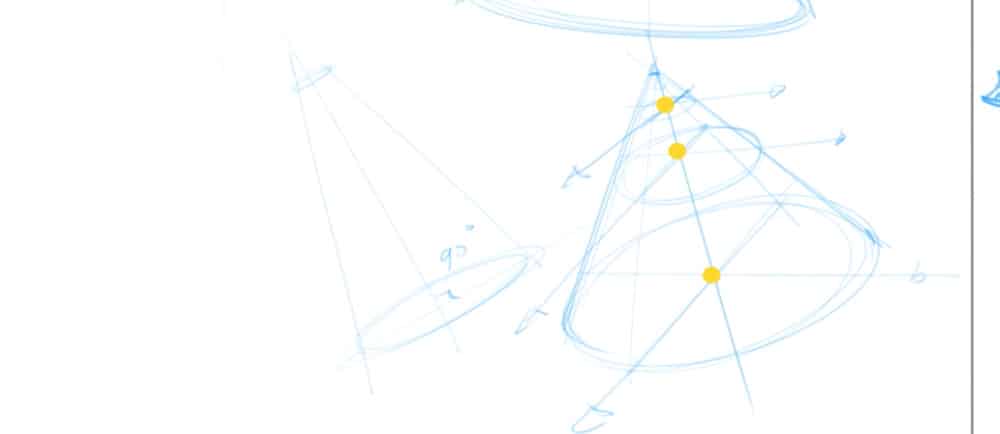
Want to get a bit more advanced? Try tilting the cone’s axis to draw it from different angles, like oblique views or more top-down views. Keep applying the same coin and perspective rules, adding more “coins” or cross-sections along the cone to keep everything proportional and aligned.
This takes practice, but as long as you remember symmetry, coins, and perspective, you’ll be able to draw cones from any angle confidently.
Drawing a Cube

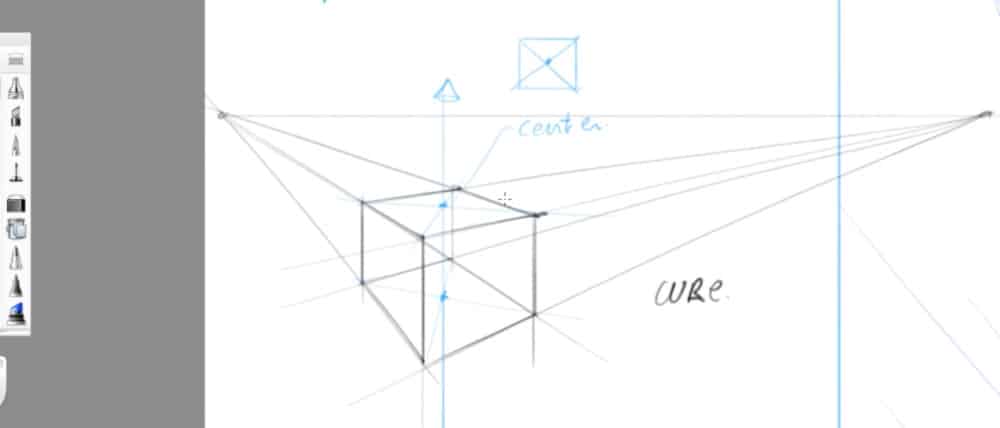
Now let’s move on to the cube, which often feels tricky if you don’t follow perspective rules. Start with a front-facing square and connect its corners to a vanishing point on the horizon. Then draw another square behind it to build the cube’s depth.
Make sure your horizontal lines stay horizontal, and vertical lines stay vertical—that’s the golden rule for one-point perspective. When you bold the lines, make the outer edges thicker and keep the construction lines lighter or dashed to create depth.

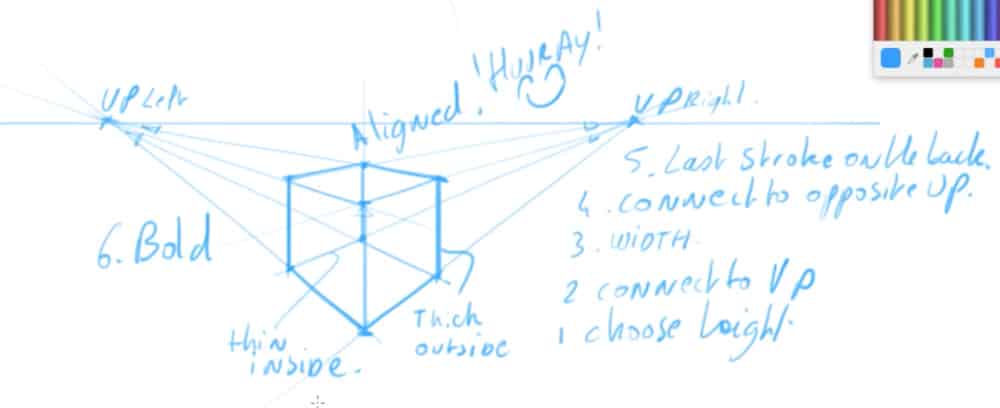
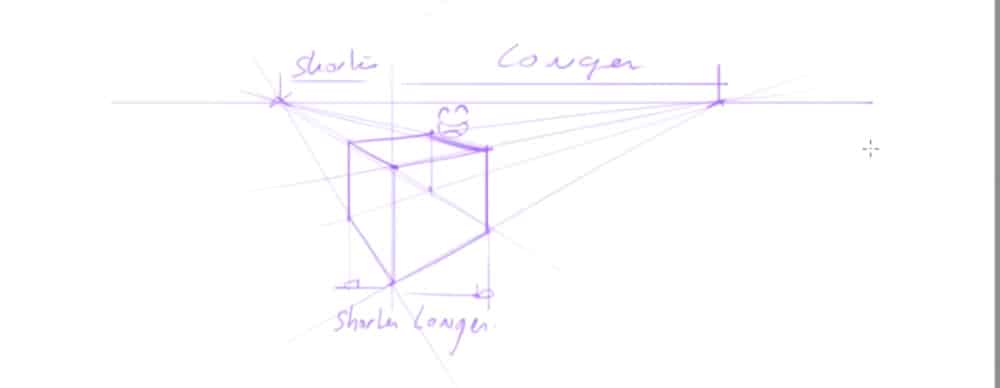
For two-point perspective, start with a vertical line for the middle of your cube, then connect the top and bottom points to two vanishing points on either side. Adjust the width of the cube by deciding how far the left and right sides go, and connect the edges accordingly.
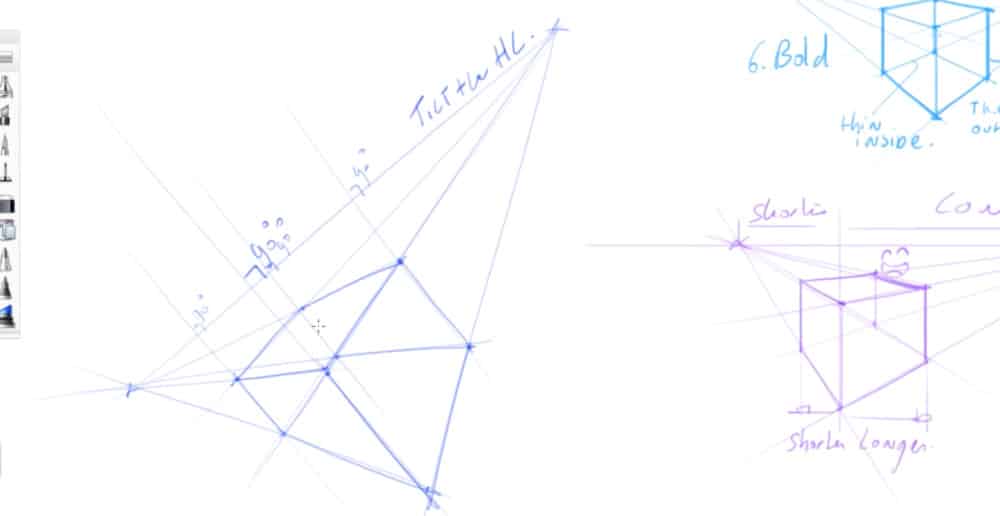
If your cube is tilted, tilt the horizon line as well, keeping all vertical lines strictly vertical and the edges perpendicular to the horizon line.
Combining Volumes: Cube, Cylinder, and Cone
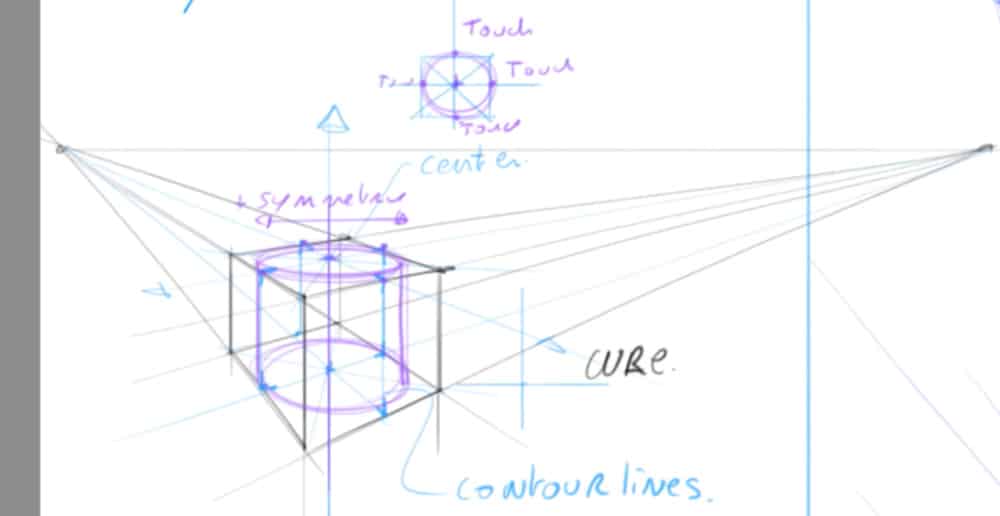
Once you’ve mastered the cube, try drawing a cylinder inside the cube by connecting the diagonals to find the center. The same goes for drawing a cone inside the cylinder. It’s like Russian dolls—simple shapes inside other shapes. This approach helps you build complex objects from basic volumes using simple geometry.
Conclusion
That’s all for today’s tutorial on drawing basic 3D volumes!
Remember to practice transparency, perspective, coins for ellipses, and symmetry.
Download the Designer Starter Kit for more exercises, and keep sketching regularly. S
ee you next time!
Related Articles


Hi Chou-Tac
Greetings from Cape Town. Just wanted to say thank you very much for this wonderful gift that you are offering the world. It is so well done, and so much appreciated. You are a Gem.
All the best mate.
Cape town, wow ! :) Always cool to have readers from all over the world.
Thanks Luciano. Take care.