Start your sketching process on a large Photoshop canvas to expand your creative possibilities. This guide shows how to set up and utilize a big workspace effectively, helping you boost accuracy, speed, and inspiration in your product design sketches.


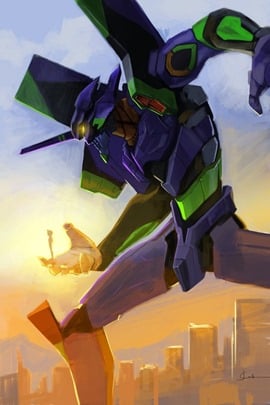
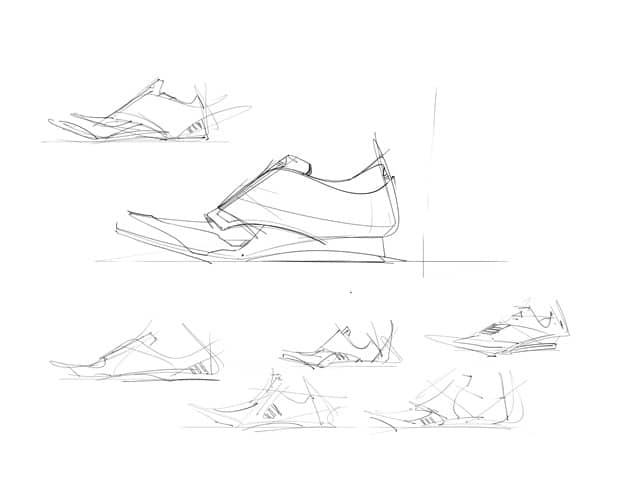
These days I am looking at some pictures of Evangelion.
I love this mix of organic and machines.
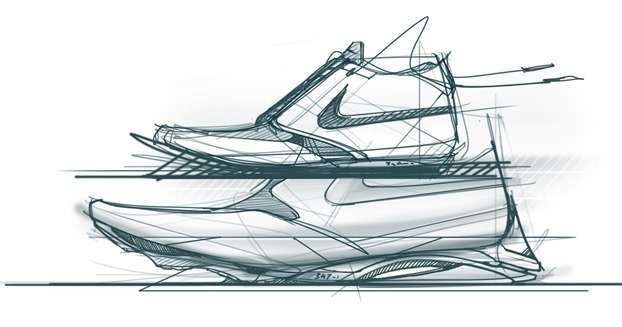
So I started to draw a shoe inspired by them – but trying to keep it simple.

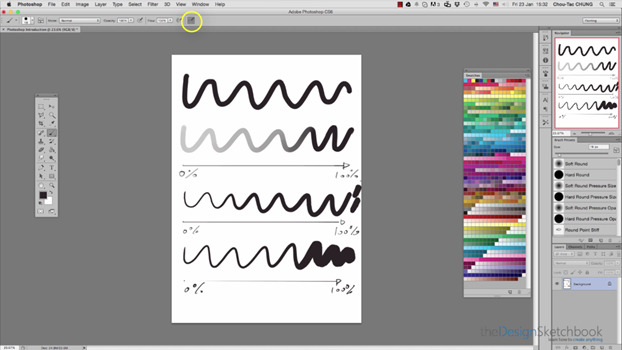
TIP 60 Photoshop > Start working with a huge canvas

In Photoshop (or any graphic software), it’s ideal to work with a canvas much bigger than needed. Somehow, the bigger your canvas will be, the more your imagination will be opened.

Choose a resolution of 1200 x 1200 with a resolution of 120dpi.
It is a comfortable set up for any modern computer.

If you are a professional for printing and have a powerful machine, you might want to work with 300dpi.


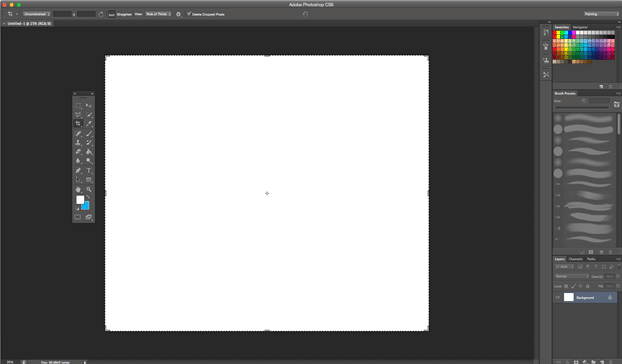
The white area is your canvas.
The dark grey area can’t be edited.
If you start drawing leaving that space as it is, it’s equivalent to having a smaller screen.
Even if the canvas has a big dimension, the canvas space looks restricted.
It already gives some limitations to our imagination.


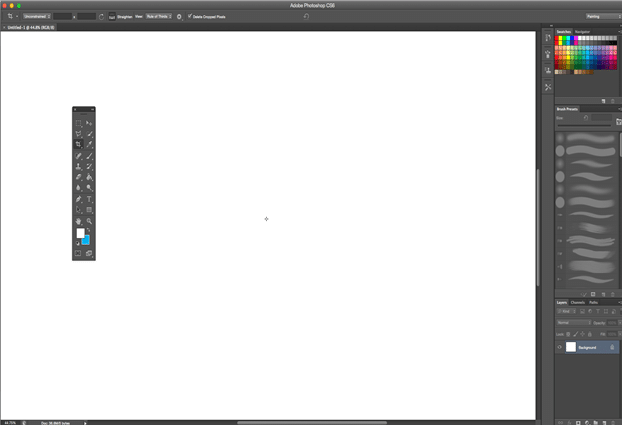
The solution is simple. Zoom in.
Cover the whole working space with your canvas.


Look at the top right corner.
The red rectangle is the actual visible area of the canvas.
The extra space around can be used for doodling ideas for example.
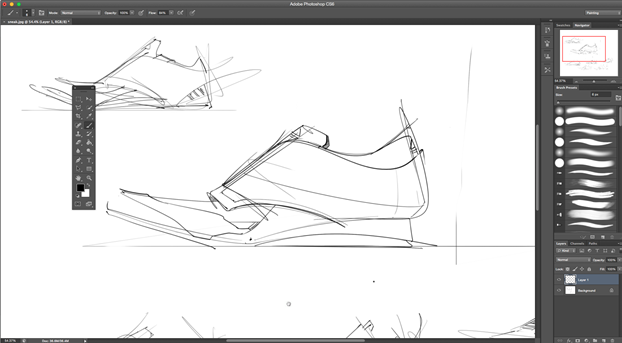
The whole document.
The main sketch occupies about 20% of the document.
It could be more or less. It’s up to your creativity.


When you get your final sketch, hide the others. Crop the document.
A crop that is a lot wider than the height always looks good. Think about the 16/9 TV screen or the movies in the cinema.

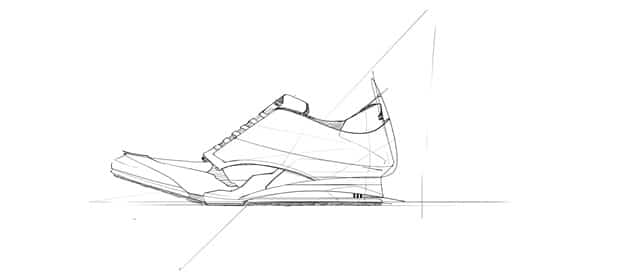
I added some color blocks and a quick background.
(Feel free to crop the canvas after setting up the background, it’s fine as well.)


Did you notice the hidden 3 stripes of Adidas?
I actually like it when it’s not that obvious, yet noticeable.

– That’s all for the Tip of the day! See you tomorrow!
And feel free to leave a comment.


Related Articles

TIP 62 | How to Create an Organic Dragon Sketch Using Sketchbook Pro’s Symmetry Tool
Master your sketching by embracing perspective lines! This article explains how horizon lines and vanishing points can boost accuracy and …
engineer or designer career
Are you a mechanical engineering student dreaming of a product design career? Explore insights on passion, career satisfaction, and pragmatic …
TIP 97 6 Tips to Quickly Improve Your Drawing Line Quality
Boost the expressiveness and accuracy of your drawing lines using 6 essential tips. Discover how regular speed, ghost drawing, and …
TIP 98 How to Activate Brush Pressure in Photoshop for Opacity and Size
This guide walks you through activating pen pressure settings for opacity and brush size in Photoshop. Understand essential interface tools, …
9 Essential Websites Every Industrial Designer Should Bookmark
Looking to grow your design culture? Discover 9 essential websites packed with inspiration, trends, competitions, and material insights to fuel …
TIP 1 | LEARN DRAWING FASTER BY SKETCHING THE WORLD!
Want to improve your sketching? Step outside and sketch real-life action! Capture the energy and emotion in every movement using …

Chou-Tac

Hello! I'm Chou-Tac, a Product Designer from France.

If the sketching methods I’ve acquired aid me in my life and in my industrial design career, I believe that they can also help you reach your dream goal as a student or professional designer.

Leave a comment in the blog or send me an email at choutac@thedesignsketchbook.com : )

Chou-Tac

View all posts

Add comment

Your email address will not be published. Required fields are marked *

close-link
Start Sketching Today Step-by-step!

GET YOUR DESIGNER STARTER KIT NOW!

The
close-link
The
SEND ME THE BOOK NOW
Send me The Book
close-image

Don't Miss New SKetching Tutorials!

Subscribe
LEARN 1-TIP-A-DAY TO BOOST YOUR LEVEL!
SUBSCRIBE!
Yes! I want to follow
The Design Sketchbook Youtube CHannel!
close-link
Click Me