Simplify your Drawing Process (in 4 steps) 9.24min
Hey Design Sketchers!
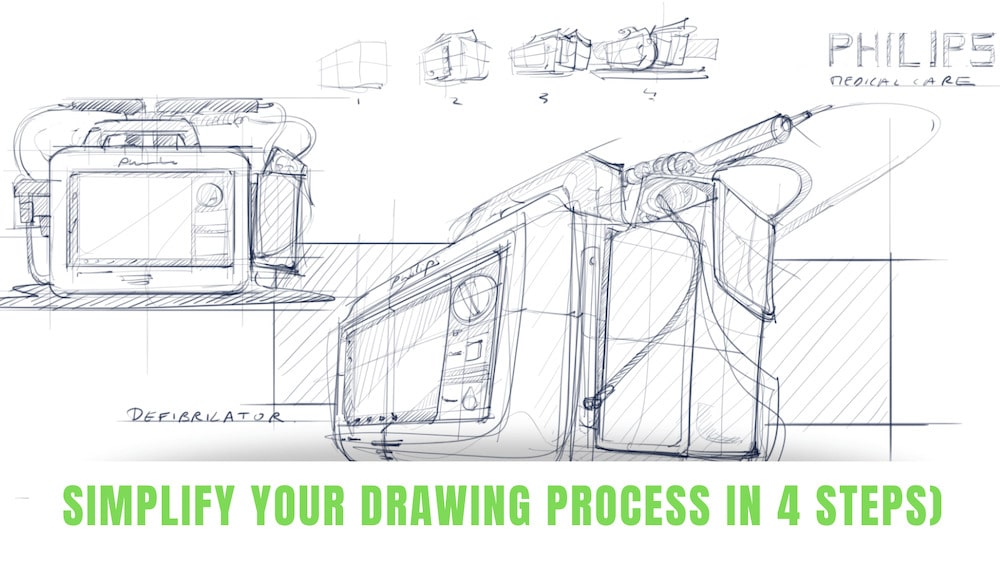
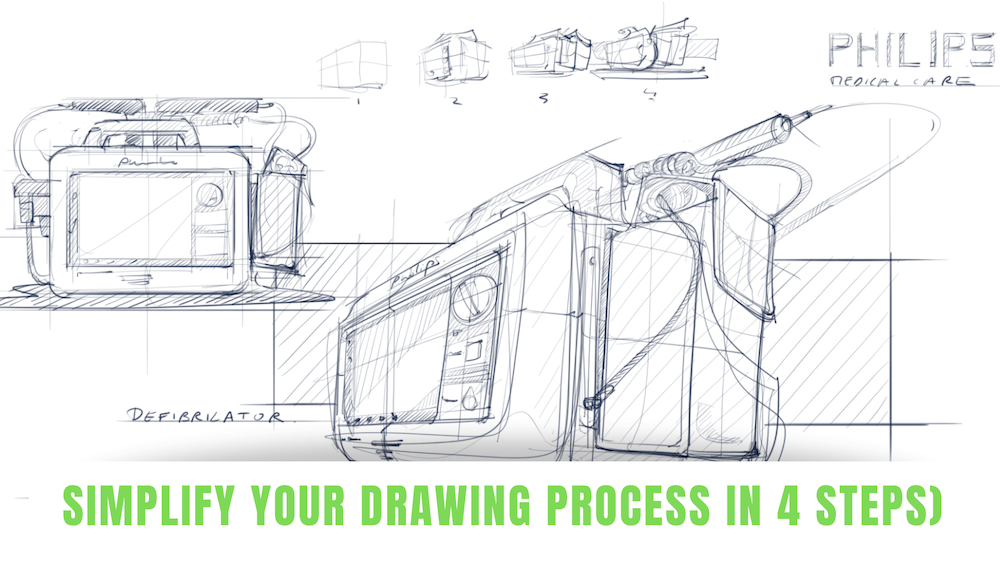
Welcome to this exciting tutorial where we dive into the 4 Simple Steps to simplify your sketching process.
Today, we’ll be sketching something you might not expect – a defibrillator – to show that you can draw anything. From everyday objects to specialized equipment, this approach will help you capture the essence and learn new shapes for your design library.
So, grab your sketchbook and let’s get started!
Remember, we’re here to study, to learn, and to have fun with our lines.
Let’s make every sketch count!
So welcome to the DesignSketchbook.com
After starting warm up with drawing some circles.
Let’s go ahead!

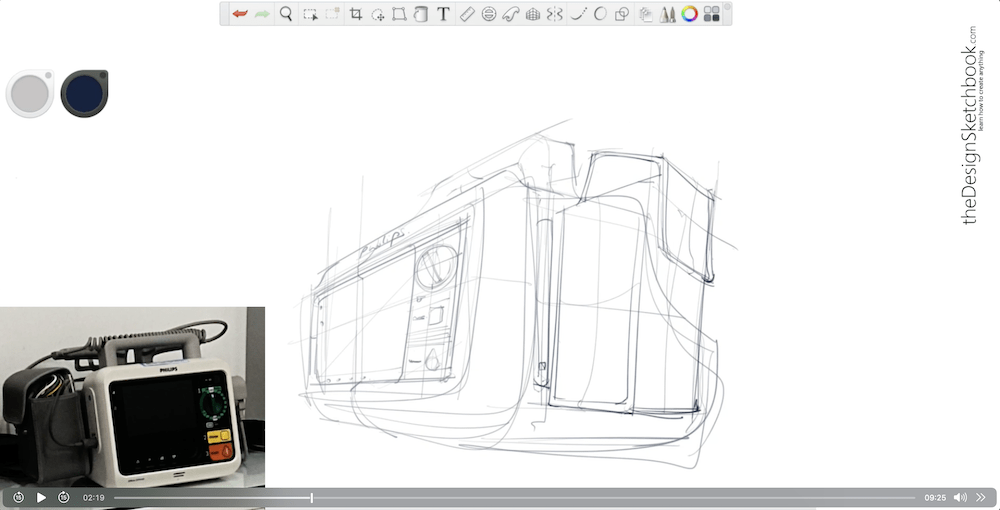
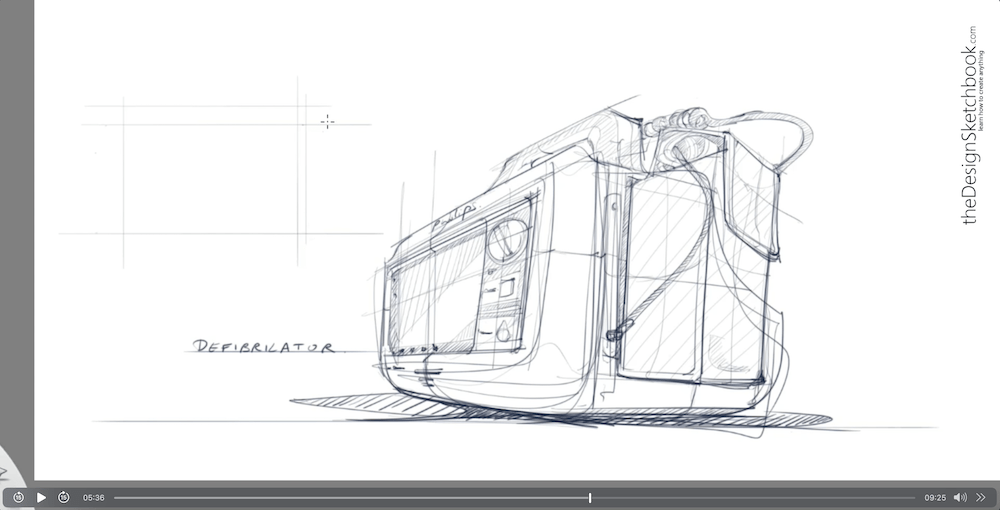
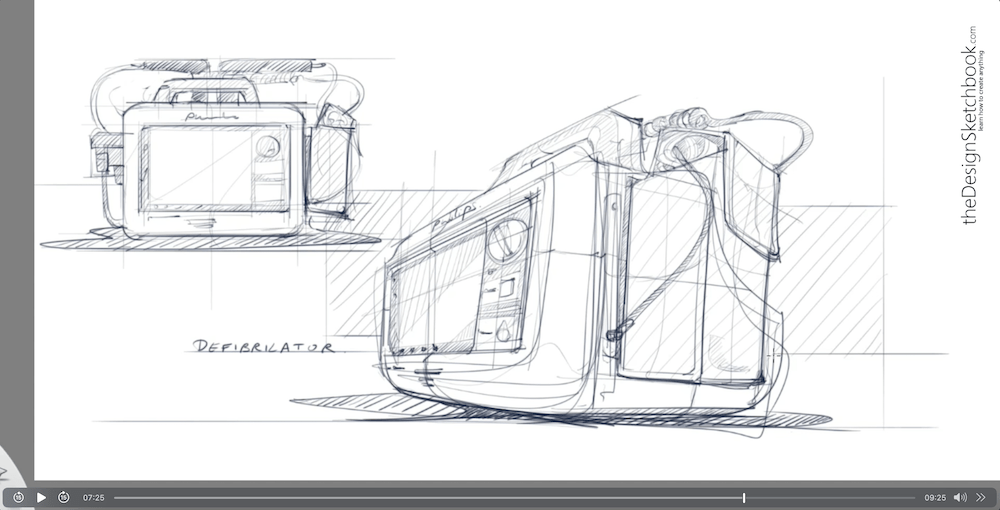
I start with the front face of the screen.
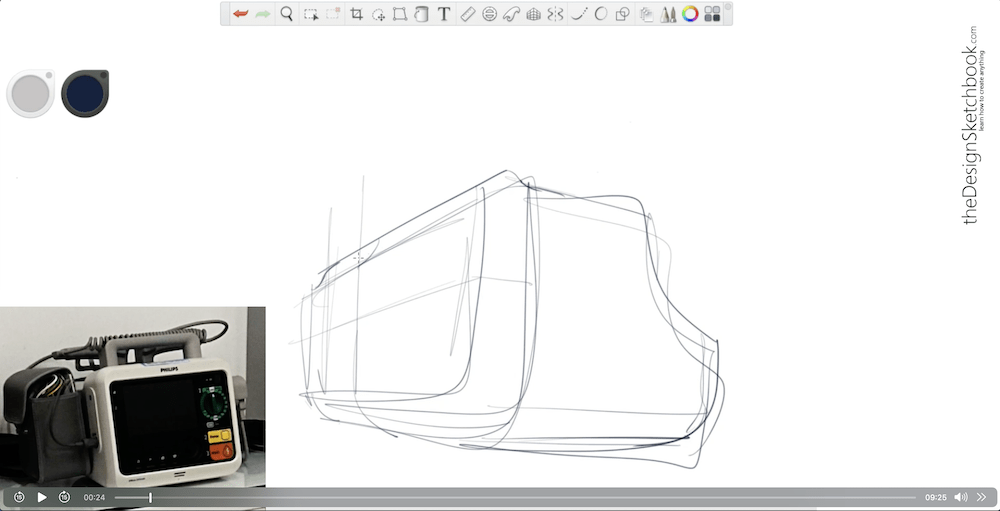
I’m trying to complete the main box of this product.
The contour lines are helping.
I like to add this logo because it kind of solidifies the overall.
So it’s giving me the feeling that this is a 3D object, something that we can touch somehow.
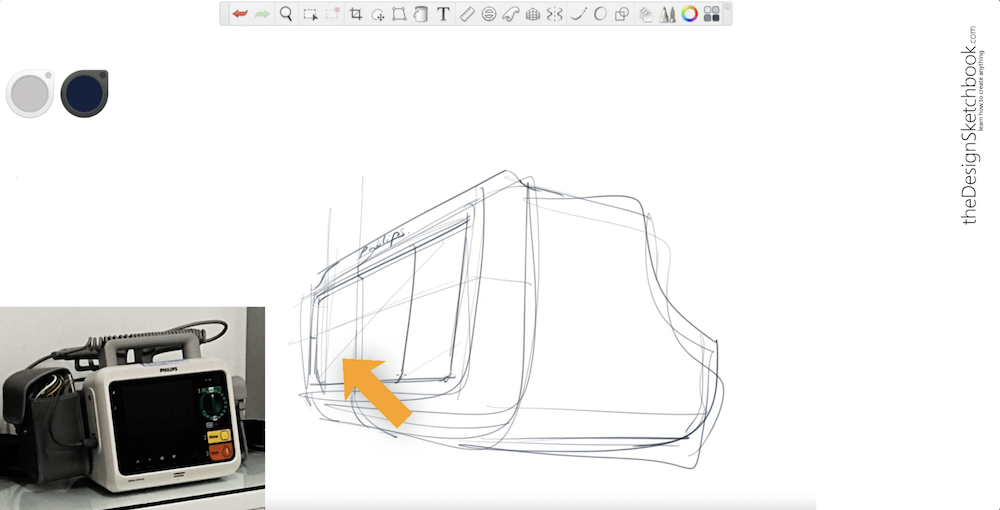
I add also this quick reflection of the screens to capture that.
This is something reflected as glass.
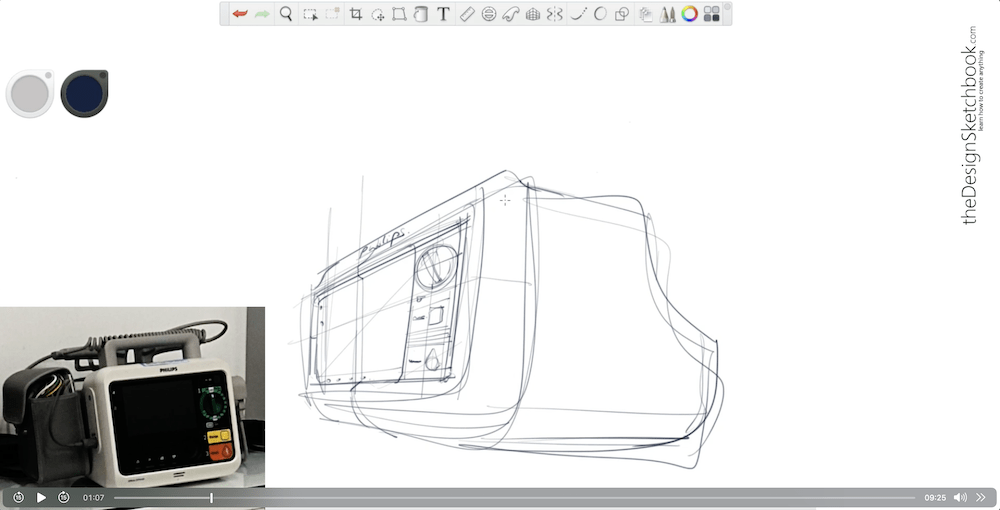
I add here a quick proportion of where are the different elements of the details for this main box.
So it’s kind of like the big TV of the old time of the ’80s ’90s.
As you can see, I don’t go too much into detail.
It is just enough to understand what’s going on.
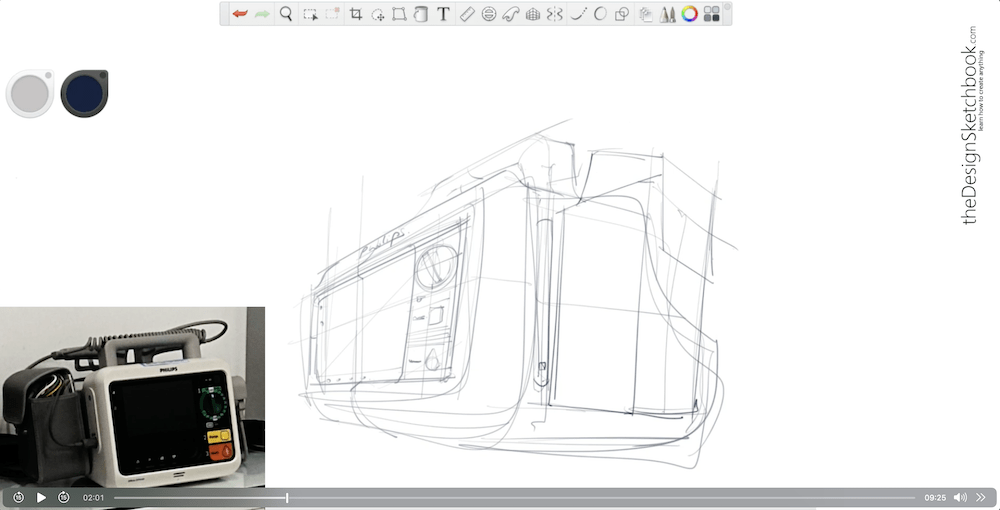
So after this big box and the screen, I go on the handle.
That is on top of it, attached to it.
Carrying on with this contour line right here.
As you can see the main form is actually drawn very fast and also with very loose lines as well.
I’m not trying to reproduce 100% what I see.
Because my purpose here to draw this, is to study, is to study the different forms to try to learn some new shapes. And also add them to my library of forms.
So now I completed the big box for the screen and also the handle,
I start doing the bag that is attached to it.
So think of what is a core element,
which is the main screen, and then what is the accessories, the bag of accessories is attached to it.
That’s why I like to draw it faster.
It’s kind of psychologically easier to handle.
Instead of starting with the bag and then you start with the core.
It kind of doesn’t make sense somehow.
- So we got the first, the main screen.
- Second, we got the handle.
- And third, we got the bag.
It is really important to decompose.
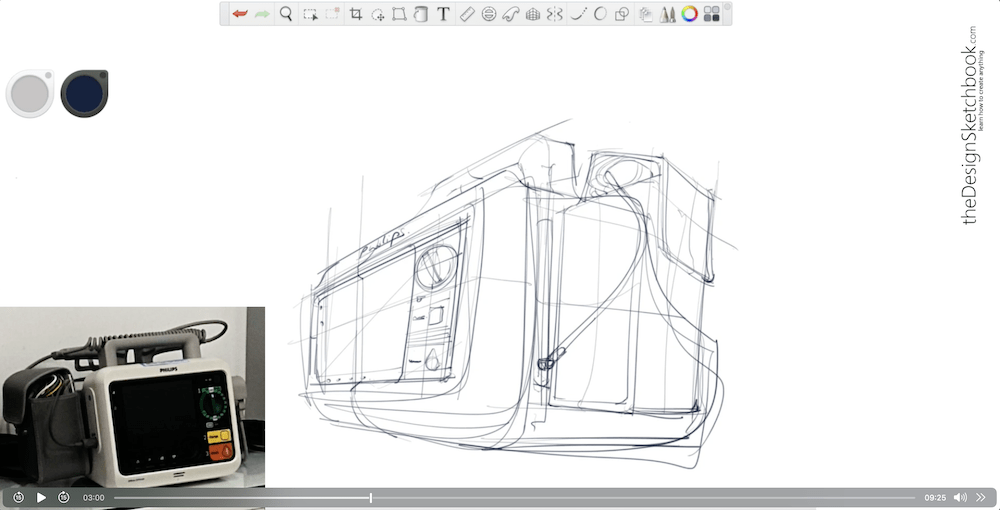
When I draw this bag, I have to draw in transparency.
Because I’m drawing on top of the screen with the lines all behind.
Why it’s important to always start drawing with a light line pressure of drawing.
So now, I add the cables.
It’s kind of feeling this logic of the order.
If I started with the cable, it doesn’t make sense.
Because they are inside this bag.
So, I draw the bag and then the cables inside
It is kind of looking for this common sense that will become intuitive with practice.
Remember the rules of “General to details”
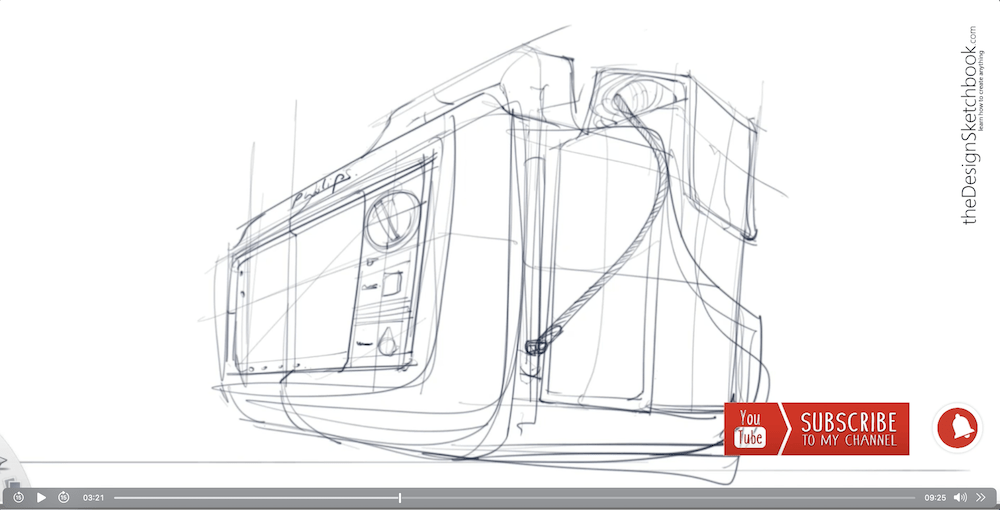
So I add here a bit of hatching to add some contrast.
It helps for better comprehension.
So before drawing, always ask yourself, what’s your purpose for drawing?
- Why are you doing this?
- Is it for study? Or is it for research?
- Is it for communicating an idea to your customers with a final rendering?
So your style is going to be different.
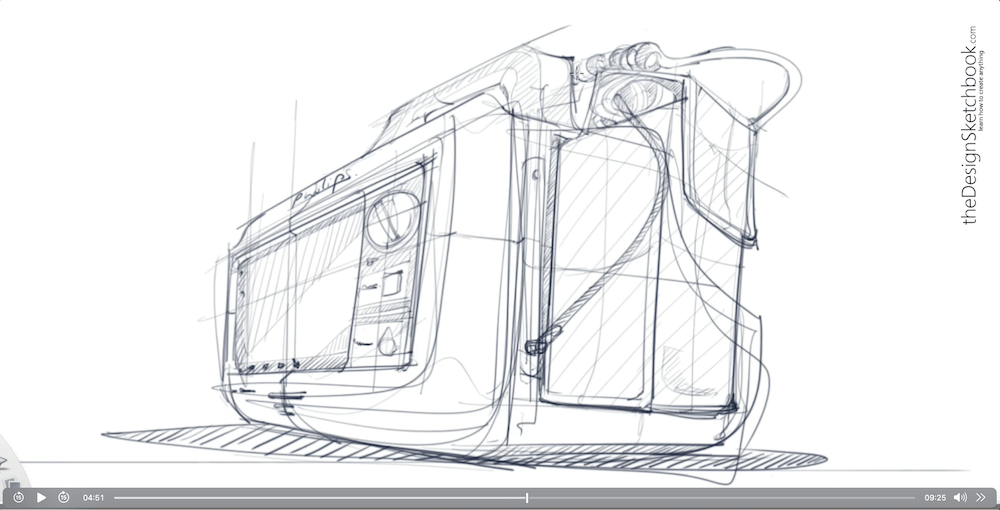
Here I draw some hatching.
Which is really helping me to actually block in some areas.
Make the communication of your product much easier.
Even though the lines are very loose, I like to do hatching super neat.
Which creates a good contrast.
So when you draw the hatching, remember to use the direction that… here I use oblique.
That is not used mainly in your drawing.
Like, in your product’s other lines that you can see, I believe none of them are using that direction which is hatching.
Which helps to contrast between the hatching directions and also your product lines.
There is also no conflict visually.
So I add more details right here.
I love drawing loose and fast because this drawing style is going to help you to find a lot more ideas when you do research.
That’s why it is important for you guys to practice drawing anything around you.
To just learn different forms, different languages, and whatever you want to use them.
And subconsciously, you’re going to grab them somewhere in a pocket in your brain.
And this form is going to be on your sketches.
Maybe you want to draw a car.
Maybe you want to draw a TV, a fridge or anything.
Maybe some of the forms of this are going to be input there.
Draw anything you like.
Draw anything that attracts your attention.
It doesn’t matter if it is sexy or not, it has to appeal to you.
It kind of influences your style and your inspiration when you create.
Draw unexpected stuff that you find interesting, or get out of your comfort zone.
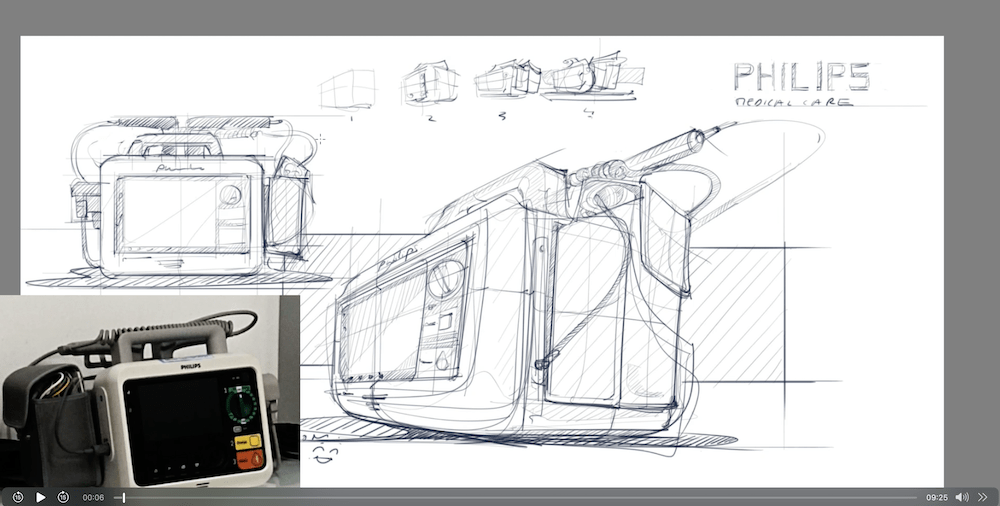
For some of you, maybe a defibrillator is something that is not sexy.
I didn’t plan to draw a defibrillator.
But when I was there (at the hospital),
I feel that the forms are super cool and there’s the style, I wanted to learn it.
So I draw it.
And it doesn’t take so long.
Now, I draw the front view.
I don’t even have the product anymore in front of me at the hospital because I’m at home and I’m drawing from pictures, but you can be able to draw this front view from this perspective here.
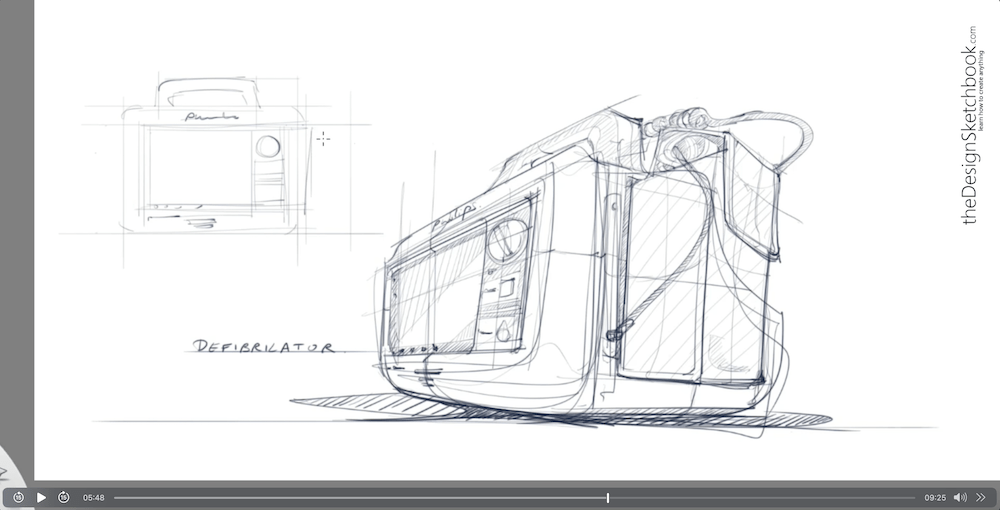
That’s a good exercise to practice.
I invite you to make it a try.
Take a picture of a product in perspective and try to draw it from the front view.
How would you visualize it? It will also help you to have a better sense of proportion as well.
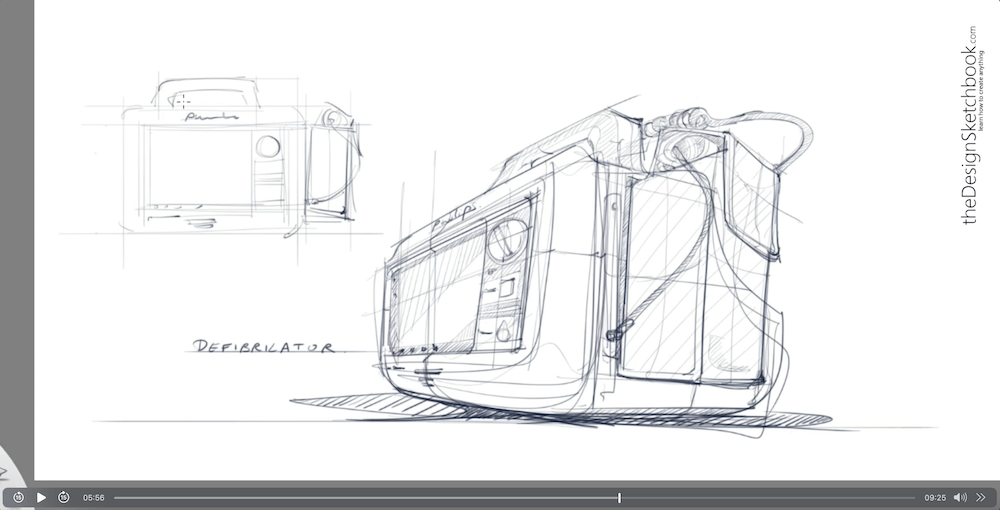
The color blocking with the hatching, and hatching blocking really helps for different layers of comprehension and blocking the different elements.
Remember, take it easy.
You don’t have to be 100%.
Keep practicing.
And you’ll be improved by having this in mind.
And I could get even darker for the back.
Here with the defibrillator, I get darker as well.
The more something is behind, the darker you could get.
It’s quickly a logic that
You could use it.
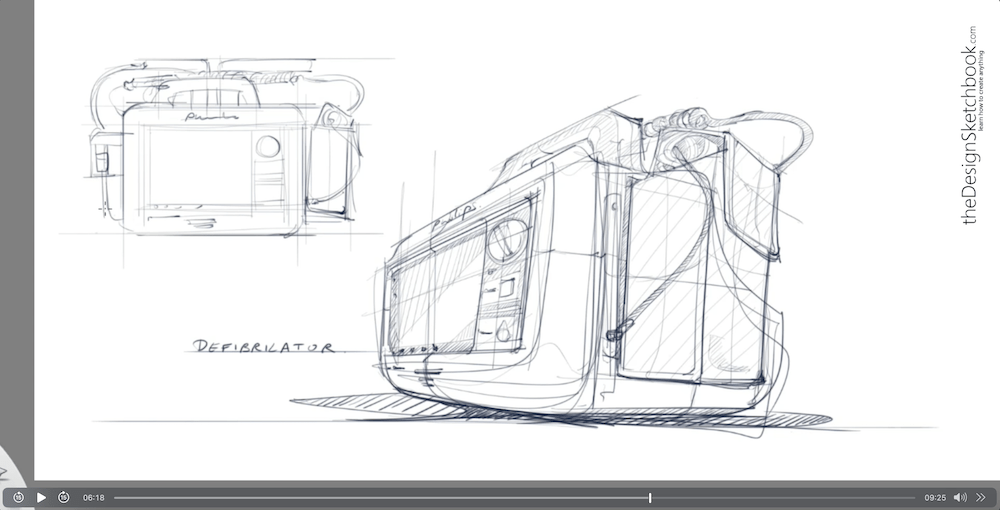
Now I add a quick background.
So I had to quit rectangle around behind.
It helps to make it pop out from the back.
And I add the logo. As you can see I add two lines.
Bottom and top line. Then I add the logo inside.
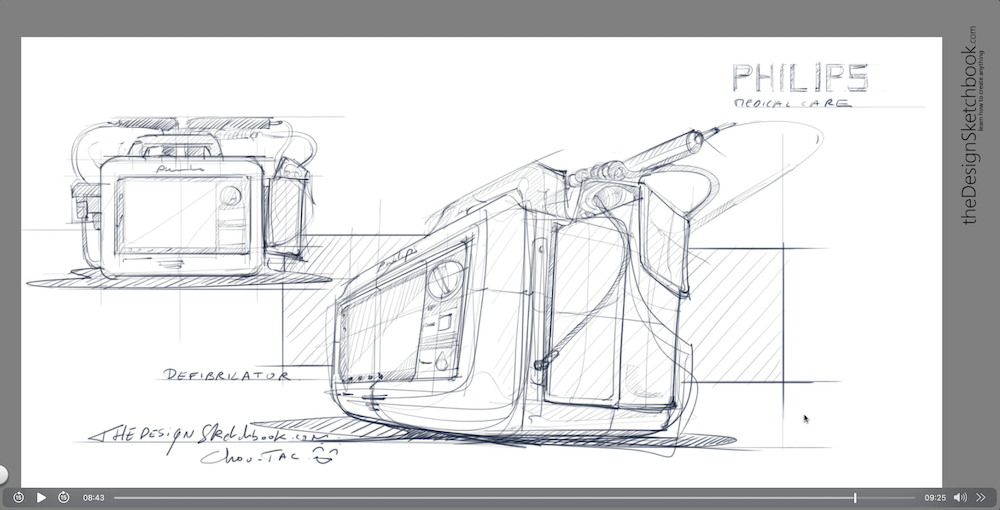
Here I add the handle of the defibrillator I forgot to add.
And with the cable that is super dynamic!
I didn’t draw the cable entirely.
It’s kind of tricky to draw it.
It’s not a detail that is very important.
It suggests the form of the cable.
And gives even more dynamism to the sketch!
Wrap-Up!
Congratulations, design enthusiasts!
You’ve now explored the 4 simple steps to simplify your sketching process.
Here’s a recap to keep that creative spark glowing:
- From General to Details: We started from the core, moved to accessories, added details, and finished with hatching and background. This method will guide you in creating comprehensive and dynamic sketches.
- Embrace the Freedom of Sketching: Remember, your sketches don’t have to be 100% perfect. It’s about capturing the essence, studying forms, and learning from the world around you.
- Draw Anything: No object is too mundane or too “unsexy.” Every form, every shape, and every curve can inspire your designs. From defibrillators to everyday objects, they all hold a treasure of design knowledge.
- Practice, Practice, Practice: Keep sketching, even if it’s just a few minutes a day. You’ll find yourself progressing faster than you ever imagined. Each sketch is another step towards mastery.
So, what’s next?
Keep exploring, keep sketching, and let your imagination run wild.
Whether you’re designing the next big product or just sketching for fun, these techniques will serve you well.
And hey, if you enjoyed this journey or have any questions, drop a comment below or let me know if you’d like more tutorials like this.
Let’s keep sketching together, and you’ll soon find yourself not just drawing, but mastering the art of design.
Your passion for sketching and design will take you far, so keep going, keep dreaming, and keep having fun with your designs!
Happy designing!
Cheers,
Chou-Tac
PS: If you’re starting as a beginner in Design Sketching, I invite you to download the Designer Starter Kit.
This is a free book that is going to help you with perspective.
PPS: The software I use is “Sketchbook”. It’s free!
You can download it and draw on tablet and desktop versions.


1 comment