- Example of Dynamic Sketch
- Below are the 8 Steps:
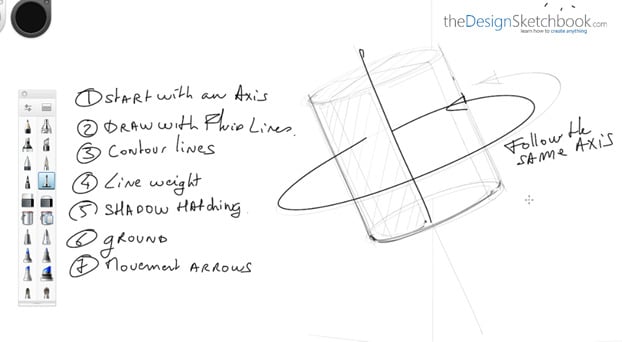
- 1- Start with a simple axis (To explain you the technique, I made a demo with a simple cylinder.)
- 2- Draw with fluid lines
- 3- Contour lines
- 4- Line weight
- 5- Hatching Shadow
- 6- Ground
- 7- Movement arrows
- 8- Touch up! There is always a session of touch up at the end of the sketch. If the sketch has been well done, the touch up shouldn’t take long.
Today I would like to share with you the method that is the most precious to me. Some people may say I should keep it SECRET– and keep it as my own style. But to me, this might change and greatly improve the way you sketch, as how it did for me when I was a student.
8 steps to Make dynamic sketches – the Design Sketchbook
This method is NOT only about drawing with a dynamic style. It’s also about being accurate. To succeed you will have to practice it when you learn your fundamentals rules such as perspective, proportion…Earlier you know about these 7 steps, earlier you can implement it as a habit.
Example of Dynamic Sketch

The method applied on a sneaker – Chou Tac Chung
(I use some hatching on certain pieces to show that they are made of different materials)
This method helped me to improve DRASTICALLY when I was student. I actually learned it from 2 of my talented classmates. They was my friends and we was all sitting together on the same table, from where we learned from each other. I remember how I kept observing them drawing. It was so easy for them ! How come with one single stroke, they got so much precision ! The first secret is that sequence of steps. The second is PRACTICE.
To make it easy to explain, I dissociate every single step and put them in a sequence. Take your time to practice each step. You will slowly be able to combine them.
Note:
You don’t have to follow the sequence with that exact order. But it’s the one I myself feel comfortable with.
Before starting let’s have a look at the advantages to use that method :
- Minimalist, clean
- Fast and efficient (Great for drawing multiple ideas in a minimum of time)
- Accurate, you don’t have to draw perfect
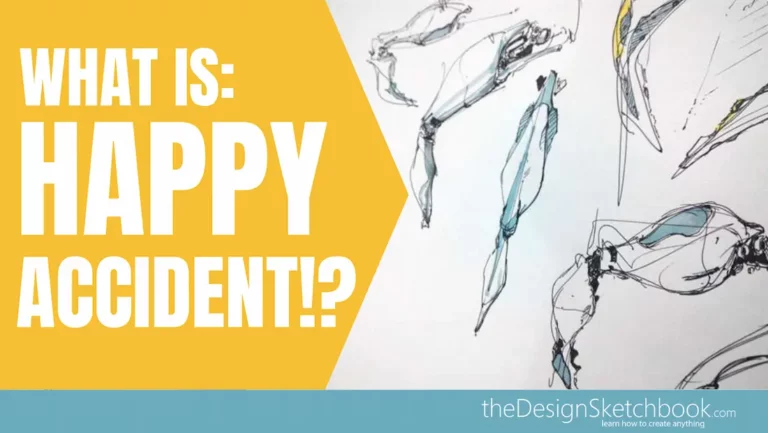
- Intuitive (Sometime it’s good to do not think too much while you draw and provoke some Happy accident)
- Easy to fix
- Easy to import into Photoshop
TIP
“You may use this technique with more or less a loose hand depending if you want to draw a doodle or a final sketch.”

To better draw with this sequence of steps, I recommend you to train your “hand-brain synchronisation” to gain in accuracy. You will find the essential exercises in the Designer Starter Kit. (How to draw straight lines without ruler, perfect circles without compass, how to hold your pen…)
“It’s like martial art. More your practice, more your hand will draw with precision and effortless.
But you have to learn the right movement.“
Below are the 8 Steps:
1- Start with a simple axis
 (To explain you the technique, I made a demo with a simple cylinder.)
 (To explain you the technique, I made a demo with a simple cylinder.)
This axis will give the orientation to your cylinder or product. It will help you to better visualise your cylinder/product before drawing it.
2- Draw with fluid lines

Make sure to look at the 3 common mistakes from the video:
- Drawing with hesitation
- Do not finish the ellipse and leave pointed edges
- Give an irregular pressure to your pen for the ellipse.
There is a solution to help you draw better: it’s the ghost drawing.
It’s about simulating your movement before tracing your ellipse. It helps you to visualise better. This technique works for any type of lines (Straight line, C-curve, S-curve).
3- Contour lines


They are made to represent the volume surface. The most common contour lines divide the object in half.
4- Line weight


It’s about variation of your line thickness. Bolder is your line, more visible your product will be. So you can direct your viewer eyes on it. (Especially useful if your board contain many sketches and you want some of them to pop out)
We add more line weight at the opposite side of the light source.
5- Hatching Shadow

To draw faster, we don’t add any degrade of grey with a pencil. We rather add hatching to represent the shadow. Feel free to play with the distance between each hatching. Closer they are, darker your shadow will be. Make sure they are parallel.
6- Ground

I add 2 axis to represent the ground and add a distant shadow on it. It’s a simple visual effect that give lightness to your product.
7- Movement arrows


It’s an other simple trick that give motion to your sketch. It’s optional though, but it participate to attract the viewer eyes.
Note:
If your drawing already contain some functional arrows, you should avoid using them. It may confuse your reader.
8- Touch up!
There is always a session of touch up at the end of the sketch. If the sketch has been well done, the touch up shouldn’t take long.

Assignment of the day
Practice these steps on Cylinders, then try to do the same for Organic shapes. As soon as you can make it, apply them to your own product sketches for your personal research, homework for school or even the projects for your clients. Your presentation boards might looks more dynamic, expressive and attractive.

Related article:
– Combine this article with that article about the 3 types of line I use 80% of the time
– Some exercises on How to draw Lively lines and practice your pen pressure.
– Live drawing helped me to train at representing things with the minimum of lines. Feel free to get some Live drawing courses if you can. Otherwise, you may do like me, drawing people from pictures or from the street.
If this article is helpful to you, let me know in the comments 🙂 !
Collapsible


Very useful tips, thank you very much for sharing!
I am not sure about movement arrows – they are only used on objects in motion, right? So stationary objects do not need them? Is the placement arbitrary, can be across the object, above or below? And what is functional arrows?
Hello Irene,
1- On the example with the cylinder, the arrow is optional. It has only a visual appealing purpose.
2- If you draw a sketch which you want to express one or multiple functions, you want to use functional arrows to express a rotation of an helix, a twist of a sponge, a pull of a door… It’s up to you to skip the movement arrow I show you on the video – By skipping it, you may avoid a conflict with both types.
Note that he movement arrow’s head can be removed – without the head, there is still a sensation of movement.
3- Yes the placement is arbitrary.
4- Usually functional arrows are pretty wide and flat. You can have a look at this article: https://www.thedesignsketchbook.com/tip-105-how-to-draw-arrows-part-1/
Hope it helps.
it was great that you so much! you are perfect teacher. 😉
Thank you Mohammad. I appreciate 🙂