


- 7-Days Roll of Concept Art Paper Challenge
- Why Try the 7-Day Roll of Paper Challenge?
- Materials Needed for the Challenge
- Key Strategies to Success
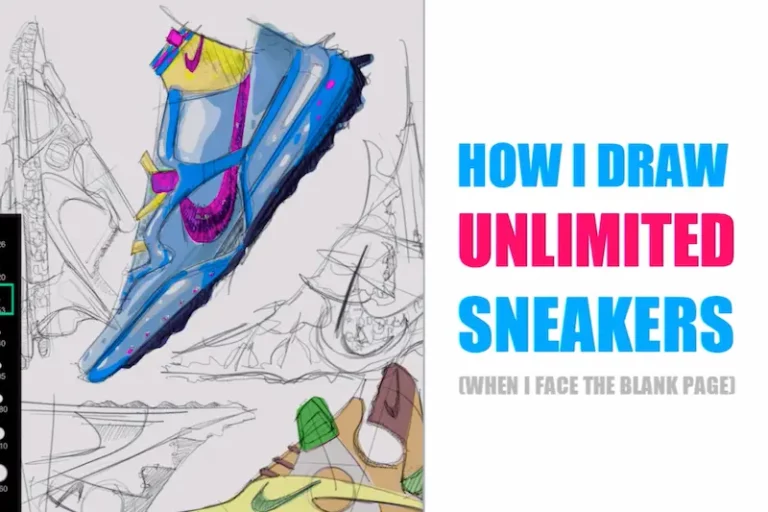
- 1. Embrace Multiple Short Sketches
- 2. Keep Inspired and Use References
- 3. Eliminate Distractions and Stay Focused
- 4. Warm Up Your Hand and Brain
- 5. Stay Confident and Keep Improving
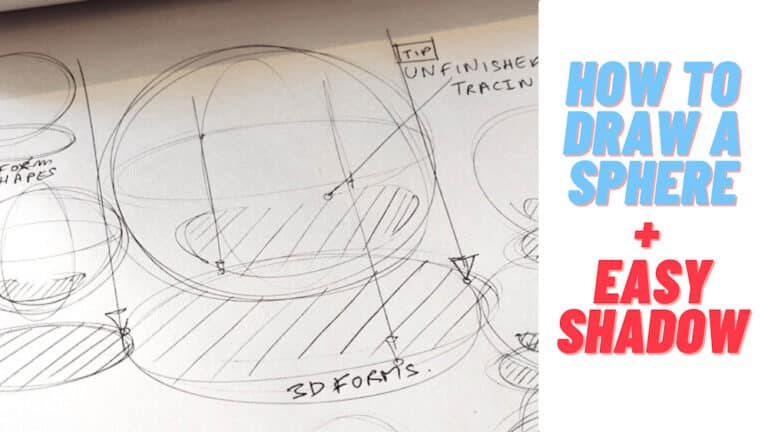
- Sketching Tips for Building Concept Art Skills
- Your Creative Journey Starts Now
- Sketching Tips Series!
7-Days Roll of Concept Art Paper Challenge
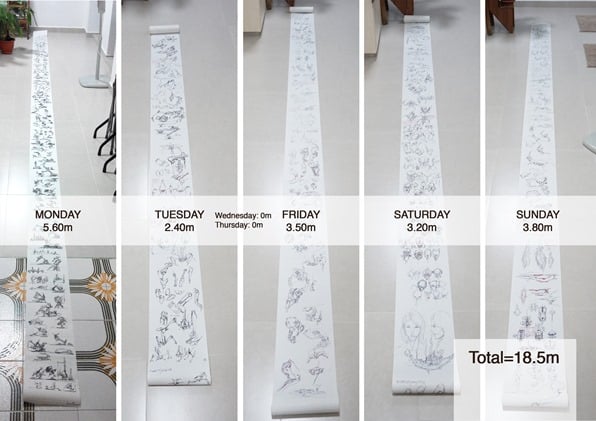
Embarking on a daily sketching challenge can be a game-changer for your creative development. Over seven days, I committed to filling an 18-meter roll of paper with sketches focused on concept art—specifically bots, mechs, and spaceships. This journey was not about creating perfect artworks but about exploring new sketching territories, multiplying ideas, and improving my skills through consistent practice.
Why Try the 7-Day Roll of Paper Challenge?
The goal was to set a tangible deadline—seven days—to push myself beyond comfort zones and break mental barriers. This intense, focused effort taught me several valuable lessons:
- How to generate a multitude of ideas efficiently
- The importance of consistency in sketching
- Deepening self-awareness and discovering new strengths
Materials Needed for the Challenge
- Paper: A roll of fax paper (width 210mm), with length depending on your preference. Amazon provides plenty of options.
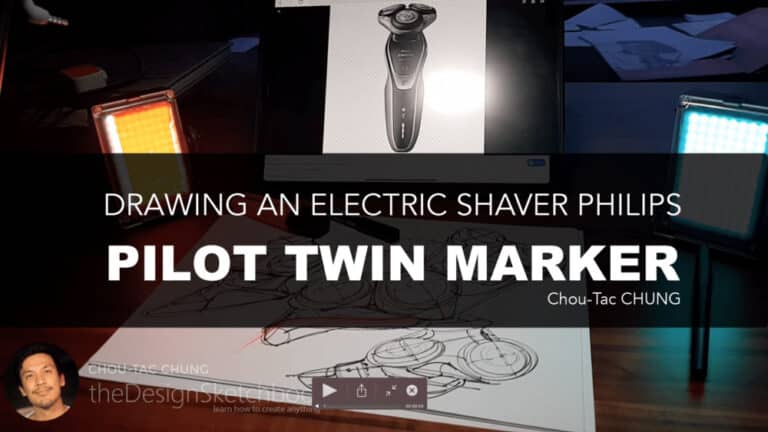
- Pens: A mix of drawing tools, such as ballpoint pens for details, Sharpie ultra-fine tips for loose sketches, and thicker markers like Pilot Twin or Papermate Flair for simplified shapes.
- Additional Tools: A good workspace, reference images, and a distraction-free environment help maximize your progress.
Choose your paper type
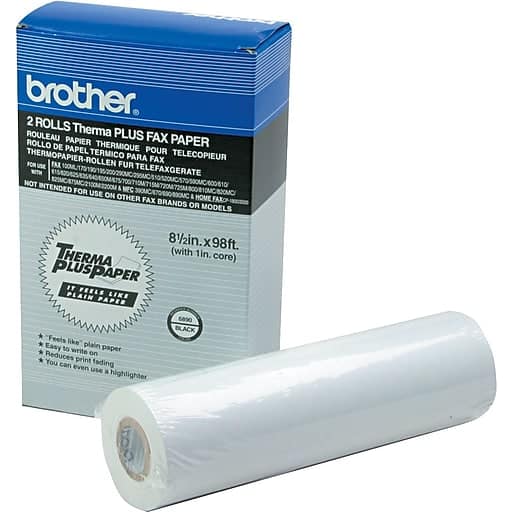
A roll of paper for fax, width 210mm. The length is up to you, different length are available.
You can find some Fax paper roll on Amazon.
Choose your pen
- a Ballpoint pen: Thin lines and great pen pressure – great for drawing details
- a Sharpie Ultra fine point: Deep black pen, slide great on paper – great for loose sketching.
- a Pilot Twin marker and a Papermate Flair: Thicker than Sharpie – great for focusing on simple shapes (you can’t draw much small details with it).
To me, the Papermate Flair is better than the Medium tip of the Twin Marker. - Know more about the pen I used here.
Key Strategies to Success
At start I was super motivated. I draw more than 5m the first day!
The day after, I did half of it. Then Wednesday and Thursday I took a break. Plus, I was busy with other things (Making the first sketching video tutorial included).
TIP: I personally like to take some break. I spend some time at studying pictures from Concept artist works such as John Park, Feng Zhu, Scott Robertson and many others. Keep in mind that looking for reference is part of the sketching process.
1. Embrace Multiple Short Sketches
Don’t aim for perfect, lengthy drawings in a single session.
- Instead, focus on quick, 10-second to 5-minute sketches.
- This approach fosters idea multiplication and keeps your mind agile.
2. Keep Inspired and Use References
Feeling stuck is normal.
- Use reference pictures from concept artists like Feng Zhu, Scott Robertson, and John Park.
- Search in multiple languages to broaden options. Creating a story or context around your sketches can spark new ideas.
Choose your reference pictures
1- Don’t be ashamed to look at reference pictures. Sometime, I like to look at concept artist for 5 minutes or more before starting a drawing session. My brain calibrate itself viewing things better volume with outlines. Plus I try to absorb that Concept art mood. I like to look at great artist such as John Park, Feng Zhu, Scott Robertson, Daniel Simon…
TIP: I draw a lot following my feelings. If I draw a vilain, I try to imagine myself being a mad men. My lines get naturally more edgy. If I draw a Despicable Me Minion, I imagine having one beside me as a friend ! It’s fun and my line get smoother and rounded.
2- I open Google image on Ipad. Anytime I get some pictures from any kind of machine, spaceship, motors and so on. If you have books, it’s even better.
TIP: Try to type your keywords in multiple language to get wider your results. I type my keywords in English and French.
Start with an imaginary story
If you don’t have any ideas, then provoke them. Start with what you like. What was the recent movie you watched ? Use the “What if” technique. Or draw something you already know, and try to improve it or adding in new elements.
Start with many small sketches
When we are beginner, we tend to spend hours on our first sketch.
However, when we are in the initial phase of research, quantity matters.
- Spend from 10 seconds to 3 minutes per sketch to multiply your ideas.
- The secret is do not get too much involved in detail, and not looking for perfection.
3. Eliminate Distractions and Stay Focused
Turn off notifications, shut down your devices (except for the reference apps), and find inspiring environments—like a busy café—to enhance concentration. Use music playlists to maintain rhythm during long sketch sessions.
This is maybe the biggest enemy we have nowadays. The distraction is virtual. It comes from your phone, Facebook, email, Instagram, YouTube. To be able to finish the roll-on time, I need more discipline as usual. It’s good to shut down the phone and computer (not in sleeping mode but shut down). I only allow Google image on my iPad or Instagram artist for reference.
TIP: Go out for drawing. I like to go to some cafe and draw. It may be noisier, but my brain can focus more on the task. There is a cafe nearby I like. It happened I stayed there from morning to evening. I had lunch, cafe, dinner keeping studying new stuff and drawing all day. Time flies.
TIP: Music! Put your earphone and get ready to sketch for hours. Do not shuffle your music among different artist or style of music at every song.
Don’t listen to music from YouTube playlist. The advertising will interrupt your concentration. You could make some playlist with Soundcloud.
4. Warm Up Your Hand and Brain
Expect initial sketches to be rough. Dedicate the first few minutes to warm-ups—deep breaths, correct posture, slow flowing lines—to improve focus and hand control.
Expect to see your first drawing clumsy. You don’t only warm up your hand muscles, but also your brain concentration. At start, we are still quite distracted. It may take 2mn, 5mn or even 20 minutes to get a good concentration.
TIP: When I can’t get that concentration, I tend to be a bit frustrated. So, I stop drawing for a while, I make sure my drawing posture is correct (straight back), and I breathe deeply.
It’s a kind of small meditation session that calm me down. It works even better if I breath slowly and deeply 5 times. Focus on your breathing. Don’t think about anything else.
I invite you to try it now. Inhale slowly from your mouth and exhale slowly from your nose 5 times. Your brain will feel lighter. :)
5. Stay Confident and Keep Improving
Frustration is part of growth. Remember past challenges—like drawing symmetrical eyes—improve over time with patience and persistence. Celebrate your progress without pride, keeping a humble attitude toward learning.
I could fill the roll with stuff I already know. But what the point ? The aim is to learn new things.
When we start getting some results, people tell us that we are doing great stuff ! So, we may tend to keep drawing what we are good at only. We stop taking risk and maintain that illusion of being good.
It was the same thing when I as a kid. If I got the kind words from my friends about my drawings, I would be still drawing clumsy drawing of cartoons. Set up your own standard. Make them progressive.
TIP: Welcome positive feedback. But don’t take it as “Wow. you are a great and accomplished talent”. Instead, take it as”Wow you impress me, I can’t wait to see more from you !” It is great to be proud. But the best alley to progression is not pride but humility.
TIP: Get a secret sketchbook, that ONLY yourself will see. Nobody else. You will be able to draw all the crap you want. Nobody will judge you. Be sincere with yourself, face your problems and you may save years of progression.
TIP: Each time you feel improving. Enjoy your new skills, then target the next level.
Sketching Tips for Building Concept Art Skills
- Highlight the Line of the Object: Your eye quickly grasps shape and volume when lines are emphasized correctly.
- Focus on Joints and Mechanisms: Study how joints move and how armor covers vulnerabilities—this adds realism to robots and mechs.
- Start from Basic Shapes: Break complex forms into simple volumes, then refine gradually.
- Use Proportions for Scale: Draw humans or basic figures to give scale and presence to your robotic or spaceship designs.
Your Creative Journey Starts Now
Commit to sketch daily, explore new themes, and don’t fear making mistakes. Each sketch is a step toward mastery. If the challenge inspires you, I’m happy to share the full roll of paper images and tips to further refine your concept art journey.
Ready to unlock your sketching potential?
Take the challenge—determine your theme, set a deadline, and just start drawing!

Sketching Tips Series!
Instead of just showing you, my sketches.
Why not giving you guys some sketching TIPS as well :).

Highlight the line of the Bot.
Your eye understands the bot shape in a microsecond.

Highlight the internal joints of the Bot.
Focus on how much area is covered by the bot “armour”. Usually in video games, visible mechanism or joints are a strategic spot of vulnerability.

Fusion. Crab + Scorpion fusion.
Study the robot postures with doodles.
These few minutes of research will rise your chance of success.

Highlighting the front of the Spaceship.
Usually, what is closed is bold. What is far, are sketched with a very light pen pressure.
We purposely omit some details, especially when the sketch is symmetrical.

Start from a human base. I like this method because I have a base that I am familiar with.

Impressive body. Strong shoulder, narrow waist.
We often see this effect from american cartoons and some comics. Don’t hesitate to exagerate the proportion while drawing cyborgs and robots.

Studying joints.
This need a lot of study to explore all types of joints. In sketching, the most important is that your creation looks cool and credible.

Getting inspired from a driller and nuclear central.


How to start from scratch.
1- Start drawing spaceship with an abstract shape, yet symmetrical.
2- Add Spaceship details !
This exercice is not that easy, but it’s definitely very fun !


Start with the branches, then add details.

It’s good to warm up sometime at drawing certain type of lines. Here I trained at organic body shapes before drawing the organic spaceship.

Draw simple bots ! Start with a symmetry axis, then add details on both side.

Draw people for scaling. The bot will become more impressive.

Science fiction like to use spider legs for there creation.

Simplify complex shapes into simple volumes.
This is how you will be able to draw without using any model, a character in multiple positions.

Remember to start basic. Then you can refine.
This is a TIP we saw earlier.
If you want to see the WHOLE roll, let me know. I will send you the pictures by email.
If the challenge inspires you, and you also want to try, let me know!
Related Articles


Such an inspirational challenge! I’ll have to give it a shot one day. Do you have pictures of the entire roll?
wuauuu that was a long post with a load of information!
thanks CHou-Tac!
I like your style!
Soon or later, I think it’s good to redo the challenge :)
awsome man… i m up for the challenge… :-)
Enjoy Umang ! It will be fun :D
Wow amazing sketches …. I personally love robotics and mecha stuff and it was a delight to see your works.
Great idea and awesome tips!
I’d like to try this one out . :)
Sure, get a roll of paper by tomorrow and try ! If you are beginner, I recommend you to start the 7 days Sketching Challenge with 3 meters first. :)
You are so amazing man!!
Ahah, Thanks Bruce !