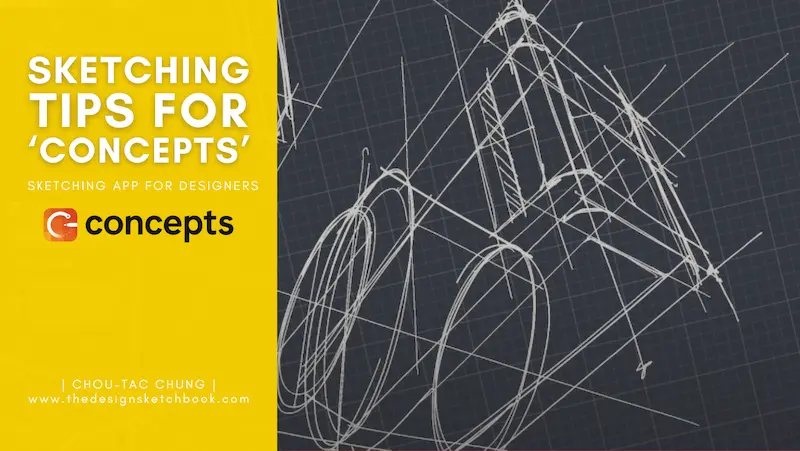
- Concepts App Sketching Tips on iPad Pro
- Visual Note-Taking with Concepts App
- Introduction and Setup
- First Impressions of the Concepts App
- Building a Sketch Step by Step
- How I Use the iPad When Sketching
- Mastering Line Weight and Pen Pressure
- Practicing Perspective and 3D Forms
- Experiment with Shape Bases
- Practice, Iterate, Improve
- Final Thoughts
- Transcript of the video:
Get ready for better sketches with iPad Pro and Concepts app!
This beginner video gives you the sketching Tips and techniques to create beautiful designs from scratch.
Let’s get started!
Concepts App Sketching Tips on iPad Pro
Download the Concepts app for iPad Pro or Windows (Microsoft).
The basic version is free and already very complete! You can also purchase a membership or choose individual tools to create your own à la carte setup.
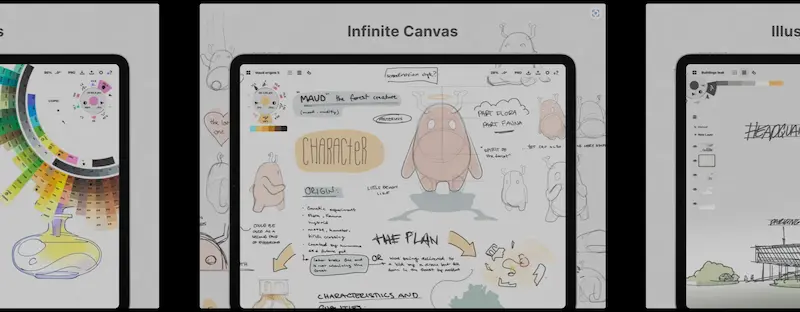
Visual Note-Taking with Concepts App
The Concepts app is perfect for designers who want to take visual notes, sketch, or prototype ideas intuitively. In this video, I’ll walk you through my early experience sketching with the app on iPad Pro.
Introduction and Setup
Hey guys, welcome to TheDesignSketchbook.com!
Today, we’ll explore the Concepts app on iPad Pro. But before we begin, let’s solve one of the most common sketching issues on the iPad: palm conflict.
To help with that, I’m using a drawing glove designed to prevent unwanted palm touches while sketching.
Before starting, don’t forget to download The Designer Starter Kit to take your first steps in perspective drawing.
First Impressions of the Concepts App
I’ve been spending more time with the Concepts app lately and immediately saw its potential for product design and quick sketching. Although I still need more practice to give a full review, I wanted to share my first impressions through this live sketching session.
Building a Sketch Step by Step
We’ll start with simple, general shapes and gradually make the drawing more complex as we go.
Here I’m using construction lines to define proportions and perspective. This helps maintain a global view before refining details.
Remember: whenever you add details, keep checking them against your perspective lines to ensure accuracy and balance.
How I Use the iPad When Sketching
Instead of rotating the canvas digitally with two fingers, I prefer to rotate the iPad physically, just like a sheet of A4 paper. The iPad Pro’s size is close to that of a real sketchbook, which feels natural to me.
I probably rotate the iPad hundreds of times during one drawing session—it’s faster and feels more intuitive than using touch gestures.
Mastering Line Weight and Pen Pressure
I love the gel pen feeling in Concepts. Pen pressure sensitivity lets you vary your strokes from light to bold, which is crucial for designers.
Light lines serve as construction lines, defining the shape and flow, while bold lines emphasize form and depth.
The variation in line weight helps clarify volume and hierarchy in your sketches. Use hatching to create contrast between inner and outer surfaces.
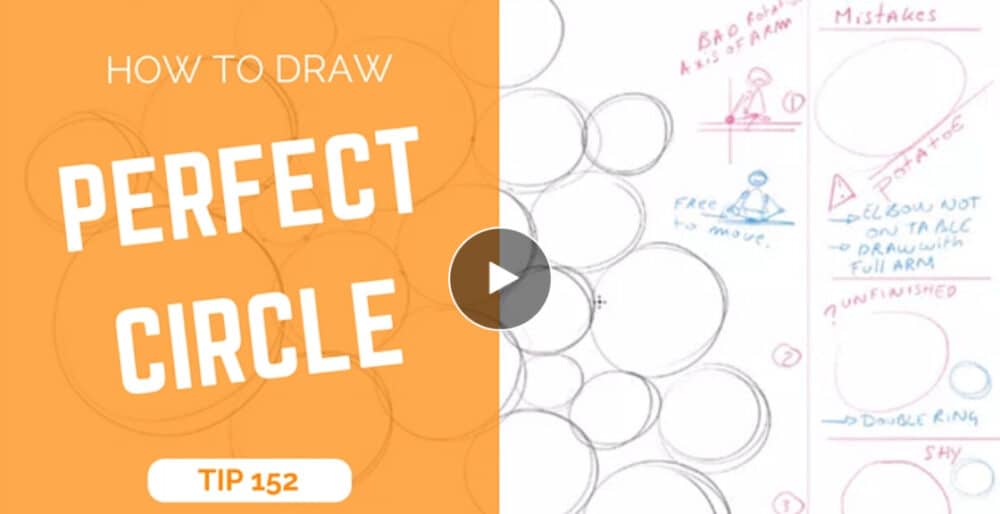
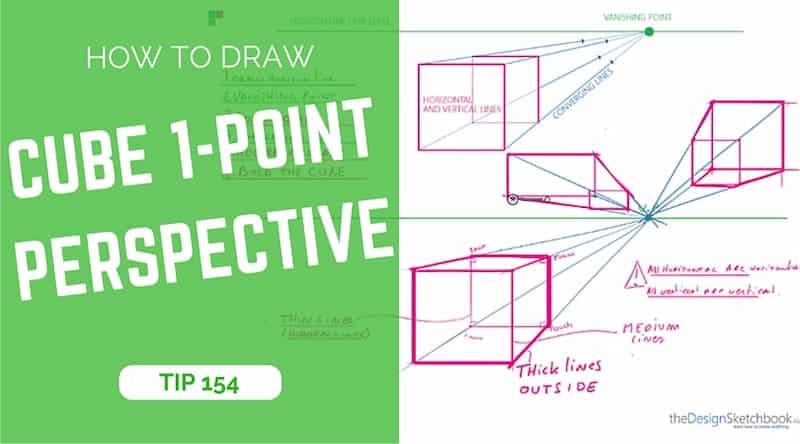
Practicing Perspective and 3D Forms
Always follow your perspective lines carefully. Use comparison between nearby lines (“neighbor lines”) to avoid accidental slants.
Add ellipses and minor axes to define rotations accurately. Creating random 3D forms is an excellent exercise to strengthen your spatial understanding.
If a shape doesn’t inspire you, don’t waste time—skip fast and draw another. This quick-switch approach helps keep your mind creative and focused.
Experiment with Shape Bases
Try starting your sketches from different bases: cylinders, prisms, or rectangles. This variety trains your visual focus and adaptability when sketching products or mechanical parts.
This process should feel like a game, encouraging exploration without pressure for perfection.
Practice, Iterate, Improve
Sometimes your strokes may look too thick or your proportions off—but that’s part of learning. Don’t be afraid of mistakes. The more you draw, the more your hand and eye connection improves.
Every iteration makes your sketches better. A 45-minute drawing session can be enough to create something fun and polished.
Final Thoughts
I had a great time exploring Concepts during this session. It’s a fantastic tool for designers who want to draw freely while maintaining precision.
Take your time, download the Concepts app, and most importantly—have fun sketching!
See you in the next video!
Cheers,
Chou-Tac
Collapsible
Transcript of the video:
Hey guys,
Welcome to TheDesignSketchbook.com.
And today we discover the app Concepts on iPad Pro!
But first of all, I have here a very special glove that is going to help me
to solve one of the major problems that issue I have when I draw on iPad Pro: Palm conflict.
Before starting, I invite you to download The Designer Starter Kit to take your first steps in perspective.
So let’s start.
So I’m discovering more and more the app Concepts, which I’m spending a bit more time with these last few days, I had already seen a lot of potential in it, in product design, and sketching, and this is why I decided to make a quick video on it.
And I would still need some more time in practice to give a proper test about Concepts. But I felt that it could be a good sharing session together.
What we are going to do today is like I’m practicing some general shape, but we are going to complexify I would say along the go on the go.
And that like you can see this one is here, I’m using some construction lines right here.
For the angle of his roundness is always to be like that, we will have a global view, then you add some construction light to add some details, which are going to be following the perspective to make sure that we feel good on overall.
As you can see here, how I use our iPad is that I could have used my two fingers to actually rotate the canvas.
But I do personally like to treat the iPad, like a piece of paper and a piece of A4 paper which is actually very close to the size of the iPad itself.
This is why I have like my left hand as you can see on the top corner, that is actually helping me to rotate the iPad itself to get the straight line that I want.
So as you can see, I keep rotating the iPad maybe 200, or 300 times per drawing, I can’t even count but it’s something that will come naturally, and it is going to be much faster than the double touch to rotate your canvas.
I like to use it like traditional media, I would say.
I really like the gel pen feeling. And actually, you can play with it with the pen pressure. It is very important as a product designer when you draw to choose some pen pressure that some are very light and someone much bolder. And you have an infinity of variety in between that depending on your style, and how much you want to play.
And what you have to remember is that the light lines are going to be very important and essential to the construction lines that are contour lines how you’re going to build up your drawings. And after that, you’re going to bold the lines that are going to allow you to better understand what is the volume that you want to showcase.
For example, here you have negative space and this bolder line inside here, actually helping you to understand what’s going on right here.
So remember, like whenever you draw the construction lines, you always have to follow your perspective, making sure that when whenever you want to do a construction line, you’re comparing the beside the neighbor lines, but I like to call to make sure that this is not going to be slanted.
And here I’m using some hatching to give some contrast between the inner side and outer side of the volume. I’m going to add here below the bottom left and upon the bottom left of this treaty form. So it’s pretty fun here because what we want to do is to create some random forms, random 3D forms.
And actually, this is what we can play from something general. They’re all in here, adding some bit of ellipses and also adding the minor axis, which is going to help me to give an ellipse in the right direction as well.
So it’s like drawing on the floor is like you’re doing something you don’t think about too much in advance, you just try to add detail by details just because you want to exercise your perspective right here.
As you can see, what we can do as a rule is skip fast, try fast, and skip fast. For example, the box that we have just drawn below before is that if you don’t feel inspired by just give it up and go to the next one.
For example, for this one, I’m going to just start with the Cylinder base, and then I got expanded and then I go to the details. And then I do something which is more intricate in more complex inside.
And this is why it’s important for you guys to end whenever you draw to keep the focus on your construction lines and also play once again with a good variety of pen pressure as well so he has a prism base. So I invite you to try with some different bases, some rectangles or some cylinders on the prism, and so on.
And this is how you’re going to help you guys to train your focus whenever you’re drawing, your mechanical pieces, for example, on your product designs.
So it is just like taking it as a game that would say, like what I discover right here on this concept app is fat.
Maybe I should have played with something which is much thinner for the light because it’s starting to be quite overwhelming or maybe as a jurist kicked into a bigger sketch. But it’s going to be better next time.
And this is what you need to remember: the more you practice why we make mistakes the more you will iterate into better and better.
Alright, so this is quite busy overall. But it has been a very fun session of drawing right here which has been completed in 45 minutes.
And I invite you to just take your time to download the app concepts and have fun!
Alright, so see you in the next video.
Cheers,
Chou-Tac


Add comment