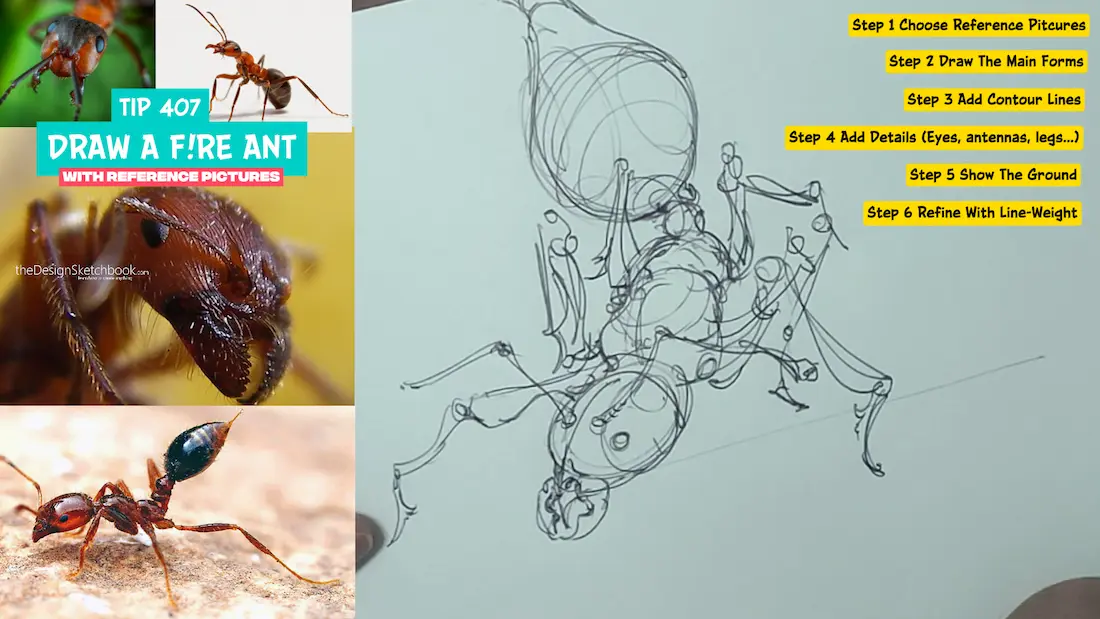
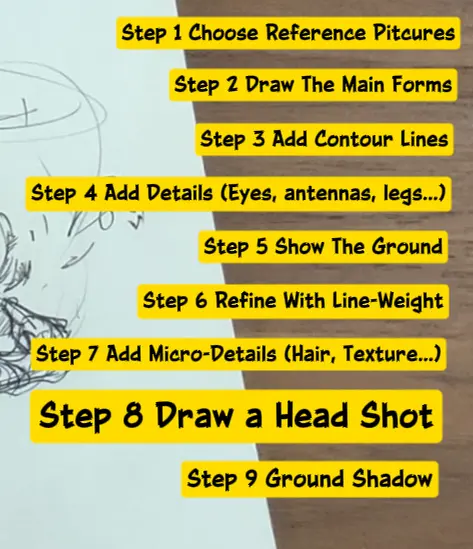
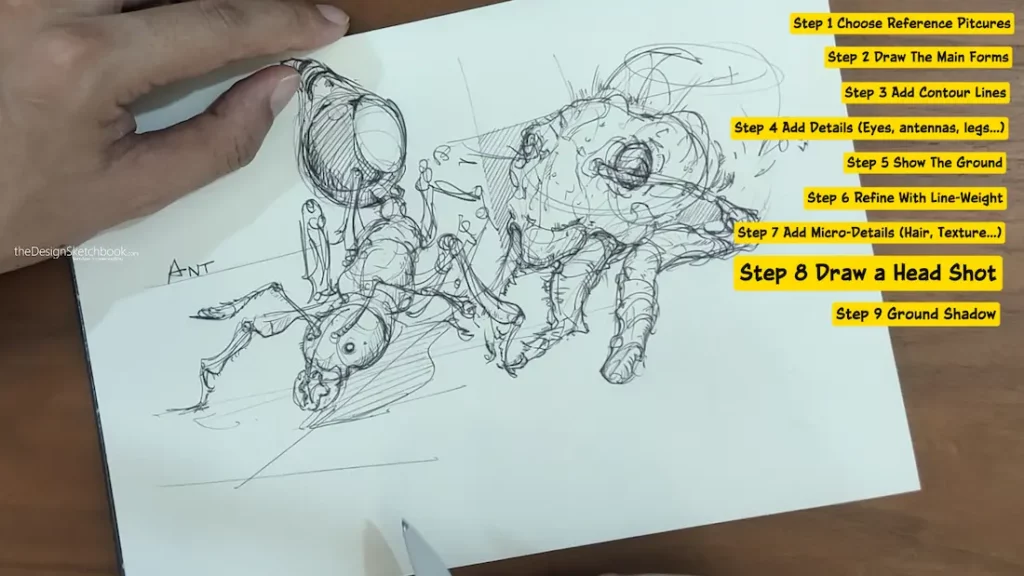
- Step 1: Choose Your Reference Pictures
- Step 2: Draw Main Forms and Postures
- Step 3: Add Details from the Reference
- Step 4: Draw Intricate Legs with 3D Perspective
- Step 5: Show the Ground with a Single Line
- Step 6: Refine with Line Weight for Depth
- Step 7: Add Micro Details for Realism
- Step 8: Draw a Close-Up Headshot for Practice
- Step 9: Emphasize Antennae in the Foreground
- Why Drawing Fire Ants is a Great Practice for Artists
2 days ago, I was sketching on the grass,
and I was bitten by a fire ant on the neck,!
The burning, the stiff sensation is a strong reminder of how powerful and fascinating this tiny insect is.
This experience directly inspired today’s detailed drawing tutorial. Hehe!
Fire ants may be small, but their intricate body structure and fierce nature make them a perfect subject for any artist looking to explore nature-inspired sketching. I wanna show you the importance for Designers to Zoom in details to level up your sense of observation.

In this article, you will learn how to draw a fire ant step-by-step using reference pictures, develop your observation skills, and improve your drawing technique, all while enjoying the drawing process in a relaxed, friendly approach for 17 minutes and 17 seconds.
Get your pen, and let’s draw together!
Step 1: Choose Your Reference Pictures
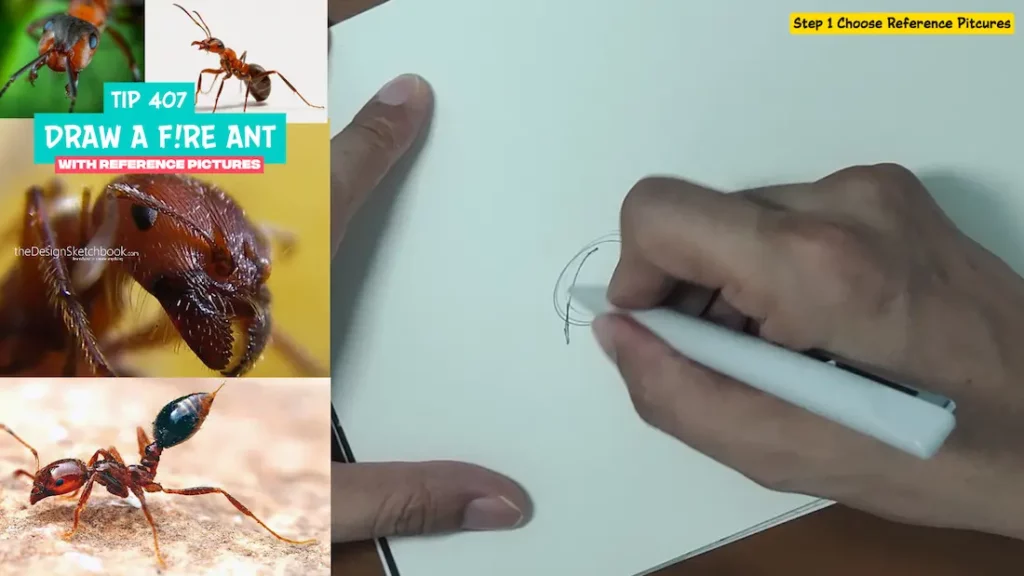
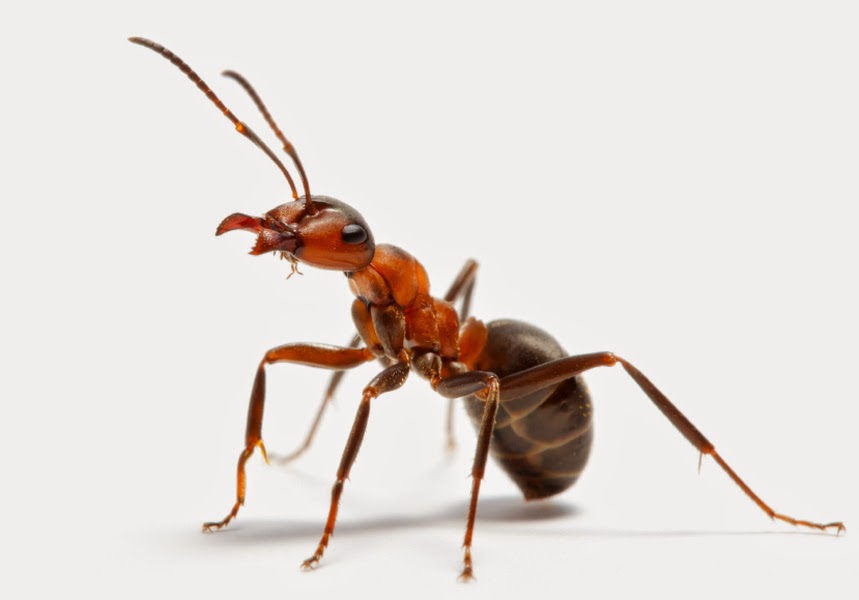
The very first step in creating a compelling and accurate drawing is to collect multiple reference pictures of the fire ant from different viewpoints. High-quality references are invaluable when:
- Observing the distinct parts of the fire ant’s anatomy, such as the segmented body, the mandibles, antennae, and legs.
- Understanding how the ant’s posture changes depending on angle and position.
- Noticing intricate textures like tiny hairs and patterns on the exoskeleton.
Make sure to include some close-ups focused on the ant’s head and mandibles where the most detailed features reside, as well as full-body shots that reveal how all parts connect.
Gathering diverse references helps you train your eye for subtle biological details and prepares you to compose a drawing that feels lifelike and dimensional.
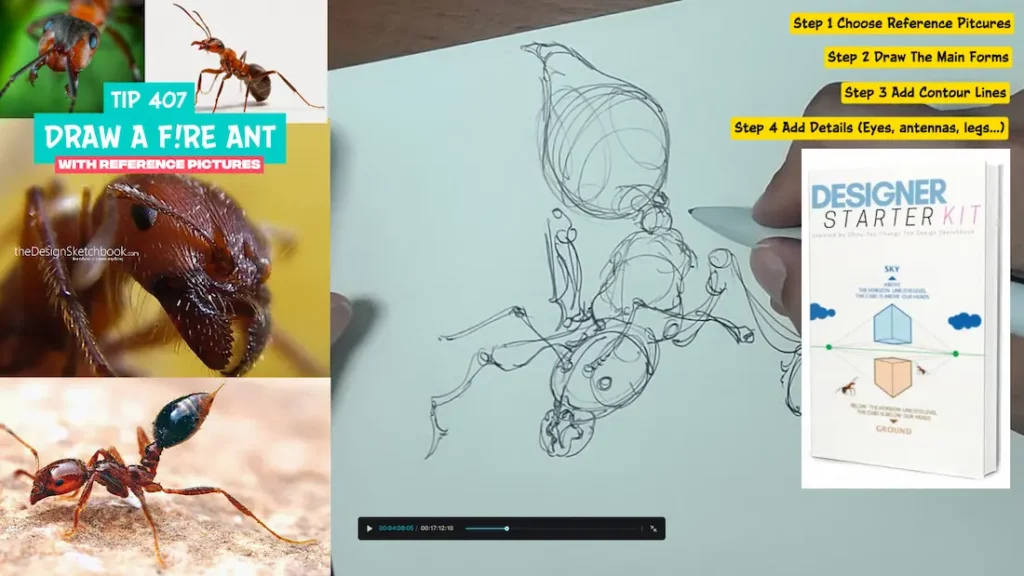
Step 2: Draw Main Forms and Postures
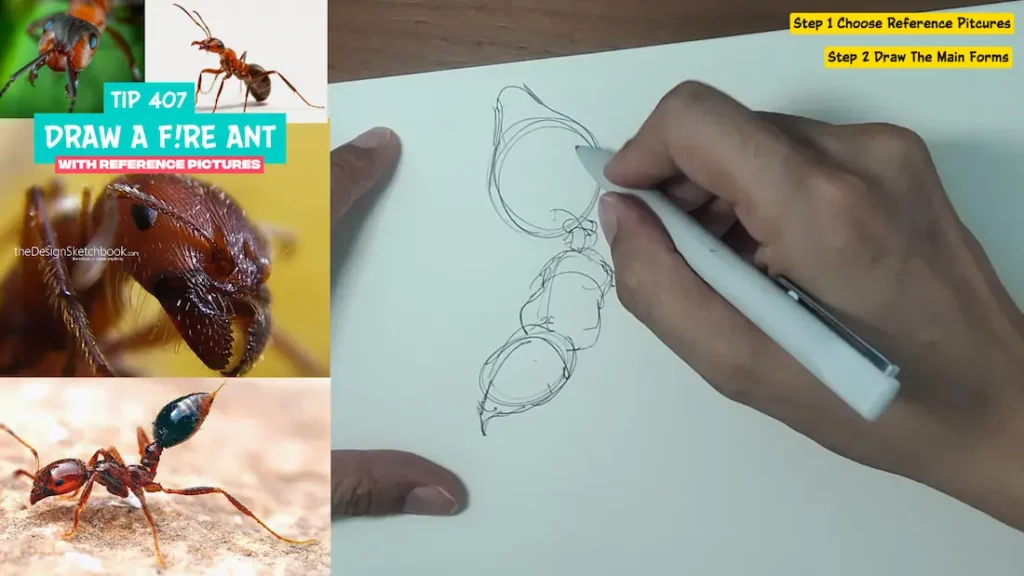
Once you have your references ready, start by blocking in the fundamental shapes. Look at the fire ant’s body as a combination of simple geometric forms:
- Draw oval or spherical shapes for the head, thorax, and abdomen.
- Add cylinders or tapered shapes for the neck, abdomen and segments between body parts.
- Use contour lines around these forms to give a sense of volume and three-dimensionality.
Take your time to ensure the proportions between main parts feel natural. This stage sets the tone for the rest of your drawing.
Step 3: Add Details from the Reference
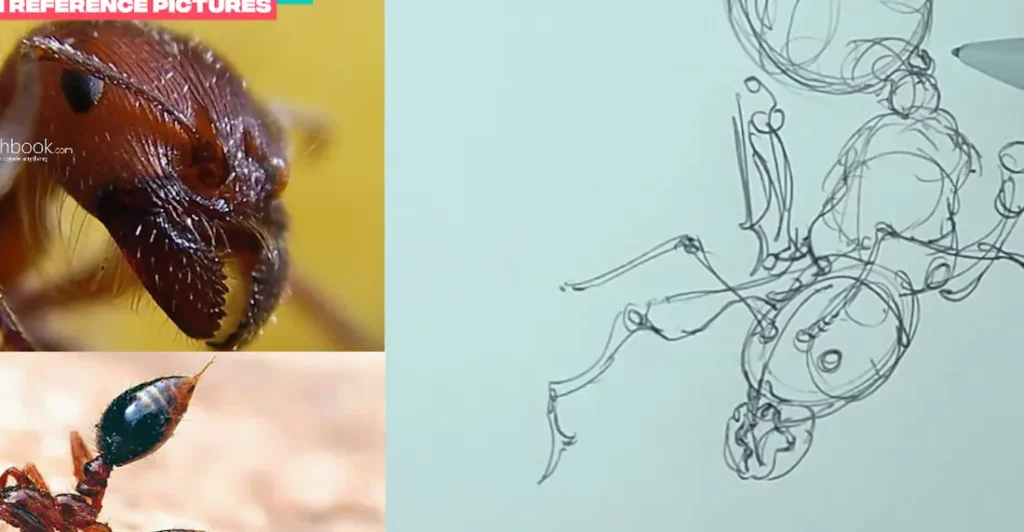
Now that your primary shapes are in place, start zooming in on details:
- Sketch the mandibles with attention to their curved and sharp edges as seen in your reference photos.
- Draw the segmented antennae in sections, connecting carefully placed dots to position them correctly in 3D space.
- Include the eyes and other facial features with comfortable, loose lines initially.
It’s important to work from general to specific—start with the main structure, then “dress” it with details. This approach keeps your drawing balanced and avoids overwhelming the page with premature detail.
Think of drawing anything like a FUNNEL: Start from general to details.
This foundational step helps you place the fire ant’s posture and key structural features down on paper before any detailed work. It’s similar to architecturally framing a building before adding decoration.
i.e: If you want to draw a house, you won’t start by drawing the door handle. You will start with the main structure, the walls, the roof come first. Then you will draw the windows, the doors, to finish with the smallest details like the curtains or door handle.
It can be an ant, a house, a shoe, a car or a plane… this art drawing principle applies.
Step 4: Draw Intricate Legs with 3D Perspective
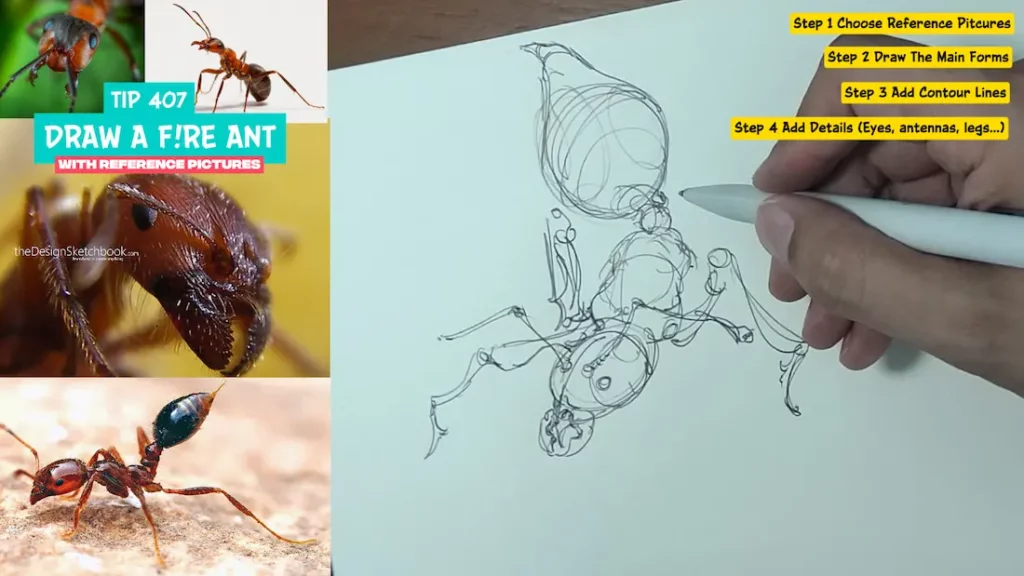
Fire ants have three pairs of legs, slender with multiple joints giving them an almost arachnid-like delicacy. Capturing this complexity is easier when you:
- Break each leg into basic shapes such as thin sticks or cylinders to understand their spatial orientation.
- Mark joint articulations with dots and connect them, visualizing how each segment bends.
- Position legs in a natural stance to convey movement or a realistic posture.
Using this deconstruction technique transforms what seems like a complex challenge into manageable steps.
Master your Perspective with the Designer Starter Kit
Step 5: Show the Ground with a Single Line

Drawing a simple, clean line beneath your ant grounds the figure and gives context to the posture. This simple addition helps prevent your drawing from “floating” and adds a sense of space.
Step 6: Refine with Line Weight for Depth
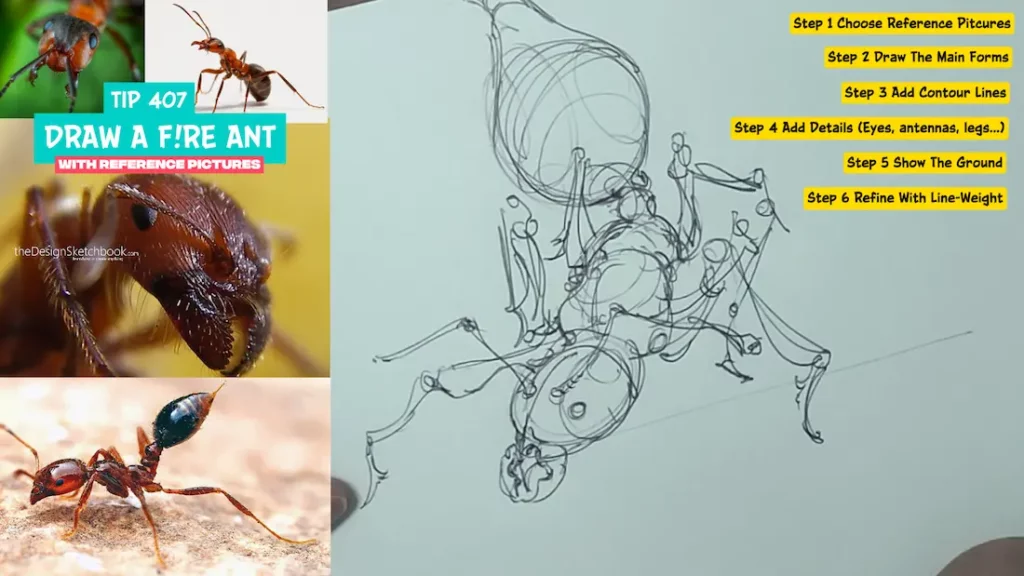
After your overall sketch is complete, breathe life into it by refining line weights:
- Use bolder, thicker lines for the main contours and shadowed areas to create depth.
- Apply lighter, thinner lines for finer details and less prominent features.
- Varying your pen pressure adds a dynamic quality and guides the viewer’s eye through the drawing.
This refinement phase is crucial for transforming a rough sketch into a polished artwork.
Step 7: Add Micro Details for Realism
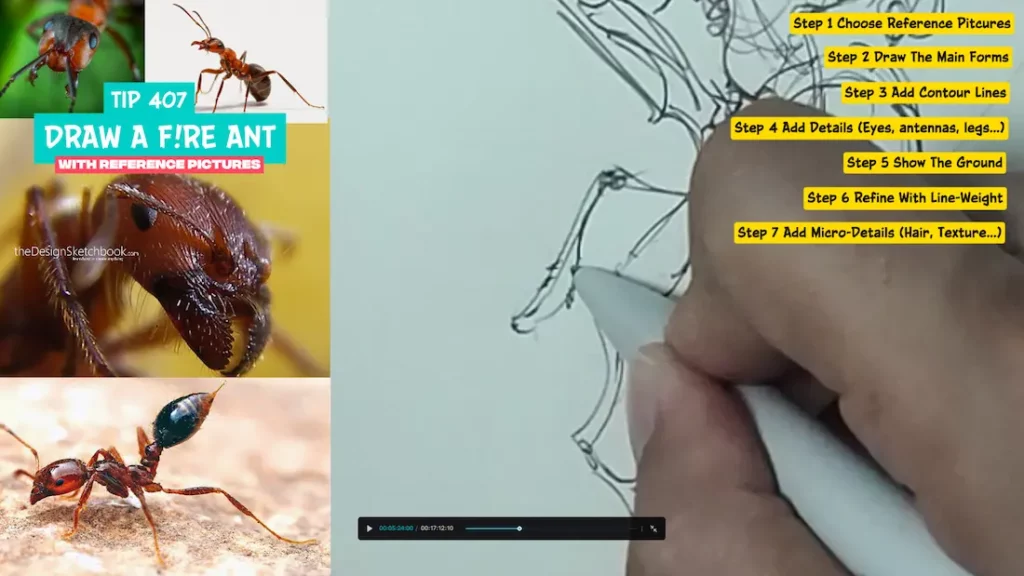
Micro details such as tiny hairs, subtle texture on the exoskeleton, and fine articulation marks bring realism and tactile qualities to your fire ant sketch. These details make the drawing appear more believable and showcase your artistic observation skills.
Step 8: Draw a Close-Up Headshot for Practice
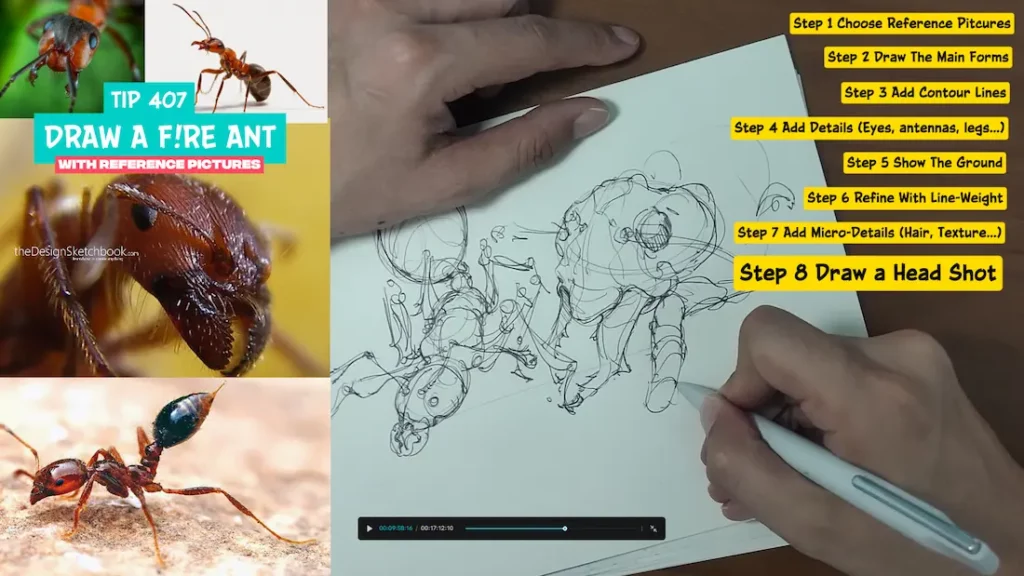
To deepen your connection with the subject, create a close-up sketch of the fire ant’s head:
- Use loose, organic lines to capture the complex shapes.
- Add hatching and cross-hatching to build contrast and define volume.
- Experiment with pen pressure to develop value ranges.
Working on focused studies like this sharpens your ability to capture intricate biological forms and improves your overall drawing skill.
Step 9: Emphasize Antennae in the Foreground
Make the antennae visually prominent by exaggerating their size slightly, placing them clearly in front of the head. Draw contour lines enveloping the antennae to emphasize their three-dimensional form and organic curves.
This approach creates a strong focal point and adds interest to your composition.
Why Drawing Fire Ants is a Great Practice for Artists
Drawing insects like fire ants is an excellent training ground for multiple artistic skills:
- Enhances observation and attention to small anatomical details.
- Practices 3D visualization and converting biological forms into geometric shapes.
- Feed your memory of forms.
- Develops patience, as capturing such a detailed subject requires slow, deliberate work.
- Encourages creativity in interpreting natural subjects with your style.
Moreover, drawing from reference photos teaches respect for nature’s design principles, helping you create concept art or product designs grounded in real-life biology.
Whether you’re a beginner or an experienced sketch artist, this step-by-step approach invites you to slow down, turn off Tik-Tok speed video, observe deeply, and enjoy the process of bringing nature’s tiny marvels to life on paper. Gather your tools, choose your favorite references, and let’s start drawing!
Happy sketching!
Cheers,
Chou-Tac
Related Drawing Tips


Add comment