- The Client’s On-The-Spot Drawing Test
- Sketch Faster for Life: Try This Simple 17-Minute Exercise
- What Material Do You Need
- PHASE I DRAW WITH ME (Step-by-Step)
- PHASE II MASTER ACCURACY WITH YOUR DRAWING ARM
- Little Story Inspiration from Bruce Lee's 1000 Kicks
- PHASE III DRAW EASY CYLINDERS VS ADVANCE CYLINDERS
- PHASE IV PRACTICE DRAWING CYLINDERS EASY
- PHASE V The Sketching Challenge
- Why This Sketching Habit Matters for Your Design Career
- SKILL NEEDED: How To Draw Ellipses Freehand
The Client’s On-The-Spot Drawing Test
Today, we boost your drawing speed with one of my favorite techniques: turning your paper thousands of times as you sketch. Unlike painters who work on a static canvas, student designers should channel their energy into speed and flexibility (Ugly doodles, thumbnail drawings)
What if a client suddenly asks you to sketch an idea right on the spot, maybe on a scrap of paper, or even a coffee table napkin?
Could you bring their vision to life in just a few minutes, so everyone can brainstorm visually together?
If you can’t come up with a visual with your pen, you might start a “verbal nightmare conversation”. When the client says A, you may think B, E or even Y!
Outch!!
Remember a client rely on you to bring ideas to life, Fast sketching is your best ally.
If you’ve mastered the skill to sketch ideas instantly and accurately, you’ve got a superpower that no 3D software can match. Sure, people might suggest using AI, and that’s great. But as a designer, your strength lies in shaping emotions and intentions with your own lines, not just relying on an obscure algorithm.
Speed matters in industrial design sketching. You’re not just sketching behind a desk. Sometimes you need to draw live, right there in front of your client. You don’t have to be perfect, but you do need clarity and a decent sense of perspective. If your client “gets” your concept, you’ve already succeeded!
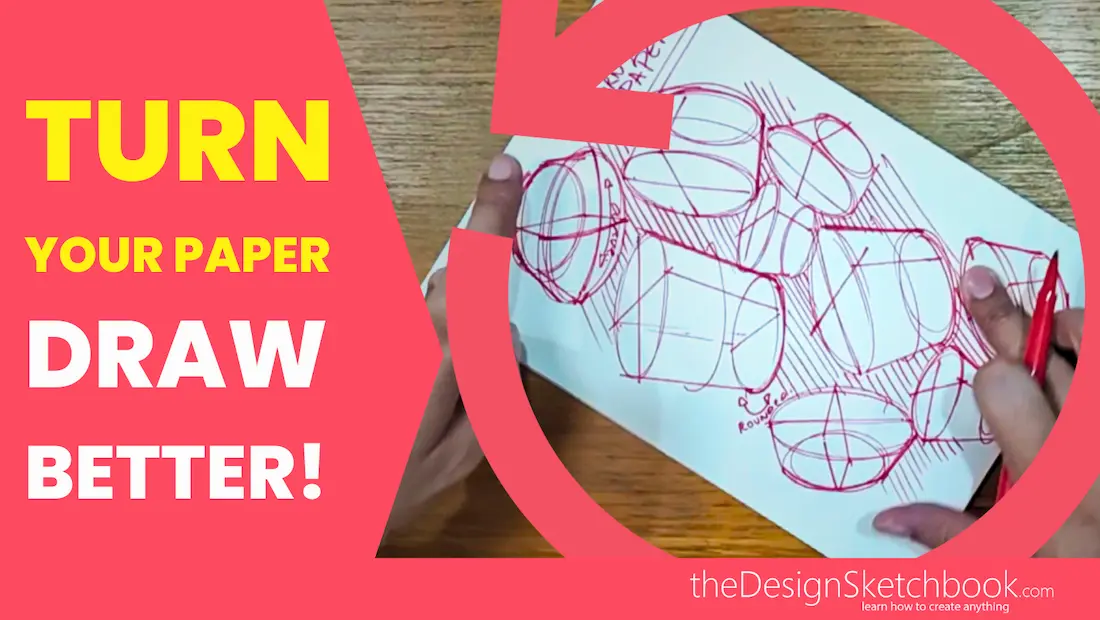
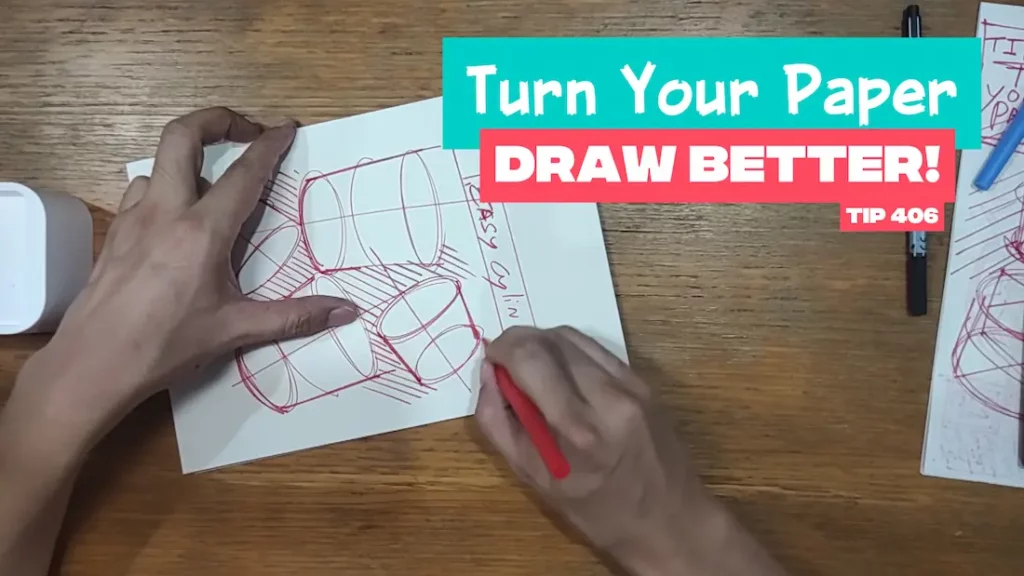
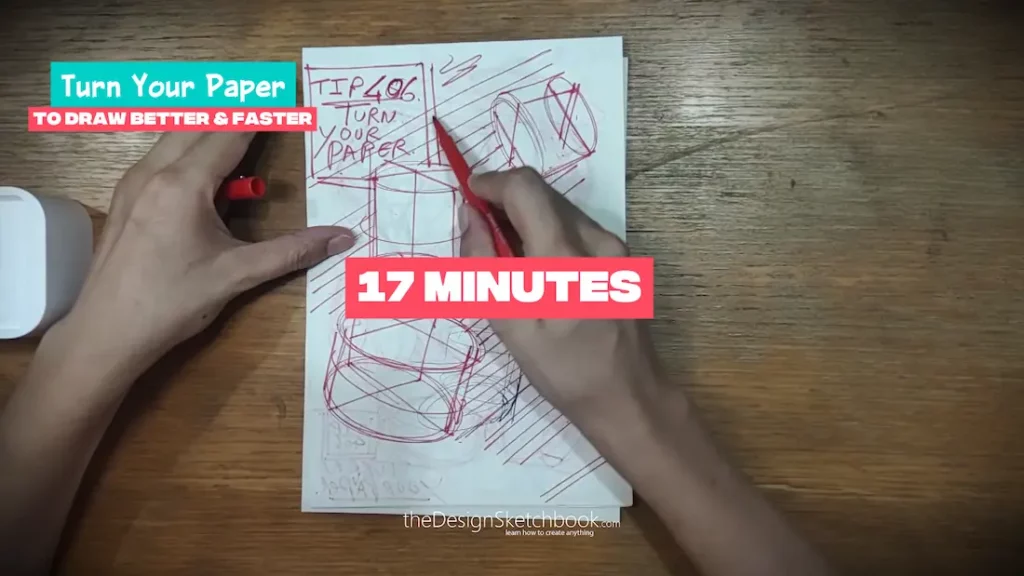
Sketch Faster for Life: Try This Simple 17-Minute Exercise
Aspiring designers, welcome! In this step-by-step tutorial, I’ll reveal the simple, powerful habit of constantly turning your paper while you draw cylinders. Give it a try—your sketching confidence will soar!
This habit isn’t just a trick for one sketch—it’s a skill that will follow you throughout your entire design career.
Learning it early sets you up with strong, lasting sketching habits that improve your speed, accuracy, and confidence from day one.
Get ready to grow your design sketching skills with practical exercises, tips, and motivational advice to master cylinders in 3D space. Today we cover and practice with these 17 minutes tutorial only!
What Material Do You Need

- Choose a medium nib size felt pen such as the Paper Mate Flair M.
- Feel free to draw with colors
PHASE I DRAW WITH ME (Step-by-Step)
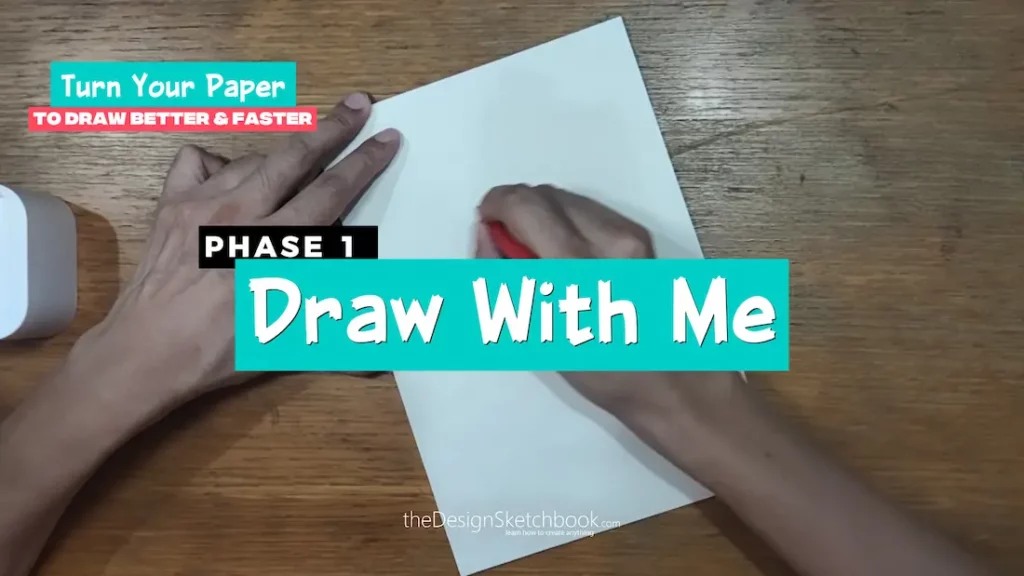
Practice with me today and you will make big progress with our creative sketching tutorial. If you do well, you may even frame it as an art piece. 🙂
Step 1: Draw Ellipses — One on Top, One at the Bottom
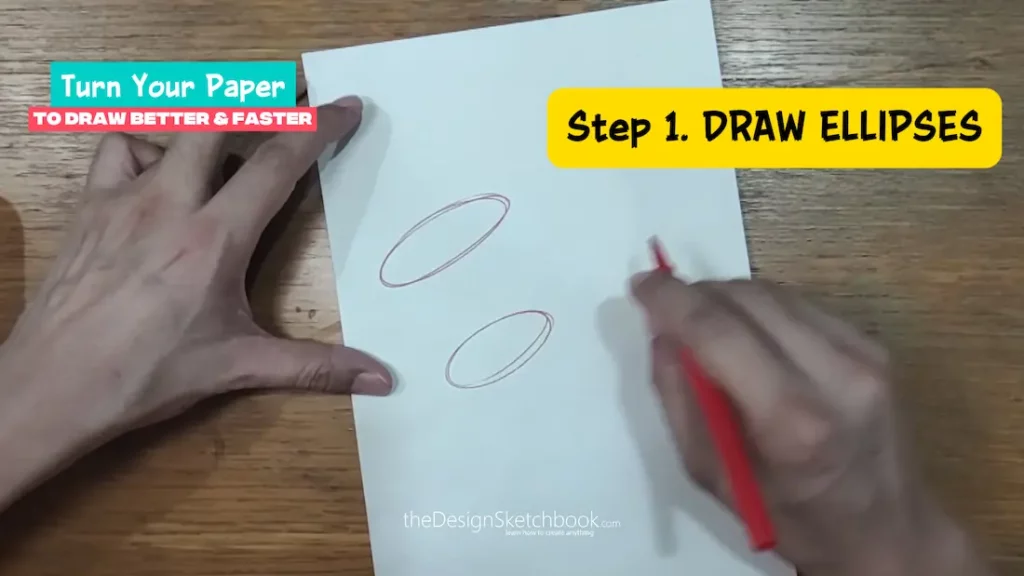
- Begin with two basic ellipses: top and bottom faces of your cylinder.
- Visualize these like flattened circles tilted in perspective.
- Remember, the ellipse’s shape reflects your viewing angle, so turn your paper if needed to keep drawing smooth.
- This foundational shape sets the stage for your entire cylinder.
For deeper ellipse practice, check out How to Draw Perfect Ellipses.
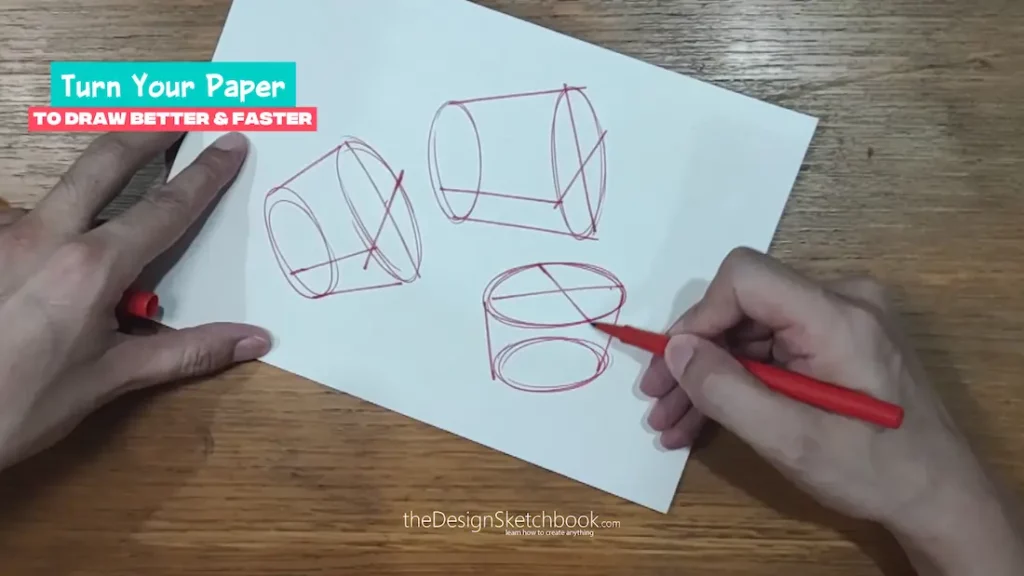
Step 2: Connect the Ellipses to Form Your Cylinder
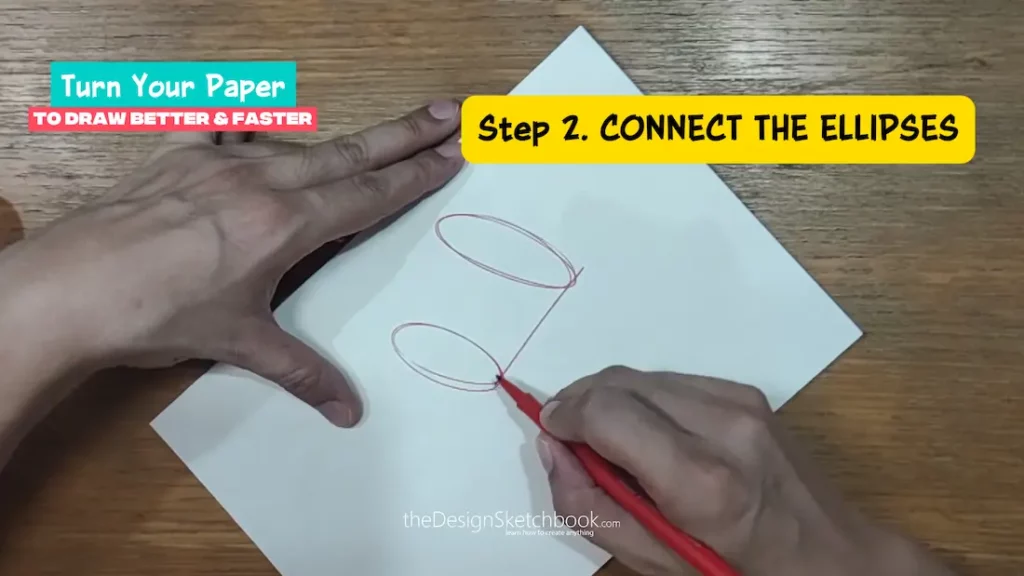
- Draw straight vertical lines connecting the edges of your ellipses.
- Ensure these lines are parallel and symmetrical; they form your cylinder’s walls.
- Use light strokes to refine your lines before firming them up.
If you want to understand perspective better, read this post on Drawing Cylinders in Perspective.
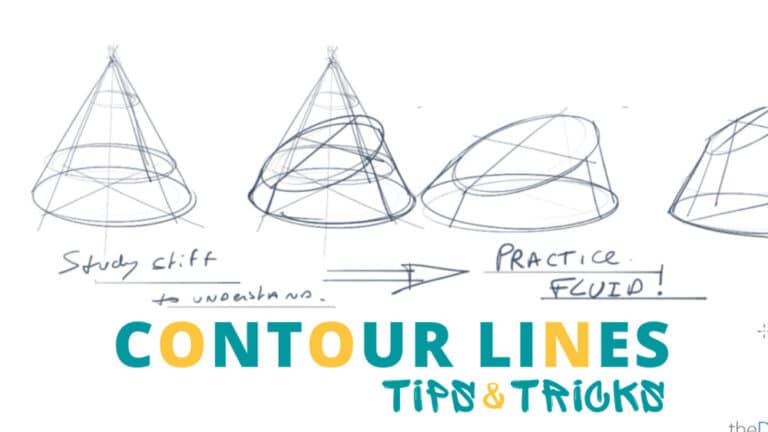
Step 3: Add Contour Lines to Boost Volume (Advanced)
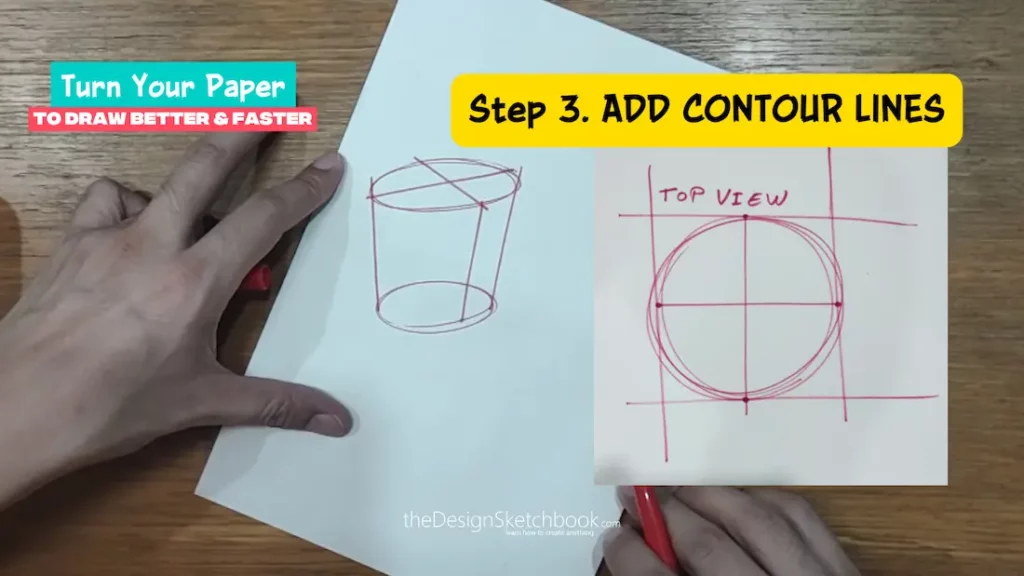
- Add subtle contour lines spanning from top to bottom; these wrap the body and give the cylinder a true 3D feel.
- These lines also help in shading and lighting later.
- This step gives your sketches professional polish but requires practice—start simple and gradually add complexity.
Step 3bis: Keep Turning Your Paper—Always!
- The golden rule: rotate your paper constantly. It makes drawing ellipses and curves more natural.
- Your arm can’t always draw perfect ovals or straight lines easily; your hand feels more comfortable when you align the paper with your stroke direction.
- This habit might feel awkward at first but quickly becomes second nature.
- This is a core habit that lasts your whole career—start early to build it right!
For more on this, see Why Turning Your Paper Improves Sketching.
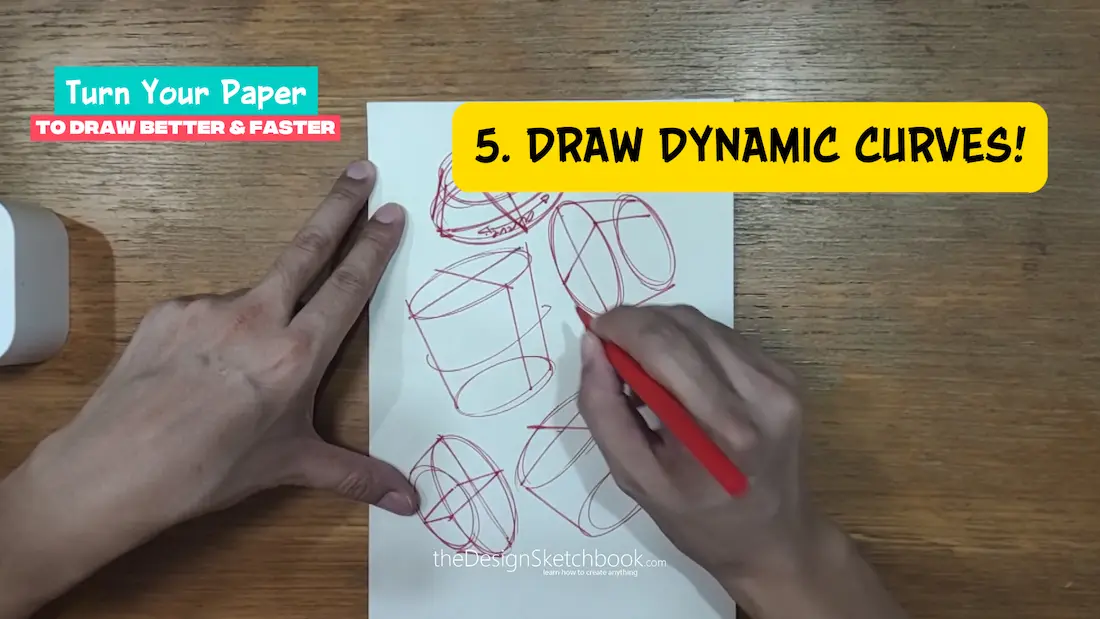
Step 4: Master Simple Dynamic Curves by Turning Your Paper
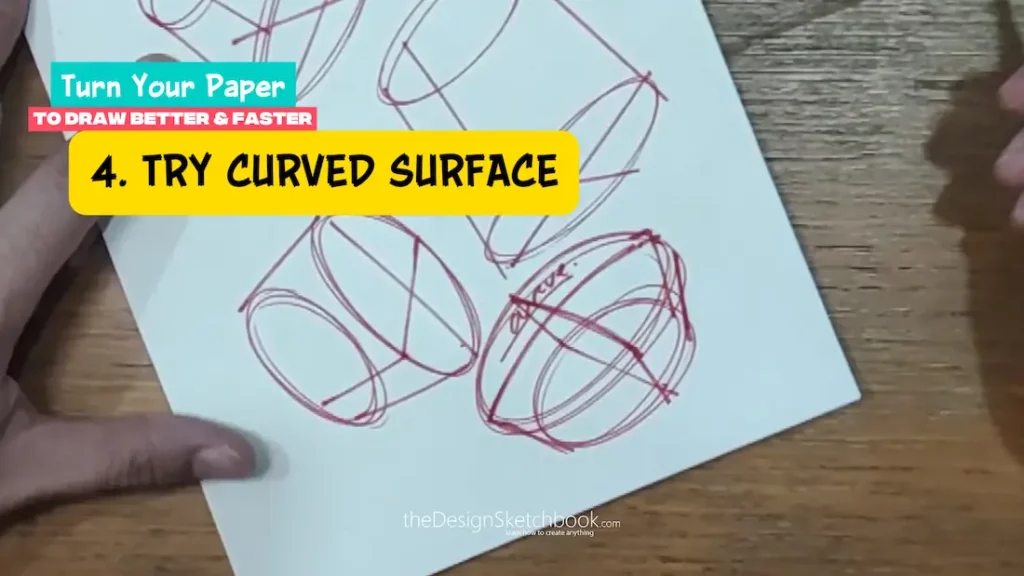
Step 5: Master Simple Dynamic Curves by Turning Your Paper

- Practice fluid curves and contours while rotating your page with every stroke.
- This keeps your lines lively and confident.
- Dynamic curves breathe life into otherwise static forms like cylinders.
Step 6: Bold Edges for Contrast

- Make parts of your cylinders “pop” by bolding key edges.
- This line-weight contrast adds interest and helps clarify form to the viewer.
Step 7: Check Round Corners

- Soften corners with rounded shapes to avoid stiffness.
- Do not hesitate to use line-weight to bold that area.
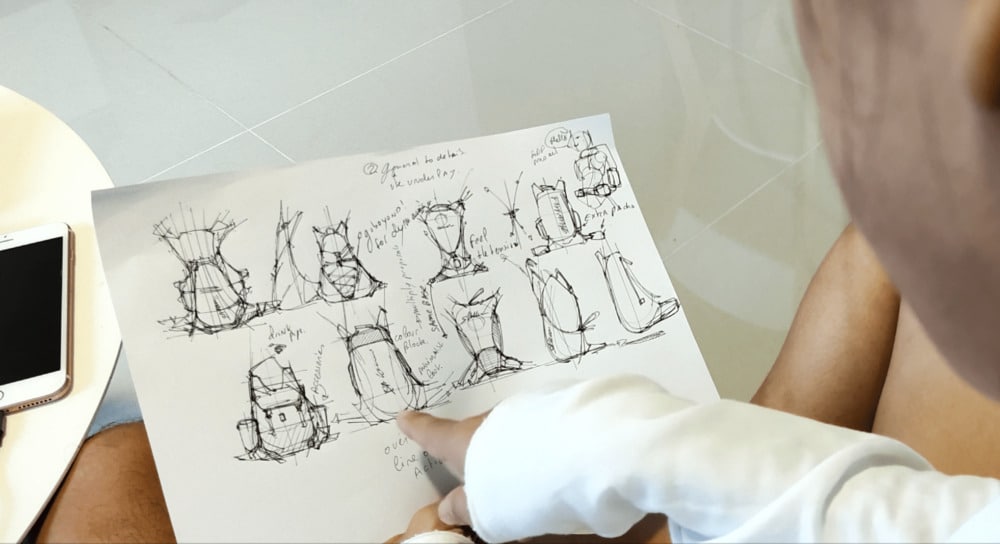
Step 8: Fill Your Paper with Multiple Cylinders for Composition Practice

- Challenge yourself to fill pages quickly with cylinders of varying sizes and angles.
- Quick repetition improves hand-eye coordination and trains your eye for composition.
- This exercise also ingrains the turning habit deeply.
Step 9: Practice Seeing in 3D Transparency
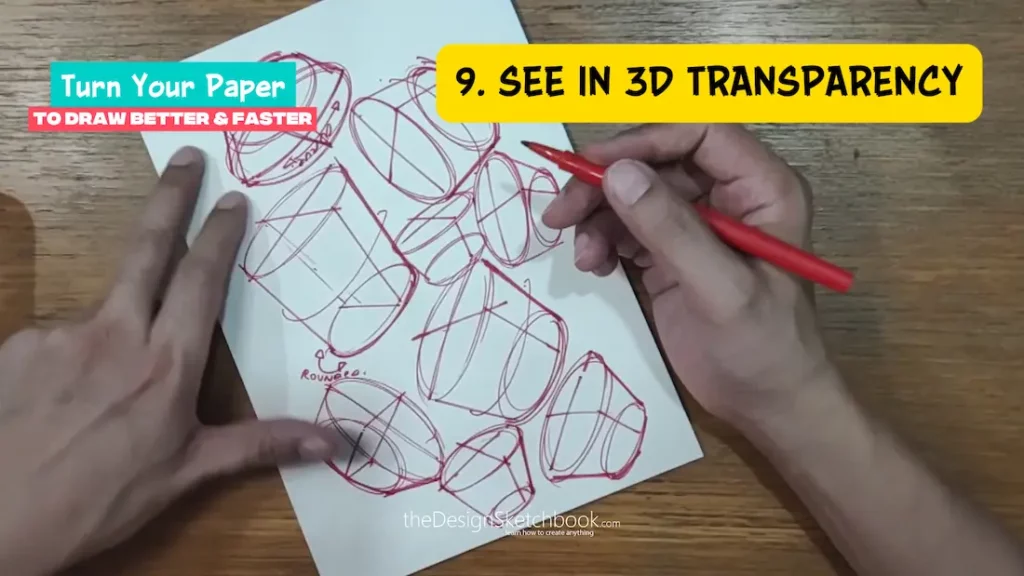
- Imagine cylinders as transparent forms.
- Visualizing internal segments and axes helps align ellipses properly.
- This skill is key when progressing to complex object sketching.
Step 10: Add Hatching to Create Depth and Make Cylinders Pop

- Use hatching lines on the sides or background to give shading and texture.
- Play with line intensity and spacing to suggest light direction.
- Longer, arm-driven strokes make confident hatching.
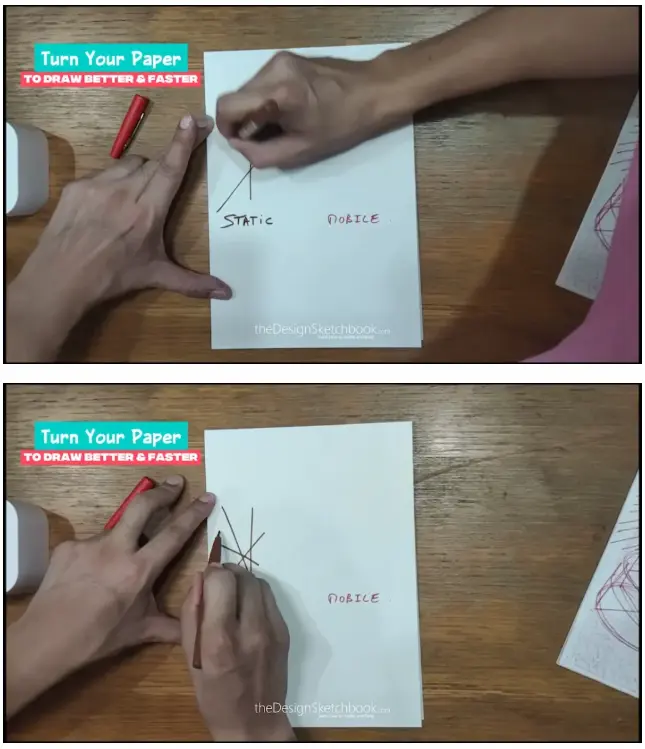
PHASE II MASTER ACCURACY WITH YOUR DRAWING ARM

Compare Drawing with Static vs. Moving Paper
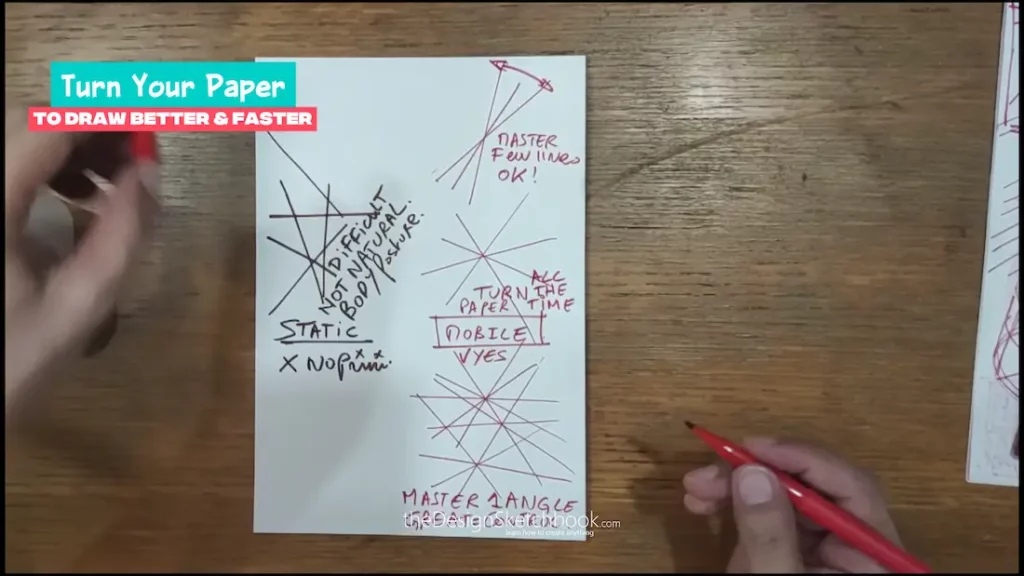
- Try drawing straight lines or cylinders while your paper is still, then with it moving.
- Experience how turning your paper prevents awkward wrist and arm strain.
- This approach is key for higher-speed, accurate sketching by adopting the right drawing body posture.
Notice how the body and arm posture are uncomfortable on both pictures when you draw with a static page.
Little Story Inspiration from Bruce Lee’s 1000 Kicks
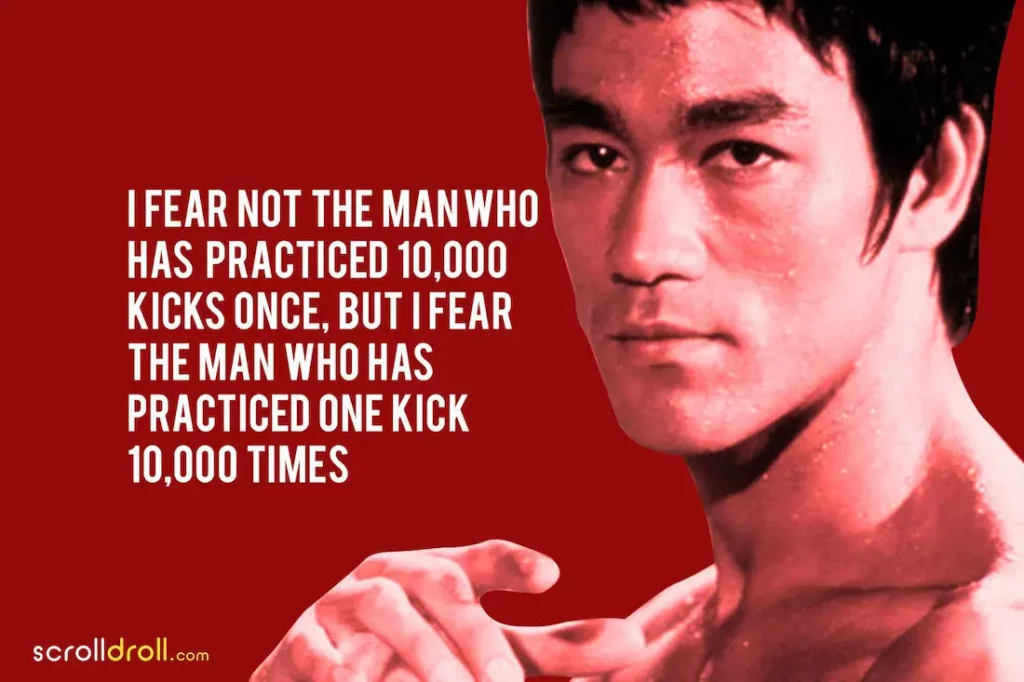
Bruce Lee said: “You should not fear the one who practice 10’000 kicks. You should fear the one who practice 10’000 times one kick.”
That is the same here for drawing straight lines practicing 10’000 times one same straight line from one angle. We bring diversity of lines by rotating the page!
PHASE III DRAW EASY CYLINDERS VS ADVANCE CYLINDERS
Draw Cylinder with the Easy Technique
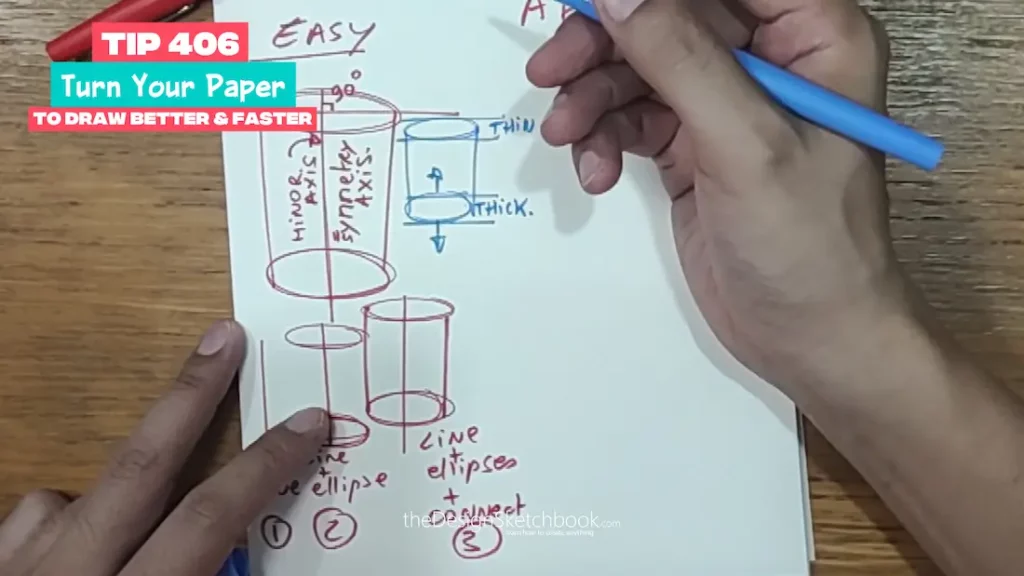
- Design Sketching Tip: The top cylinder is thinner than the bottom one. It gives an illusion of perspective.
- Practice by exaggerating the height dimension of the bottom ellipse.
Draw Cylinder within a Box in Perspective
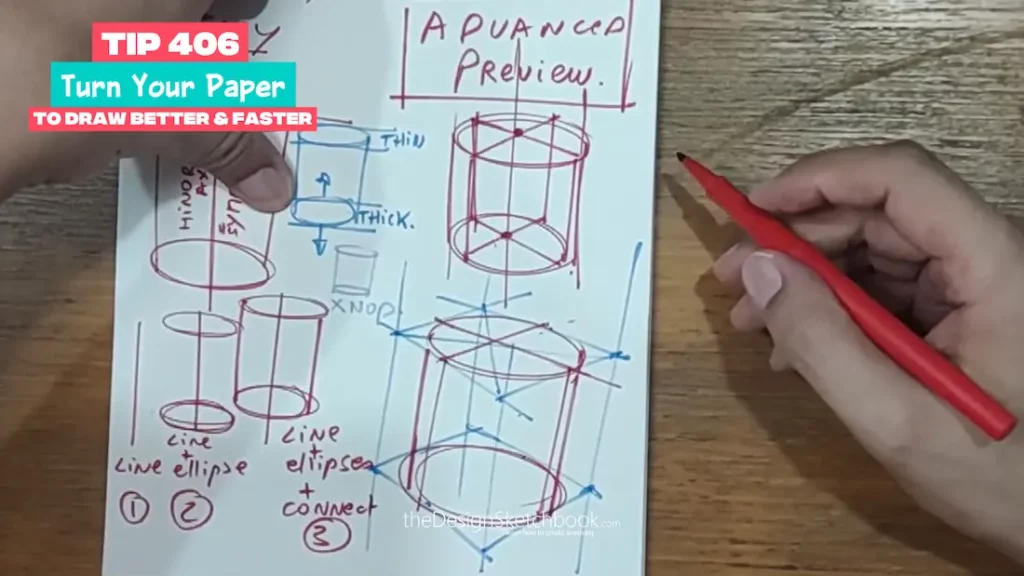
- The contour lines represent the section of the cylinder if it would be divided in 4 equal parts
- To define these parts, we draw the blue box that surround the cylinder.
i.e. Imagine a can in its box packaging
PHASE IV PRACTICE DRAWING CYLINDERS EASY
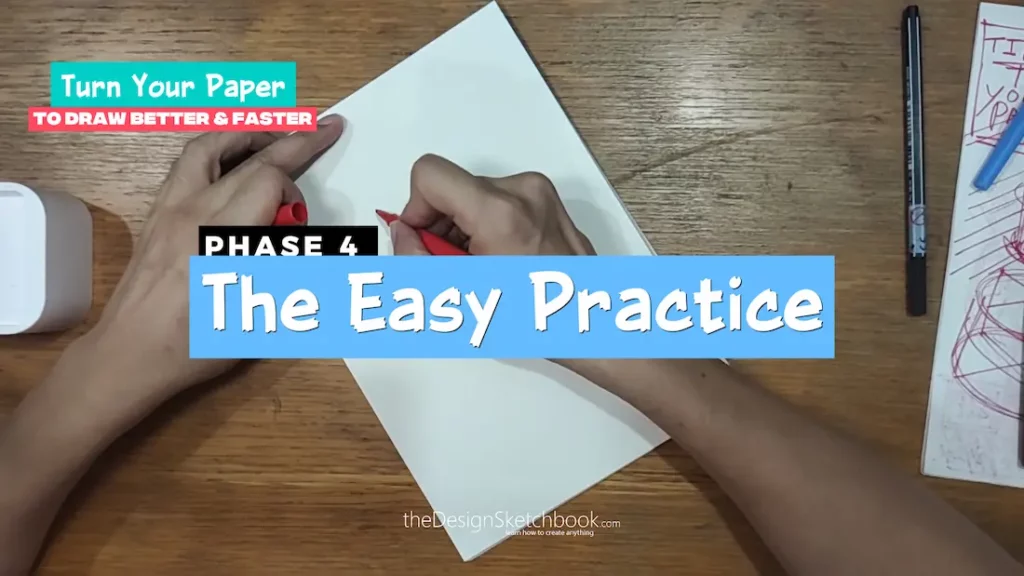
Practice Drawing Easy Cylinders with Composition for Beginners
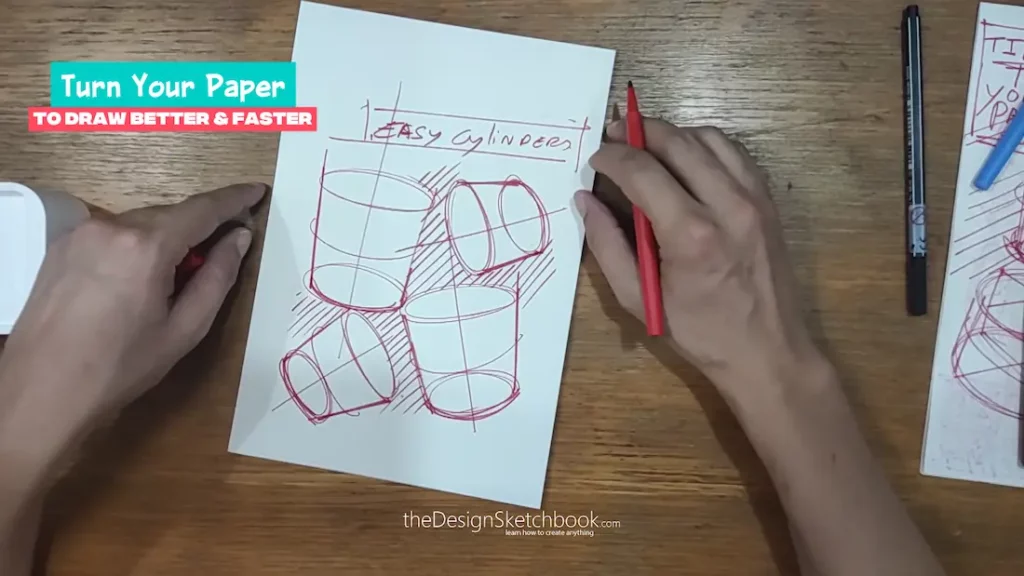
- If advanced contours feel intimidating, keep your cylinders simple.
- Focus on clean ellipses and straight connecting lines.
- Master foundation first, then build complexity steadily.
PHASE V The Sketching Challenge
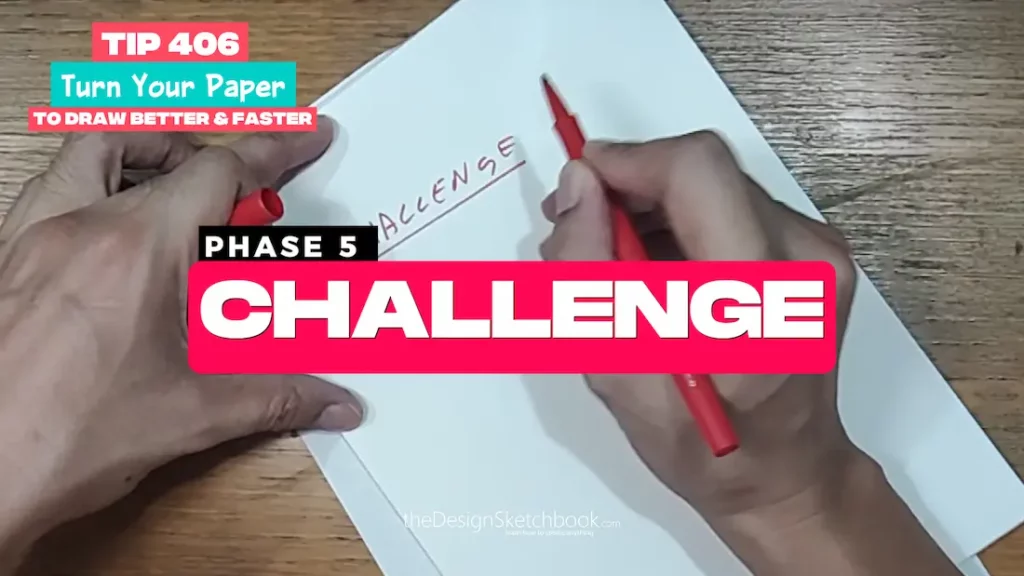
Draw and Cover 20 Pages in One Day, Today!
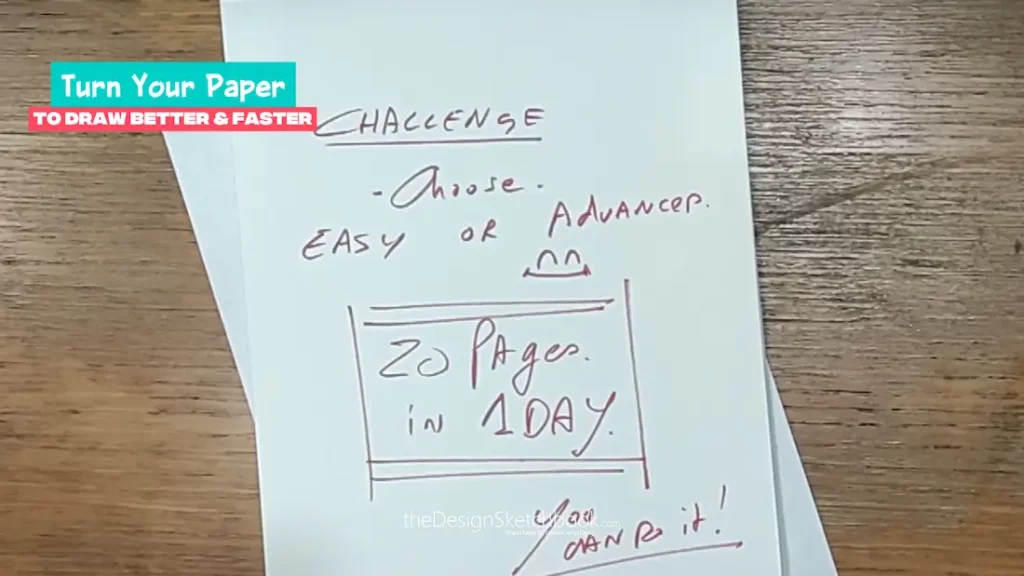
- Accept and start your design challenge today!
- Choose or mix the Easy and Advance Cylinder Drawing Method.
- Draw 20 pages in 1 day!
- The goal: build muscle memory, confidence, and quick judgment.
Why This Sketching Habit Matters for Your Design Career

No matter where design takes you, product sketching, industrial design, or concept art—the habit of turning your paper will be your lifelong drawing ally. Starting early builds good foundations needed for professional workflows. It helps you:
- Draw faster and with better precision.
- Reduce fatigue and strain.
- Improve line quality and fluidity.
- See and render 3D forms naturally with line sketching only!
- Drawing fast, you’ll be able to sketch new ideas on the spot in front of your client!
Have a wonderful Sketching Day!
Cheers,
Chou-Tac
PS: Send me your sketches for me to see :).
SKILL NEEDED: How To Draw Ellipses Freehand
Access to the full tutorial on How to draw Ellipses freehand here
Related Articles


Add comment