Unleash your creative abilities as an industrial designer with this concept artist tutorial!
Boost drawing skills and discover new ways of designing with tips to push limits and increase memory bank.
- How to Draw like a Concept Artist | BIKE TECH INSPIRED
- As an Industrial Designer who loves Concept Art, you will:
- Transform your inspiration into a sketch
- TIP1 | WARM-UP YOUR HAND
- TIP2 | TEST YOUR COLOUR PENCIL
- TIP3 | WARM UP WITH THE BASICS
- Download your Designer Starter Kit
- TIP 4 | DRAW PRODUCT GROOVES
- TIP5 | USE REFERENCE PICTURES
- TIP 6 | DRAW YOUR INTENTION
- TIP 7 | Draw from general to detail
- TIP8 | START WITH LIGHT PRESSURE
- TIP9 | Add "crispy details"
- TIP10 | REMEMBER TO START SIMPLE
- TIP11 | DON'T PLAN. FEEL!
- TIP 12| BUILD YOUR CONCEPT ARTIST'S MEMORY OF FORMS
- TIP13 | IMPORT NEW FORMS IN ID SKETCHING
- TIP14 | DRAW THE BOX STRUCTURE
- TIP15 | PUSH YOUR LIMITS
- TIP16 |FEEL THE ESSENCE OF IT
- TIP 17| REFINE ALL SKETCHES
- TIP 18| DISPLAY A DYNAMIC COMPOSITION
- Conclusion
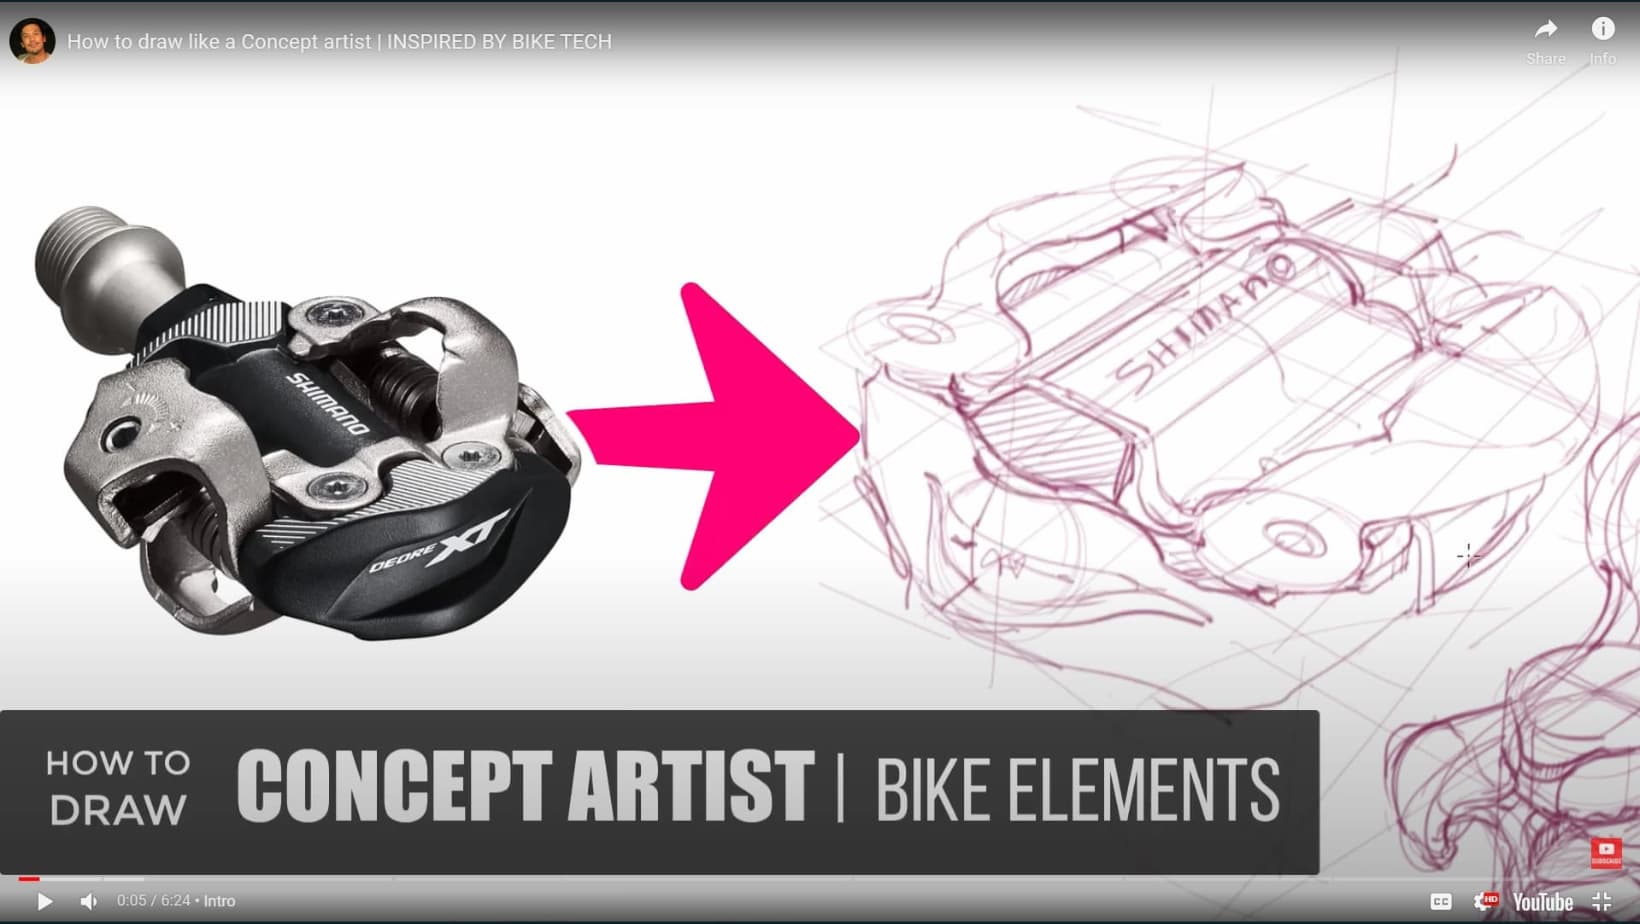
How to Draw like a Concept Artist | BIKE TECH INSPIRED
I’ve always been fascinated by bike tech from Shimano since my childhood.
You know this bike handle or brakes where you see their white logo.
My friend in Singapore started to ride a bike for Food Panda delivery. He has sent to me pretty pictures of his new bike. That’s how I got the idea to take the bike inspiration for today’s drawing tips!
If you lack inspiration or face the blank page, today, we draw like a Concept Artist and get unlimited ideas!
As an Industrial Designer who loves Concept Art, you will:
- Improve your drawing skills (pushing your limits out of your comfort zone)
- Raise your memory and library of forms (exploring new curves and unexpected designs)
- Create your own style
Tell me where does your inspiration come from?
Any favorite movies or video games like Star Wars, Iron Man, Back to the Future, Halo…?
TIP: To get your motivation lifted, get a book starting with: “The Art Of…”
They don’t teach you how to draw. But you have access to the behind-the-scenes, and they are amazing inspiration and motivation boosters!
Transform your inspiration into a sketch
As a designer, learning how to copy will help you grow faster instead of trying to reinvent the wheel. Don’t feel shy or shame to use pictures as inspiration.
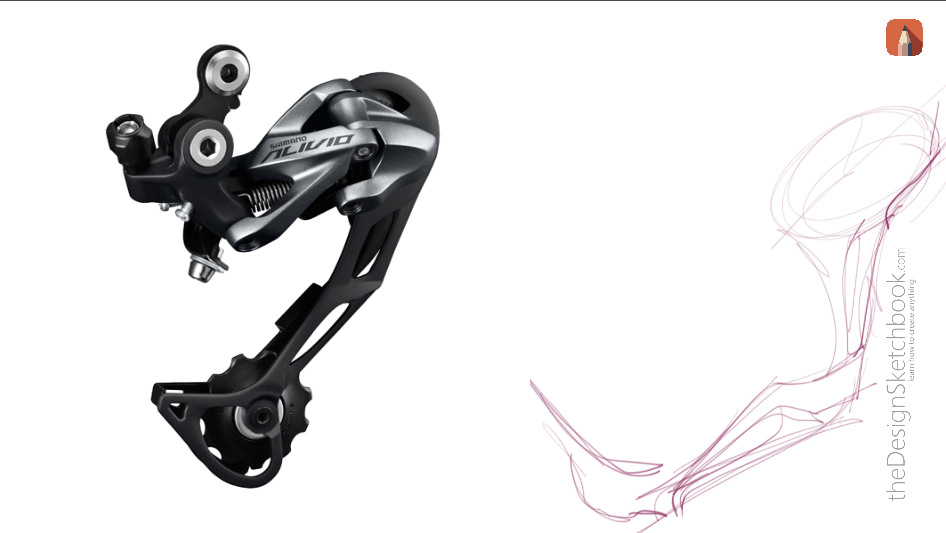
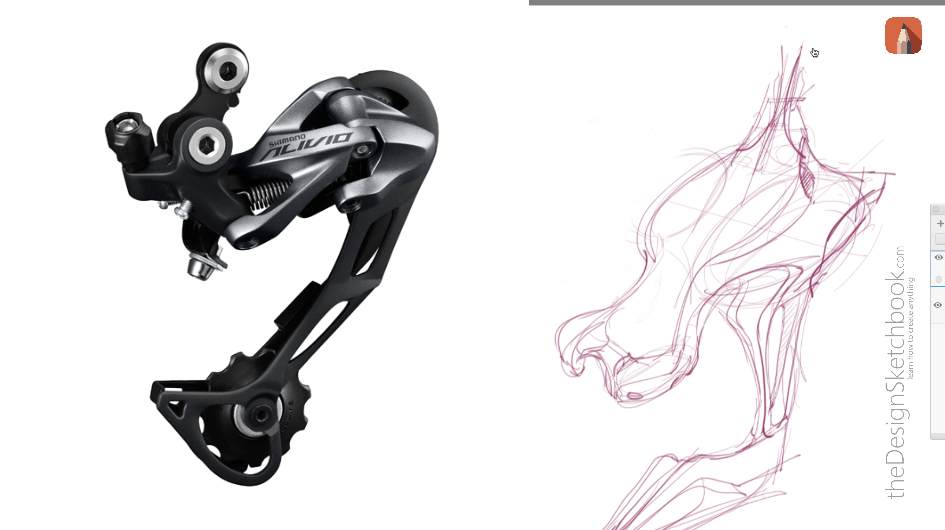
For this drawing of the professional bike pedal,
I draw the small mechanical parts for my concept art study on my digital tablet (Wacom Cintiq 13HD).
(The red button on top right of the page)
TIP1 | WARM-UP YOUR HAND
Like starting a gym session, your muscles are cold and stiff.
Take a minute to draw some curves and circles to warm up.

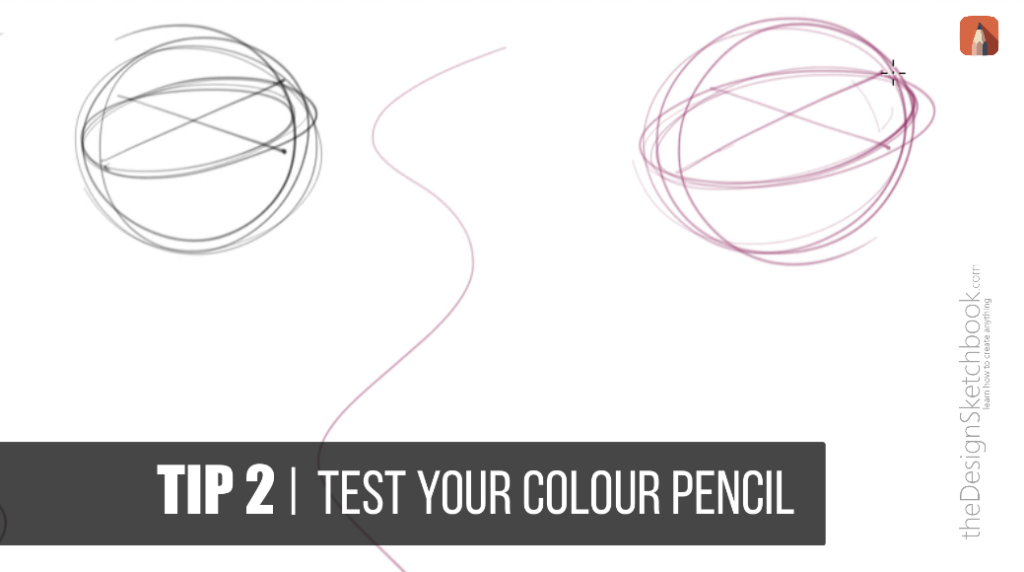
TIP2 | TEST YOUR COLOUR PENCIL
Black is boring :P.
Explore other colors of your choice. I like to pick dark tones.
It gives a professional look to your design sketching board.
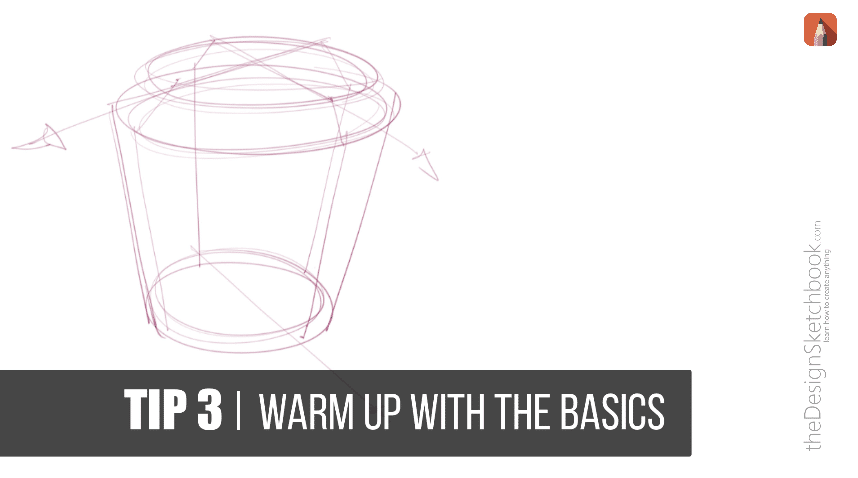
TIP3 | WARM UP WITH THE BASICS
Concept art can be very organic and random.
Especially when we use a lot of the Happy accident drawing techniques.
I like to draw this sketch to recalibrate my brain with my digital pen.
However, remember to study your basic fundamentals of sketching.
You will save years struggling at guessing. Perspective foundations are your best Kickstarter as a learner.
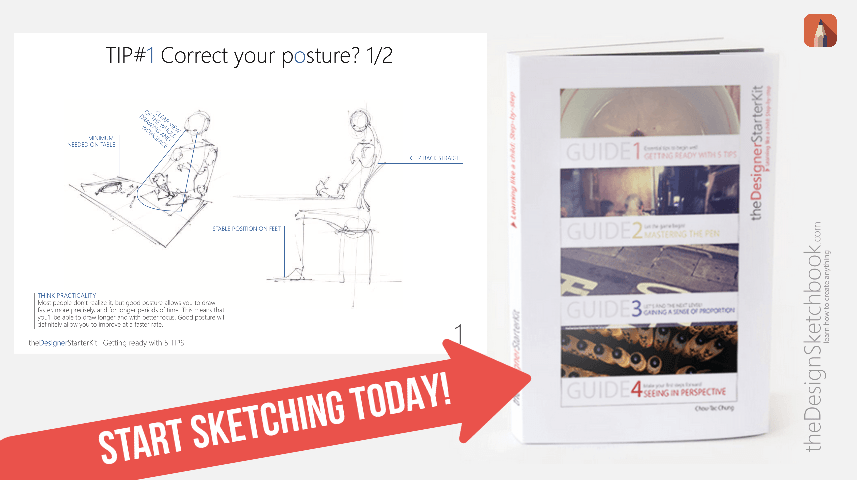
Download your Designer Starter Kit
Click on the picture to make your first steps in Industrial design sketching.
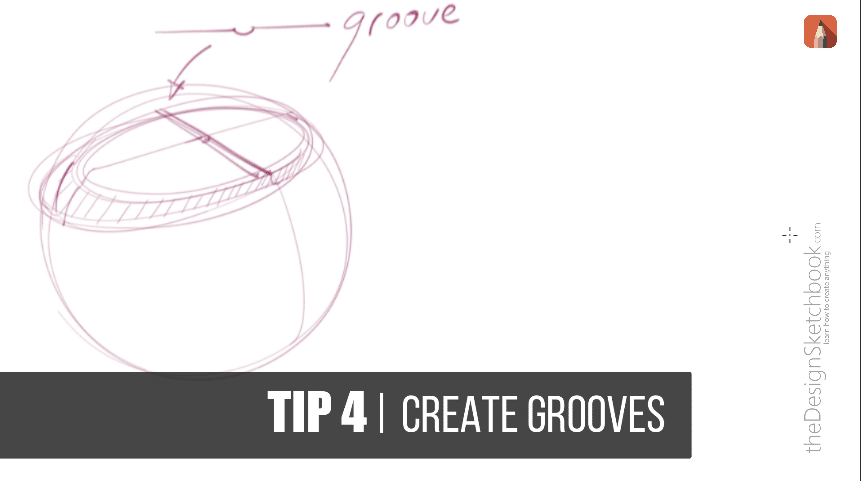
TIP 4 | DRAW PRODUCT GROOVES
A simple and powerful trick in Design sketching is to double a contour line to draw a groove. It gives your sketch a more real product feeling.
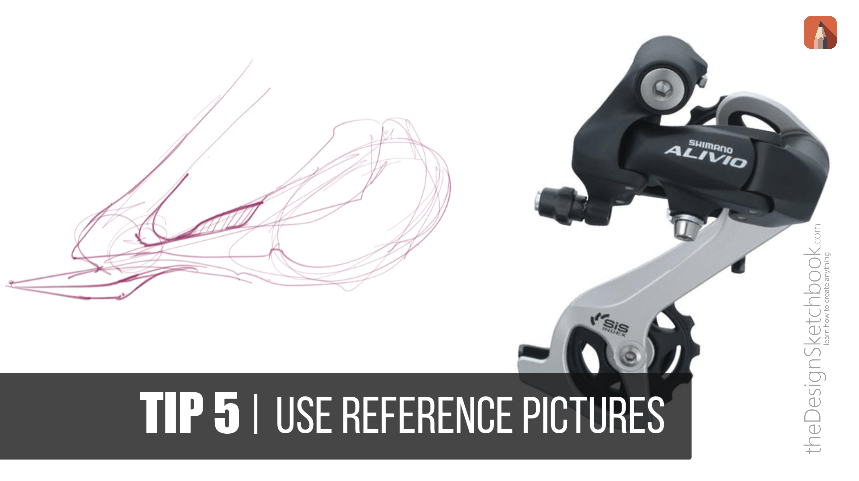
TIP5 | USE REFERENCE PICTURES
I try to absorb the overall structure of the product.
It reminds me of the articulation of a leg, a knee, or an elbow.
That’s mainly what I want to keep in my drawing.

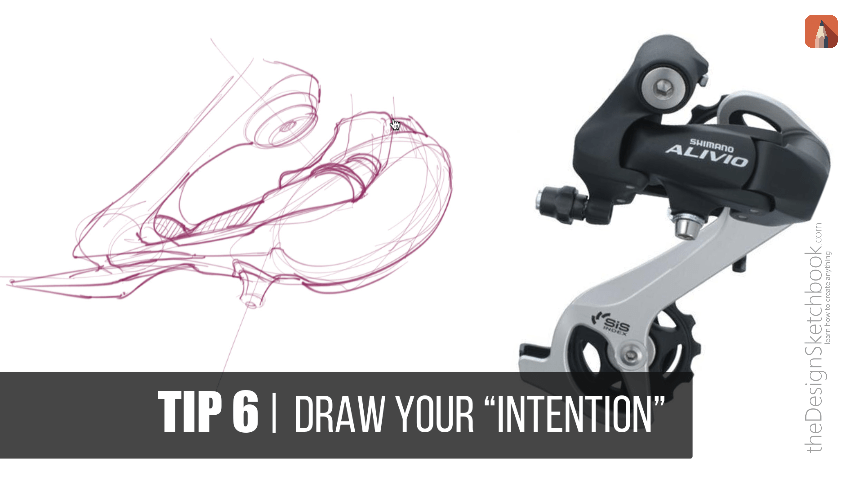
TIP 6 | DRAW YOUR INTENTION
What will make your sketch unique?
- It is your interpretation of your reference picture.
- It is how you will convey your idea in the sketch that will differ from any other designer.
- This is how you create your own drawing style.
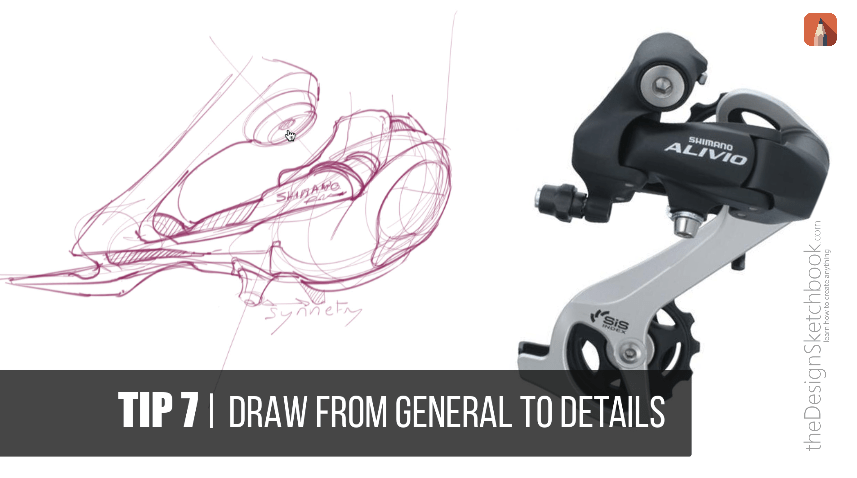
TIP 7 | Draw from general to detail
Small mechanical parts are tempting to draw starting with a screw, or a joint… but an efficient approach is to start with a general form. So the main proportion will be set up from the beginning. Then, you add the details to it.
I.e: We can’t start making a cake by adding the cherry first. We have to start with the foundation, then spread the cream, and add the fruits, chocolate chips, and birthday candles!
The same for sketching, following this order like a recipe, will help you tackle any complex products by simplifying them first.
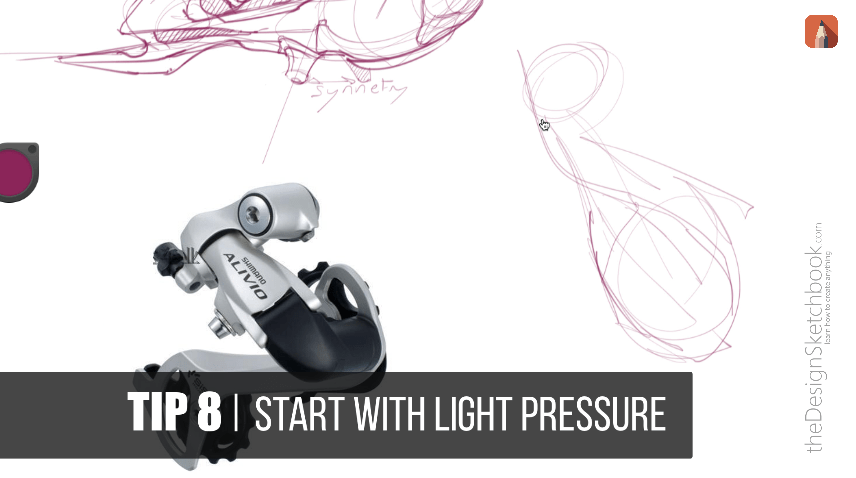
TIP8 | START WITH LIGHT PRESSURE
Be aware if you have a heavy wrist.
Make sure to start very light, so you can make a clearer drawing, especially for this complex sketch with intricate details.
I’m using the drawing software Sketchbook Pro, and you can easily parameter your pen sensitivity.
That’s one of the great benefits of digital drawing!
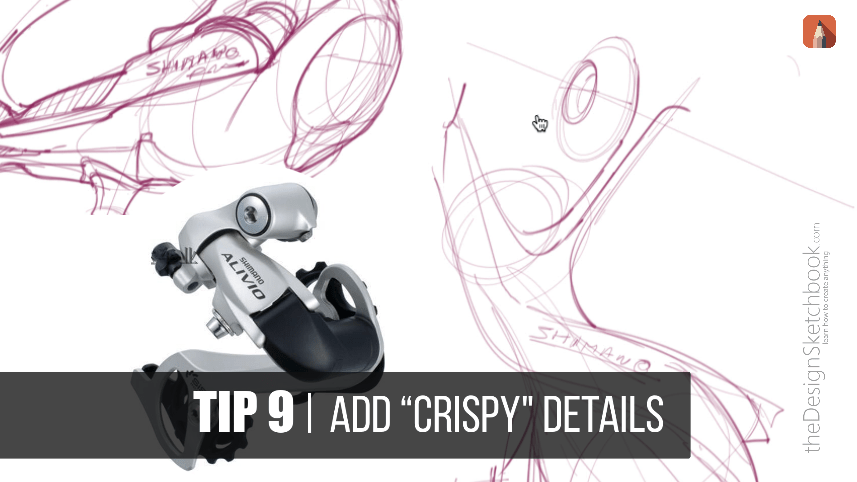
TIP9 | Add “crispy details”
Add in the logo brand, some prints, some screws…
All these added on the product surface participate in adding more sharpness to your drawing.
They are the little things that serve your product story and make your sketch more attractive.

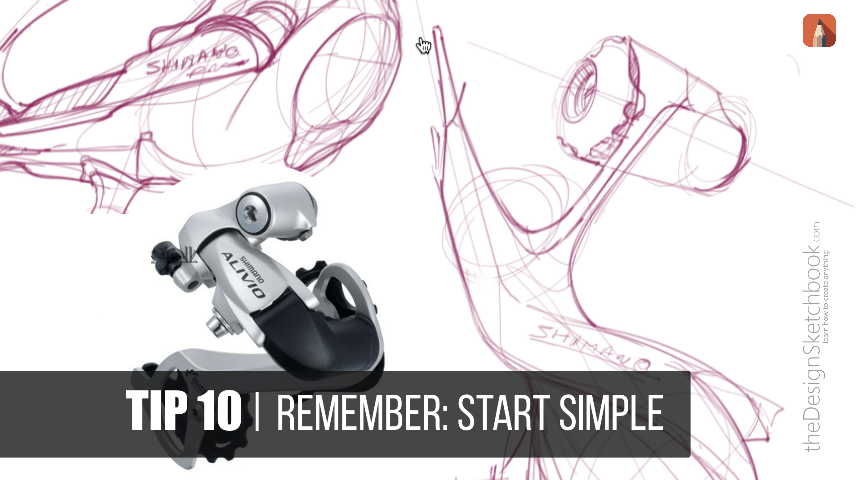
TIP10 | REMEMBER TO START SIMPLE
Adding details is cool, but only when your base is simple.
So your product won’t look overcrowded.
TIP11 | DON’T PLAN. FEEL!
There is a misconception that a sketcher has the full picture in mind before drawing.
It depends on which stage of the 5 creative phases you are in.
A concept artist doesn’t start his sketch with the precise picture in mind for his first sketches.
Consider this as an exploration sketch, where you draw and create along the way.

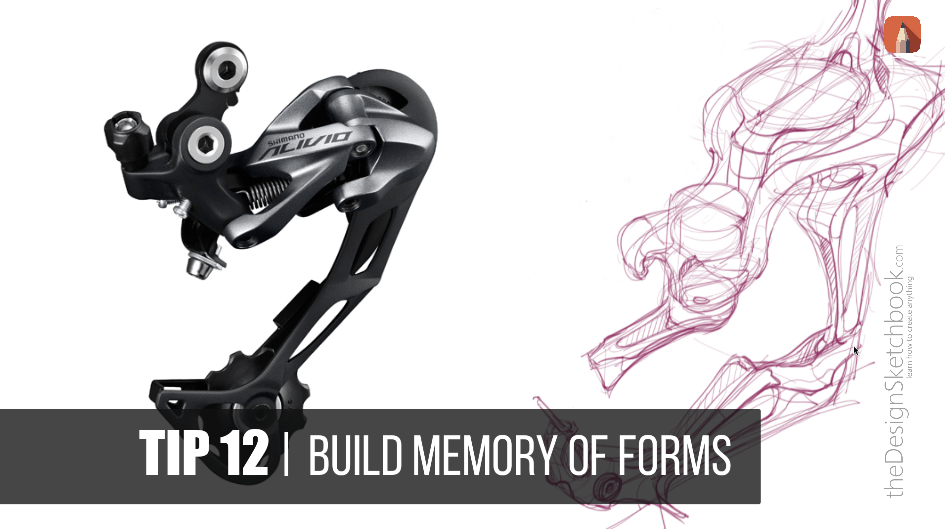
TIP 12| BUILD YOUR CONCEPT ARTIST’S MEMORY OF FORMS
Challenge your skills by drawing new forms. It will be uncomfortable.
Your brain is like a muscle that needs time and practice to adapt.
Imagine when you study a new form by drawing it, your brain is acquiring it.
The more you will draw it, the more you will master that form.
So you improve your skills, like how any sports athlete would do.
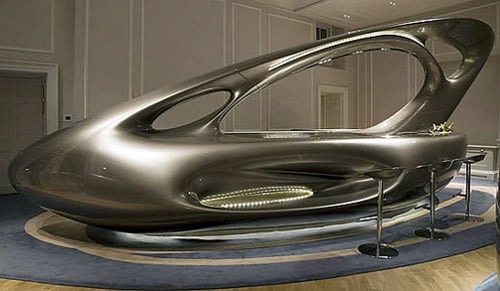
TIP13 | IMPORT NEW FORMS IN ID SKETCHING
These more or less random forms you will create will serve your industrial design sketches.
It is a great way to create something unpredictable.
For example, I love the architectural work of Zaha Hadid.

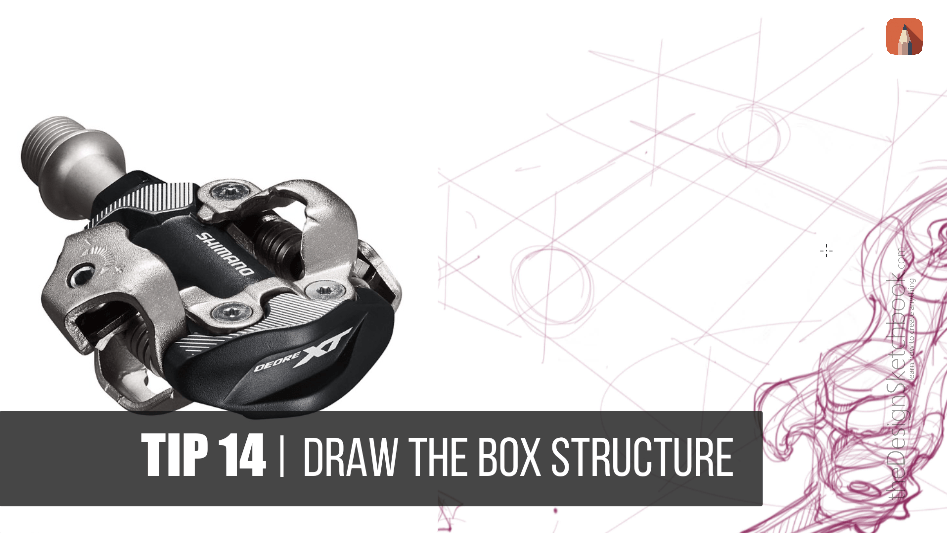
TIP14 | DRAW THE BOX STRUCTURE
To draw the bike pedal, I start with a box that will embed it.
I oversimplify it with a box and a cylinder in the middle.
They give me basic information on proportion.
From there, I’m ready to go!
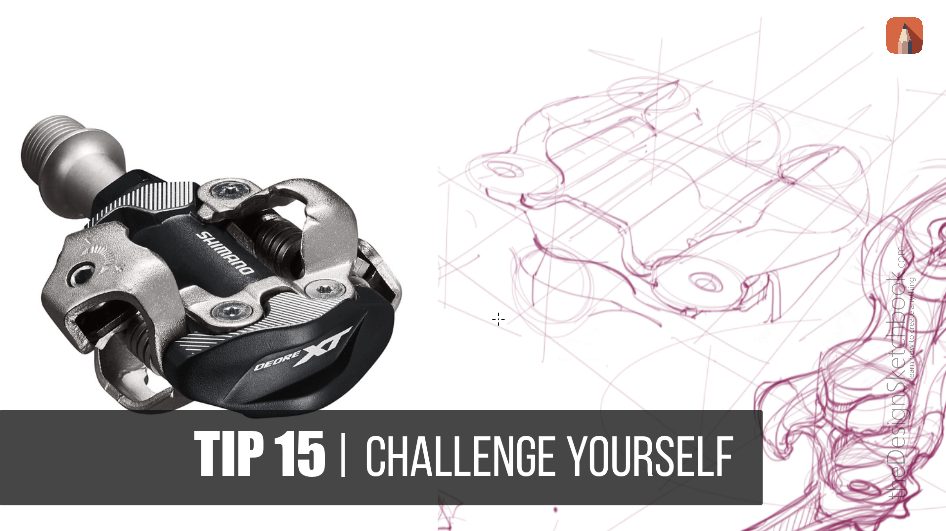
TIP15 | PUSH YOUR LIMITS
As we said, this will be uncomfortable at the start.
But don’t worry, remember to learn step-by-step.
So whenever you raise your skills, what you have accomplished before becomes easy.
Think like you are a knight in video games who get more and more power and assets to fight a bigger boss at each stage.
To succeed in industrial design sketching, it has a lot of mindset preparation.
Explore Concept art, Fashion design, Interior architecture, transport design… to keep evolving.
A designer is like an “Octopus taking inspiration from everywhere”.
If you are a beginner, I share with you how to succeed in your design school.
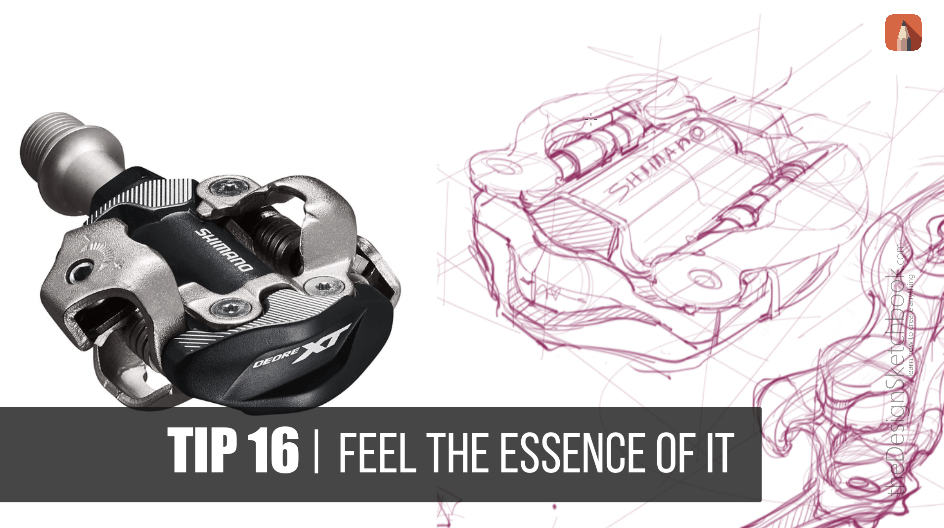
TIP16 |FEEL THE ESSENCE OF IT
Your creative brain needs to function like Google somehow.
Describe this complicated pedal in a few sets of curves, elements, or feelings. For example:
- The cylinder inside is a rotation axis.
- The silver pedal hooks are like small wings.
- The black part has a support function.
Decompose the pedal, and you will feel less overwhelmed and impressed.
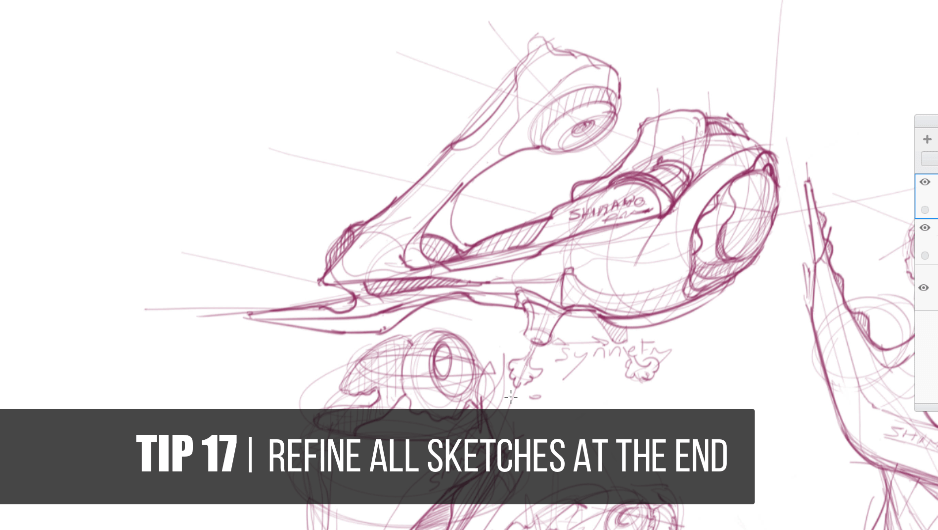
TIP 17| REFINE ALL SKETCHES
Before finishing your drawing session of concept art, take a bit of time to review the overall and touch up!
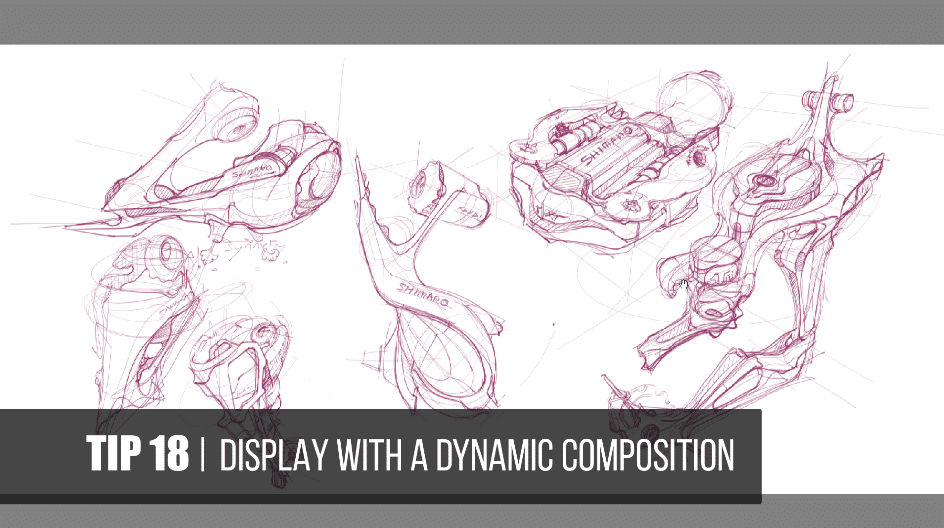
TIP 18| DISPLAY A DYNAMIC COMPOSITION
The presentation of your elements matters.
Even though it is secondary for the drawing exploration, you can start having this in mind.
Note that for this digital sketch, it will be easy to rearrange it anytime.
Conclusion
Exploring the art of concept art getting inspired by bike technology has been a thrilling journey that combines creativity, technical understanding, and a passion for organic forms.
Here are the key takeaways:
- Start with Inspiration: The real world is your muse, and bike tech offers a wealth of design elements to inspire your sketches. Remember to claim your Designer Starter Kit for beginners to kickstart your journey with essential tools and techniques.
- Iterative Process: Embrace the process of sketching, refining, and iterating. Your first sketches are the foundation, not the final product. With each iteration, you’ll refine your skills and ideas.
- Visualize in 3D: Understanding perspective and dynamic angles is crucial for creating compelling bike designs. Practice visualizing forms in space to bring your concept art to life.
- Experiment with Variations: Don’t be afraid to experiment with different forms, proportions, and details. This is where your creativity truly shines, and you can explore the full potential of bike technology.
- Learn the Basics: While creativity is endless, the fundamentals like line weight, perspective, and shading are your anchors. Review and apply what you’ve learned about line-weight for expressive sketching.
- Stay Motivated: Keep your passion for sketching alive by engaging with the community, sharing your work, and learning from others. Remember, every sketch is a step closer to your dreams.
So, grab your sketchbook, start sketching, and let the allure of bike technology fuel your imagination. Your journey as a concept artist is filled with joy, exploration, and growth. Keep practicing, iterating, and most importantly, enjoy the process.
Whether you’re aiming for a career in product design or simply exploring your artistic side, the skills you develop through these techniques will serve you well.
For more tutorials, tips, and ideas, don’t forget to subscribe to my YouTube channel at @theDesignSketchbook. Thank you for joining me on this creative adventure, and I look forward to seeing your progress.
Happy sketching!
See you tomorrow!
Cheers,
Chou-Tac


[…] The lines are more gentle, and have a Professional sketching approach: […]
[…] Edward Eyth and the Oculus Rift’s VR | Concept Artist Discover how to become a Concept artist like Edward Eyth who worked on projects for Disney and Marvel! Learn his trade secrets and […]
My major is industrial design. I’m a design sketch teacher. I’d read the book to improve my teaching skills.