Hi, Product Design Sketcher!
Ready to develop your sketching skills and imagination?
Today,
I share with you a super easy sketching technique to draw your own products even if you are a beginner!
For that, this technique will use the Cylinder as a reference.
We will modify it and create variations to create mainly organic forms and designs.

- How to Draw 100 Forms and Turn Them into Products (Cylinder Base)
- STEP 1. Draw a Basic Cylinder
- STEP 2. Punch your Cylinder!
- STEP 3. Stretch your Cylinder 360
- STEP 4. Think Wireframes (to see in 3 dimensions)
- STEP 5. Draw Abstract Volumes to Tangible Products
- STEP 6. Color Block the Elements
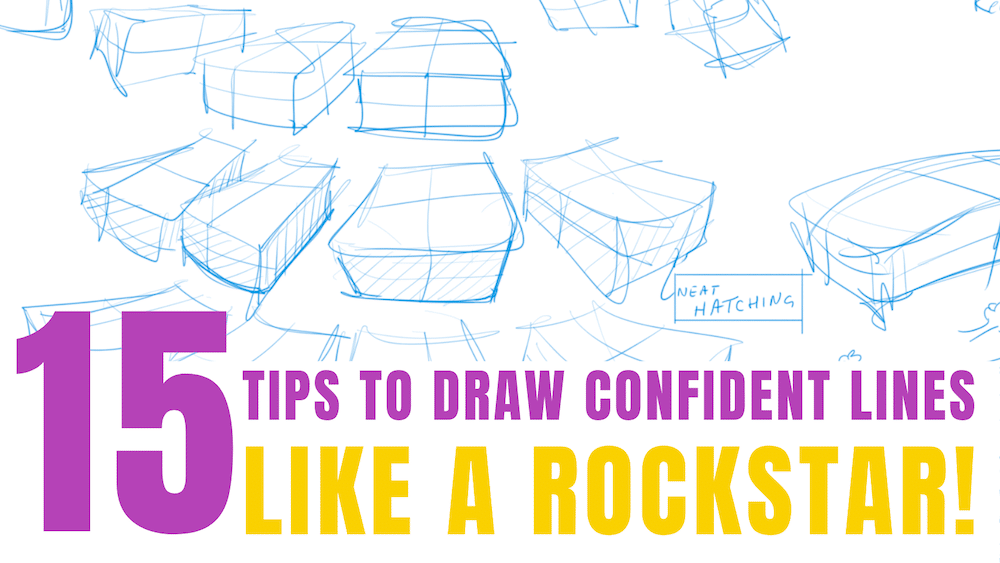
- STEP 7. Draw Clean Shadows with hatching
- STEP 8. Craft your Cylindrical form with a hollow
- STEP 9. Force applied on cylindrical forms bis
- STEP 10. Draw with Slanted Ellipses and Various Viewpoints
- STEP 11. Draw New Products from Abstract Shapes!
- STEP 12. Start Drawing Random Forms with 3 ellipses
- STEP 13. Practice Sketching with the "C – S – I Curves"
- STEP 14. Draw Expressive Cute Characters
- STEP 15. Draw Heads from any angles
- STEP 16. Don't be Shy. Draw Bigger!
- STEP 17. Fill your canvas (and challenge your creativity)
- STEP 18. Don't Overthink, Draw with your Feelings
- Conclusion
- Practical Applications and Recommendations
- Additional Recommendations:
How to Draw 100 Forms and Turn Them into Products (Cylinder Base)
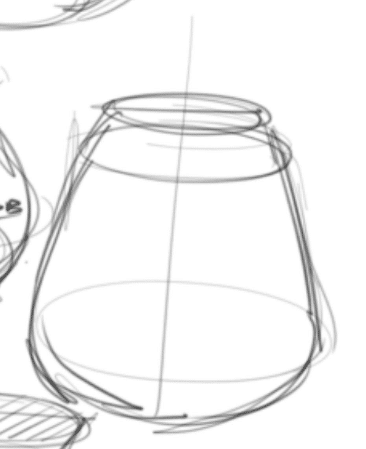
STEP 1. Draw a Basic Cylinder

The first step in creating our new 3D forms and products involves drawing a cylinder.
Draw 2 ellipses along the symmetry axis, then connect them with straight lines.
The ellipse at the top of the cylinder appears visually smaller than the bottom one due to perspective
– an essential factor that influences how we perceive objects’ size and shape from different angles.
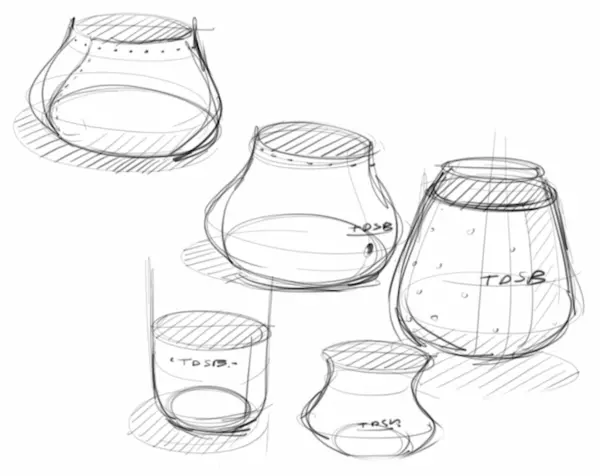
STEP 2. Punch your Cylinder!
You can modify the shape, and proportions of the cylinder by applying pressure
– much like molding clay or shaping pottery – which changes its form.
Try to visualize your drawing as if
it were a real thing that “you can touch, manipulate or mold”.
For instance, imagine you are punching the Cylinder like a Boxing bag!
And it gets squished from all around 360 degrees.
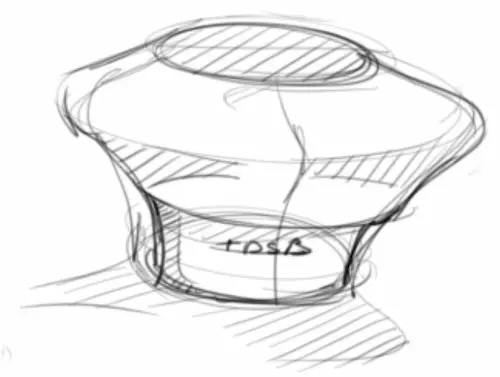
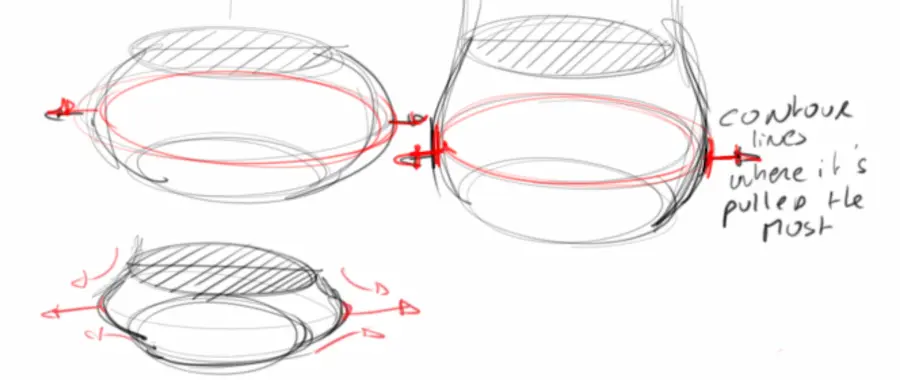
STEP 3. Stretch your Cylinder 360
You can also imagine your cylinder getting stretched, pulled out on the side,
and become an elongated form.
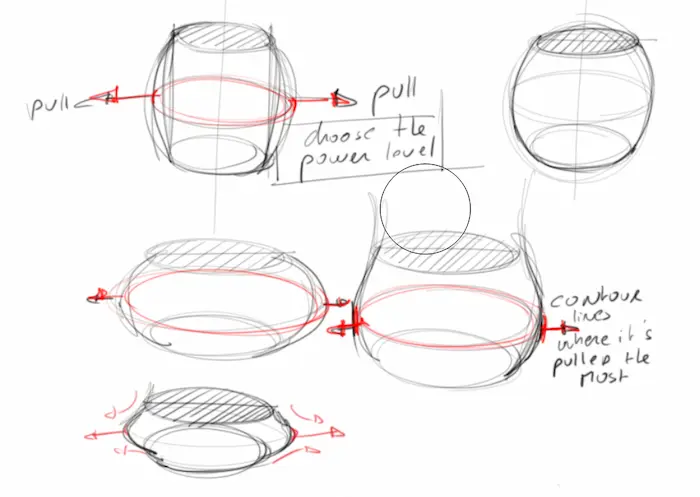
Experimenting is key here!
Try out various heights for your cylinders or apply differing levels of force
to see how these factors influence the final product’s shape and appearance.
Use contour lines marking where expansion has been most significant.
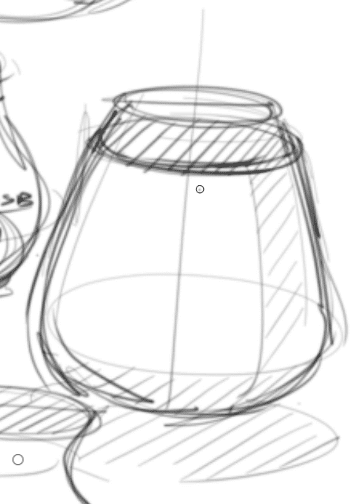
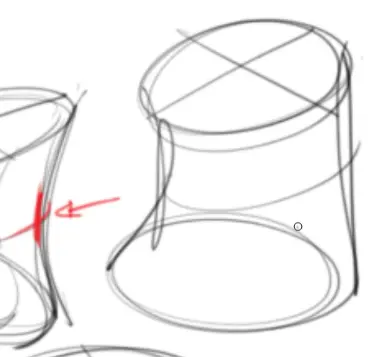
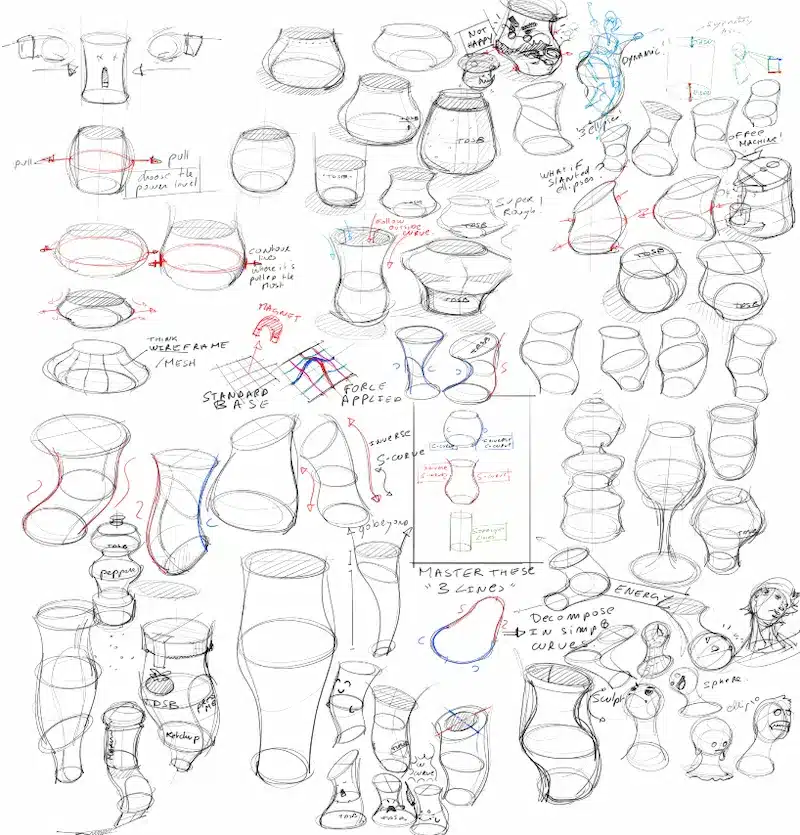
STEP 4. Think Wireframes (to see in 3 dimensions)
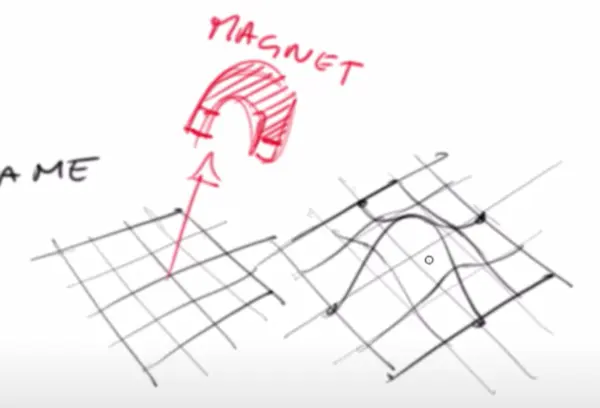
To further aid visualization when altering volumes,
consider wireframes (grid structures) on your cylinder surfaces as guides.
Think about how magnets distort metallic tiles;
that’s essentially what you’re doing here but with lines instead!
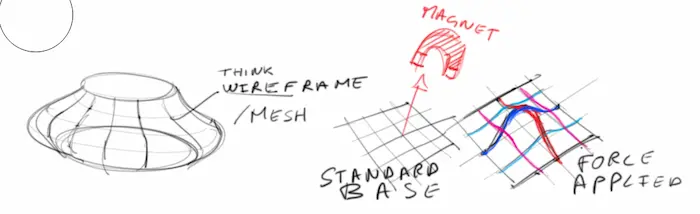
Use them whenever you need.
They may help you apprehend the volume better to draw a shadow on its surface for example.
I actually seldom use them.
But I recommend you practice drawing the wireframes
until your brain can visualize them (without drawing them).
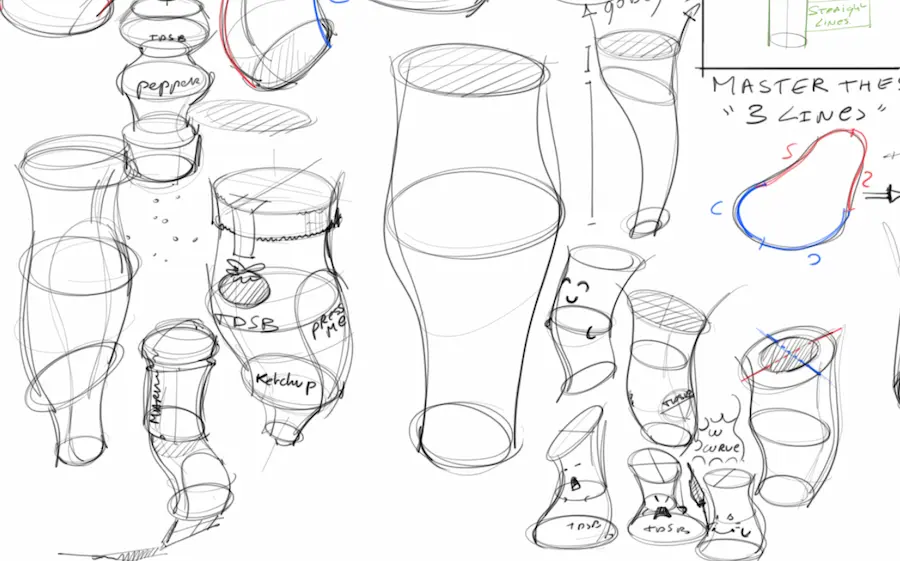
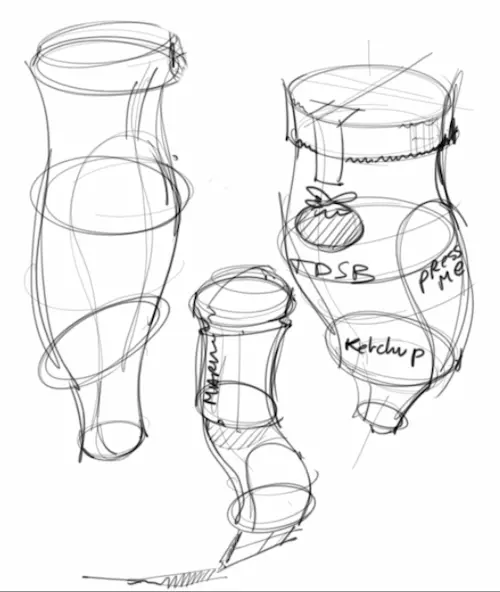
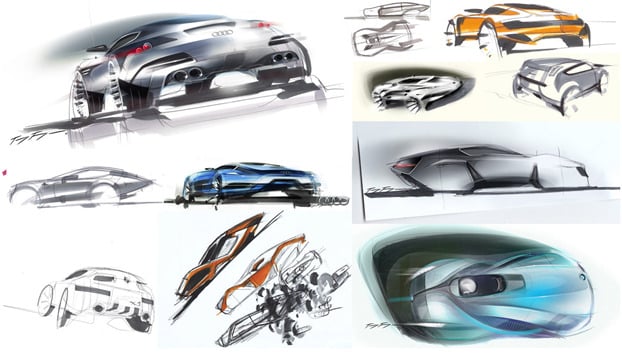
STEP 5. Draw Abstract Volumes to Tangible Products
Make abstract volumes tangible in minutes by adding details.
You can add:
- buttons,
- screen scratches,
- logos, plugs,
- pictograms,
- rubber grips,
- protective foam,
- serial numbers,
- grooves,
- battery slots…
There are no rules here; just get creative!
These detail additions not only make your work more interesting
but also serve as great practice exercises for honing detail-oriented skills.
Do not hesitate to get inspiration from objects around you or use reference pictures
of various products and details.
STEP 6. Color Block the Elements
To represent an additional piece of your product, you can “color block” it with dark hatching.
It will create a nice contrast that brings clarity to your sketch.
Draw color blocking fast with hatching.
STEP 7. Draw Clean Shadows with hatching
When rendering light sources onto these 3D forms (top right works best),
remember to include shadows on the product itself, and on the ground too.
This enhances their three-dimensional feel making them appear more lifelike!
STEP 8. Craft your Cylindrical form with a hollow
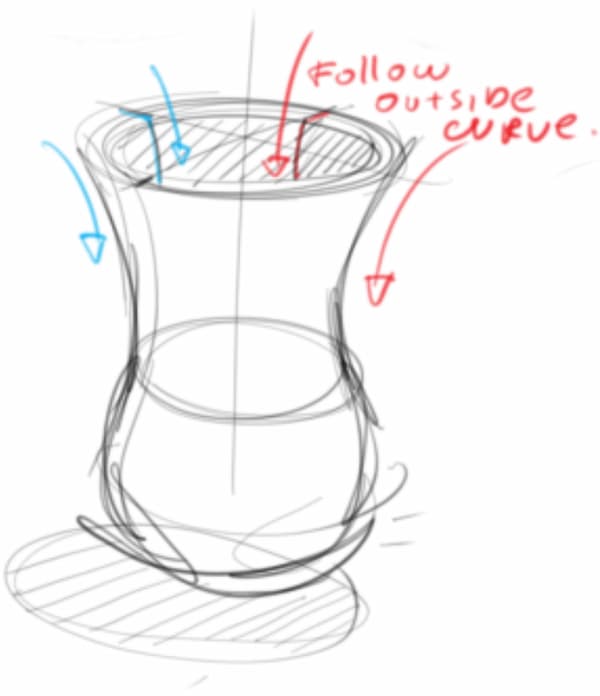
Make sure to draw the inner surface contour lines
following the outer contour lines as a reference.
Add oblique hatching to emphasize the 2 opposite surfaces.
STEP 9. Force applied on cylindrical forms bis
The red arrows show the force applied to your volume.
Try to spot them and give a feeling of animation.
STEP 10. Draw with Slanted Ellipses and Various Viewpoints
Practice drawing various angles of ellipses and viewpoints.
Try drawing wider ellipses as if you would see your volume from above.
Remember to draw the ground shadow with hatchings.
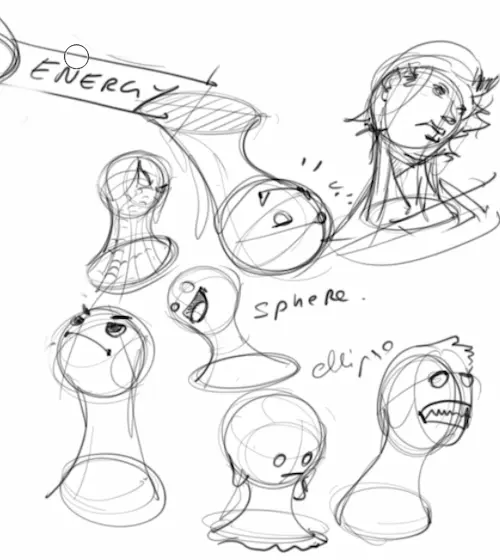
SKETCHING TIP:
Imagine your forms as “organic matters that are fueled by energy”!
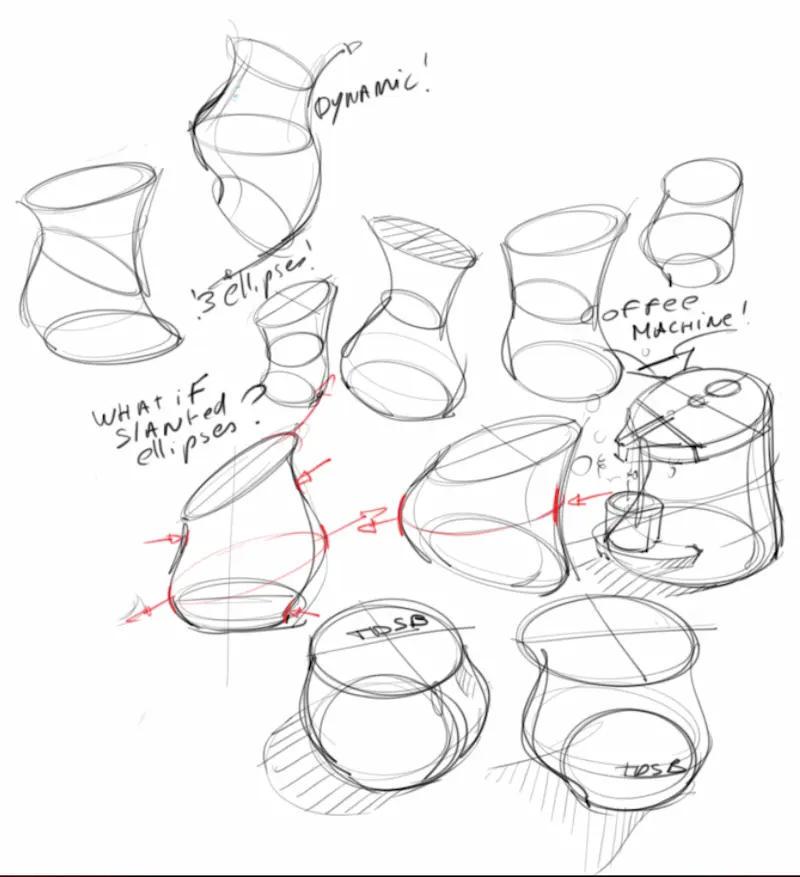
STEP 11. Draw New Products from Abstract Shapes!
This creative method reminds the “Happy-Accident technique” where you start from a random and abstract shape to provoke new ideas for products.

Start with abstract shapes transforming them into recognizable forms like a coffee machine – it promotes creativity and challenges your imagination!
Your imagination is the only limit.
Come up with unexpected ideas or import details you saw in real products or even sci-fi movies!
Note: I added the steam of the hot coffee to bring life to the drawing.
It takes a few seconds to make, and it suddenly becomes a lot more interesting.
That way, you do not only draw a coffee machine, but a little story, a moment of life.
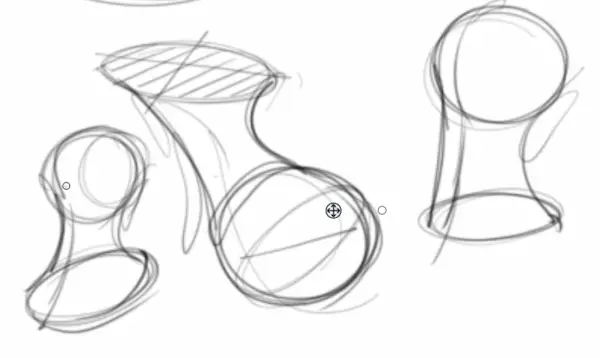
STEP 12. Start Drawing Random Forms with 3 ellipses
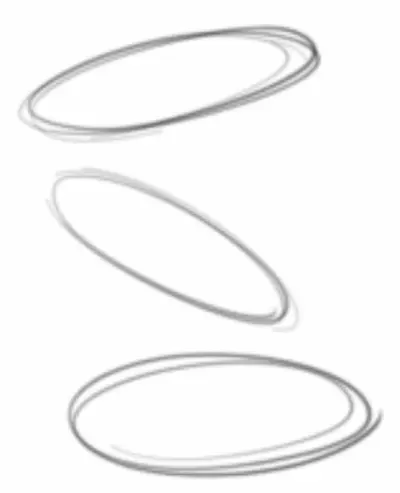
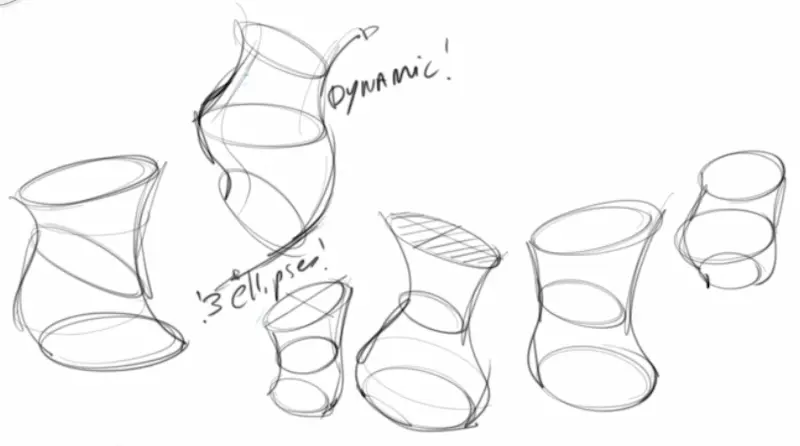
Draw 3 random ellipses with slanted positions.
Connect the 3 ellipses with dynamic lines.
You are now able to draw hundreds of combinations and variations of forms!
STEP 13. Practice Sketching with the “C – S – I Curves”
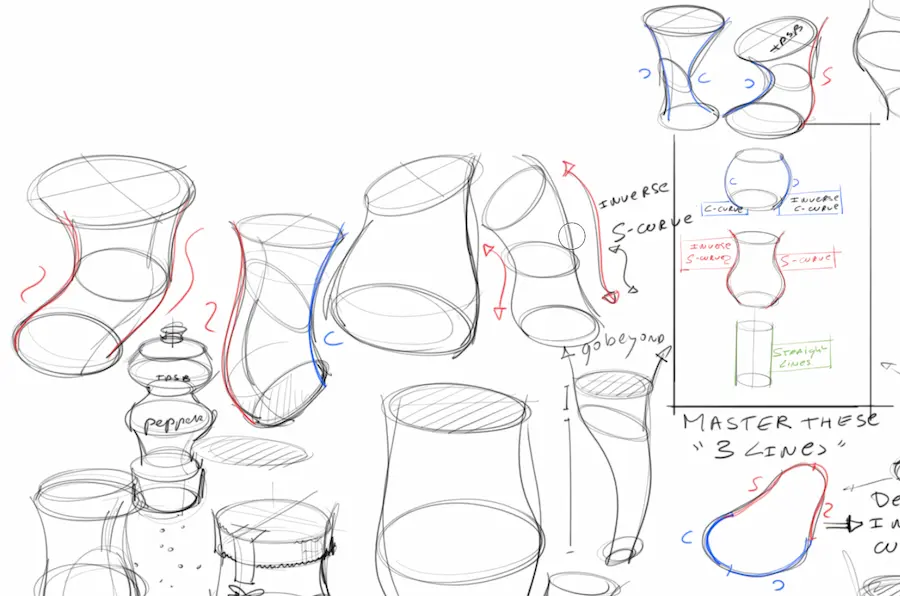
Basic Drawing Techniques:
Practice drawing quickly and roughly to tap into intuition and internalize drawing mechanics.
Master curves and straight lines that are denoted as C, S, and I.
With these 3 basic movements, you will cover 90% of your sketching needs.
When you face complex forms, simplify them by splitting them into simple curves.
Remember:
- the S-curve is like the shape of a “SNAKE”
- the C-curve is like the handle of a “Cup”
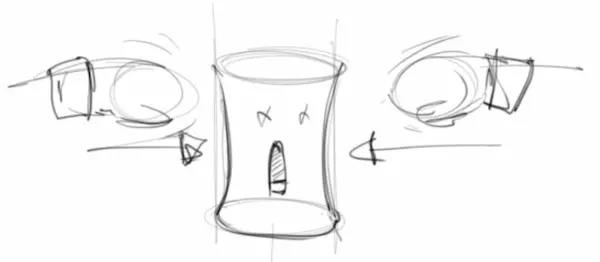
STEP 14. Draw Expressive Cute Characters
Emotion in Drawing:
Show how your drawings feel – for example, by making them smile or frown!
Think of how your abstract form would move and look if it had feelings,
and draw the corresponding facial expression.
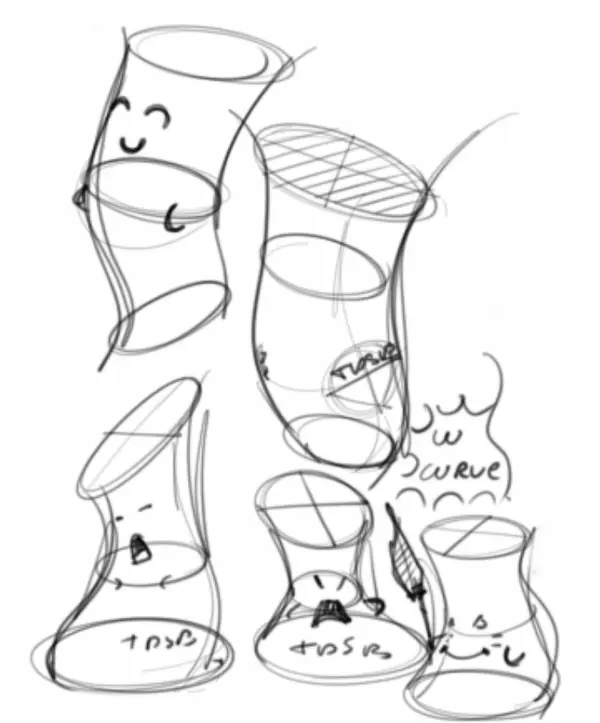
This drawing exercise helps you to use forms more effectively to convey emotions.
Forms have a subconscious impact on the viewer.
STEP 15. Draw Heads from any angles
Start drawing some spheres and ellipses.
Connect them with dynamic curves.
Try to add some tension.
You do not have to draw advanced or complicated heads.
You can practice by adding only the eyes and mouth with a few lines only.
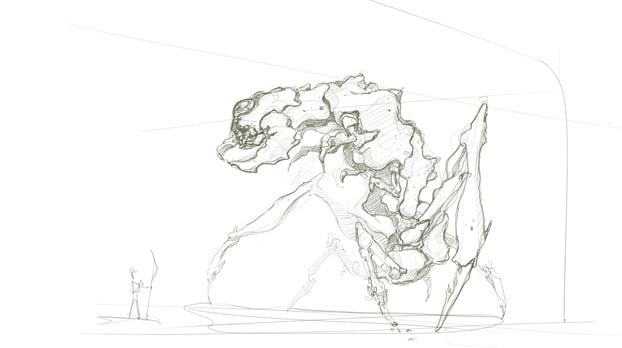
STEP 16. Don’t be Shy. Draw Bigger!
Larger Forms:
Do not draw by turning your wrist.
Practice drawing larger forms for more dynamic movements;
engage your whole arm not just wrist fostering fluidity in motion!
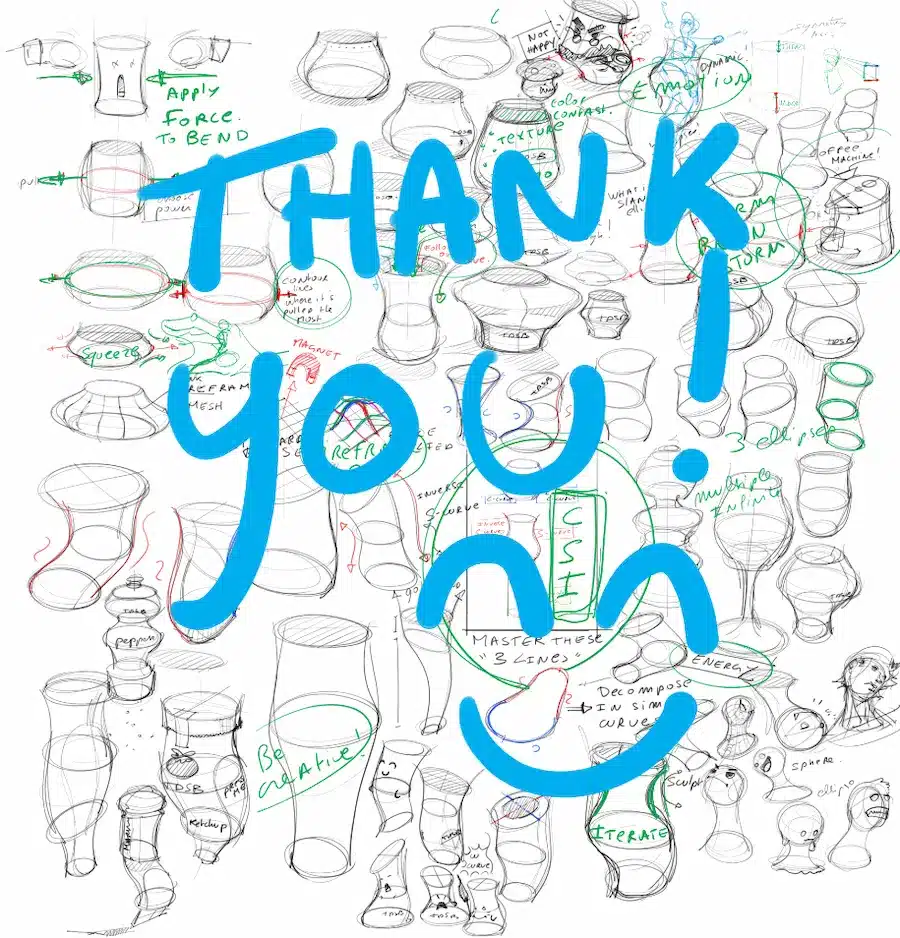
STEP 17. Fill your canvas (and challenge your creativity)
Filling Space:
Challenge yourself creatively by filling any empty space on canvas
using this approach can lead to unexpected beautiful results!
STEP 18. Don’t Overthink, Draw with your Feelings
Instead of overthinking every stroke
let feelings guide you in creating spontaneous diverse sketches
that reflect personal style taste better than anything preplanned ever could!
In the beginning, you may feel pretty dry and uninspired.
That’s ok.
You need to learn to let it go, to give yourself a chance to fail.
I know at first, it hurts to see our mistakes on paper.
It may paralyze and sometimes lead to give up.
Remember, design sketching is about ITERATION.
Did you make a mistake?
Improve your sketch, and redraw it if necessary.
Learn from it, so you can continue to climb the stairs step-by-step.
Conclusion
Drawing is an art that comes alive when we experiment freely without fear of getting it wrong.
After all, mistakes are part learning process, right?
So whether you’re a seasoned artist or beginner designer don’t shy away from trying out new things.
With this sketching method, you can come up with hundreds of new forms to help you create new product designs.
Never stop exploring!
Practical Applications and Recommendations
ACTIONABLE STEPS
- Start drawing a basic cylinder with ellipses along the symmetry axis.
- Practice basic drawing techniques,
focusing on creating quick and rough sketches to tap into your intuition. - Master the three basic movements:
C curves, S curves, and straight I lines.
Use these simple movements to create complex shapes. - Experiment with volume deformation using wireframes
or grid structures on cylinder surfaces as visual guides. - Practice transforming abstract volumes
into tangible forms by adding details like stitches, logos, shadows or perforations for a more realistic feel. - Understand how forces interplay in drawing
such as pushing and pulling – use this knowledge to create dynamic sketches. - Regularly practice rendering light sources and shadowing techniques
to enhance the 3D effect of your drawings. - Experiment with different cylinders:
heights, force levels, and expansion ratios when modifying proportions of your drawings – mark the widest point of expansion for reference. - Try filling any empty space on the simple shape then refine it by adding small specific details.
- Use drawing as a brainstorming tool
– let it translate into various imaginative designs that you can explore further. - Practice giving individual expressions to characters
in order to give them distinct personalities using shading and shaping techniques. - Finally, make sure you enjoy the process – creativity is key!
Additional Recommendations:
Sign up for the free Design Starter Kit being offered here,
which provides resources on your first steps at sketching & perspective
By the way, if you love pottery, you may discover this blog in French: Les Neo Ceramistes
Modeling and manipulating physical matter or objects to build something you have in mind
will help you build your 3D vision.
Always remember that skill in drawing comes from repetition,
experimentation & personal exploration so keep practicing regularly!


[…] are directional lines that help you modify curves and organic forms. They show the direction of your curve at certain points. Great for organic […]