Hi! It’s Chou-Tac,
Facebook has just announced they would suppress all archives of Facebook Lives!
So i went to check and I rediscover this Live Sketching Workshop for Beginners with more than 10 000 Viewers, I made with you guys from Japan in 2018!
“I should publish it” I told myself, and here we go!
To make the content straight to the point, I divided it in 50 small video Tips you can find all below.
INCLUDED: The 9 “Fast-Sketching Power Techniques” for Industrial Design Sketching Beginners!
TL;DR
- Anyone can learn product design sketching—passion and patience matter more than your current skill level.
- Set up your workspace with a comfortable chair and table, maintain good posture, and always warm up before drawing.
- Use simple tools like a ballpoint pen; don’t obsess over finding the perfect pen—focus on practicing the right techniques.
- For straight lines and circles, move your whole arm (not just your wrist) and use the ghost drawing technique to build confidence and control.
- Turn your paper for the best angle, and practice drawing from a 45-degree angle for more dynamic, accurate lines.
- Don’t chase perfection—embrace imperfection and sketch quickly to generate more ideas and make faster progress.
- Learn to think and sketch in 3D, using perspective, construction lines, and contour lines to give your sketches volume and realism.
- Add detail and realism with rounded edges, grooves, and varied line weight for emphasis and clarity.
- Use fast, “ugly” sketches and thumbnails to explore ideas and communicate visually with your team or clients.
- Sketching is a universal language—focus on speed, clarity, and emotion to share your ideas and connect with people worldwide.
- Remember your “why”: your motivation for becoming a designer will help you overcome challenges and keep you moving forward.
- With step-by-step practice and the right mindset, you’ll see exponential progress and enjoy the creative journey of becoming a confident designer.
- TL;DR
- How to Start Product Design Sketching: Boost Your Skills, Clarity and Creativity!
- Introduction
- BEFORE STARTING: Select Your Pen
- 1. What is the Proper Body Posture for Sketching
- 1.2 Warm-up: Why you Should Stretch Your Body Before a Drawing Session
- 2 Train both your Brain & Body's Memory
- 3. How to Draw Confident Straight Lines
- 4 How to Hold your Pen for Drawing
- 5. Master Circles (and Ellipses)
- 6 Avoid Perfectionism Syndrome
- 7 Focus on your arm movement
- 8 Drawing as your Warm-up Ritual
- 9 Draw Fast and Efficient to Communicate Professionally
- 10 BATTLE: Sketching 3D vs Illustration 2d
- 11 Draw from any Angle with a 3D Vision
- 12 Get Results Faster with Feedback
- 13 Fast Sketching Benefits
- 14 Draw your Lines with Emotion
- 15 Sketch with Clarity and Creativity
- 16 Think in 3D: Use Perspective in Sketching
- 16.4 Now You Can Draw a Cube from Any Angle!
- 17 LEARN THE "FAST-SKETCHING POWER TECHNIQUES"
- 18 Add Volume with Contour Lines
- 19 Draw Cylindrical Forms Fast and Easy
- 20 Don't Feel Guilty if You Can't Draw.
- 21 Fundamentals Fix your Mistakes
- 22 Bring Realism with These 2 Fast Techniques
- 22.2 How to Draw Grooves to Bring Realism
- 23 Use Line Weight for Emphasis
- 24 Animate Your Sketches for Impact
- 25 Compose Your Sketches Like a Storyteller
- 26 You don't need fast drawing movement
- 27 Draw Thumbnails
- 28 Embrace Fast and Dirty Sketching for Idea Generation
- 29 Remember WHY you want to become a Designer
- 30 Follow your Dream to Become a Designer
- My Favorite Quotes to Keep You Motivated
- Final Thoughts
- Main Timestamps – Bring Your Sketch Alive! Workshop
How to Start Product Design Sketching: Boost Your Skills, Clarity and Creativity!
Introduction
Product design sketching is the foundation of communicating ideas, expressing creativity, and building confidence as a designer. Whether you’re just starting or looking to sharpen your technique, these actionable sketching tips will help you sketch with confidence, clarity and creativity.
In today’s guide, I’ll walk you through practical tips and power techniques I’ve gathered from years of study, professional experience, and teaching students globally. For some I them, they were taught to me once only by my teachers or professionals, and I am so glad I grasped them! Since, I use them every time I sketch!
Like the law of PARETO 80/20, I love focusing on small things that bring a huge impact in your creative process.
This is my gold mine, and I am glad to share it with you.
Think of this as an interactive, friendly workshop—like we’re chatting together at a café, with plenty of opportunities to practice, ask questions, and see real progress. Let’s get started and bring your sketches to life, step by step!
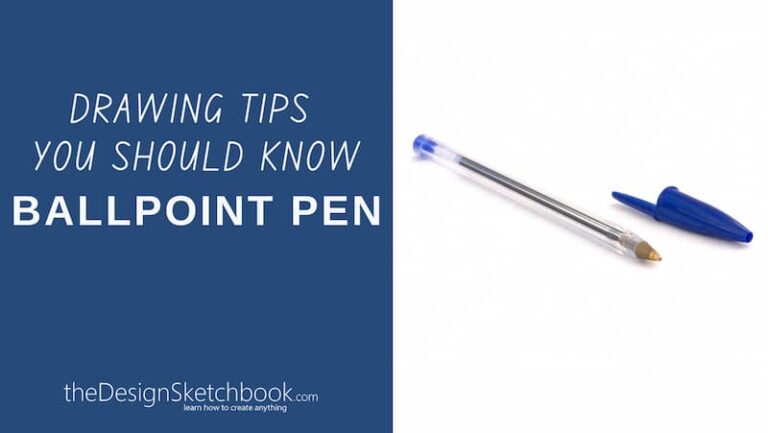
BEFORE STARTING: Select Your Pen
Selecting the right pen for product design sketching is both a personal and practical choice, but it can make a real difference in your creative flow and the quality of your sketches.

I often recommend starting with a basic ballpoint pen, like the classic BIC Cristal or retractable pen from Papermate, because they’re affordable, reliable, and versatile art material—perfect for both light construction lines and bold contours.
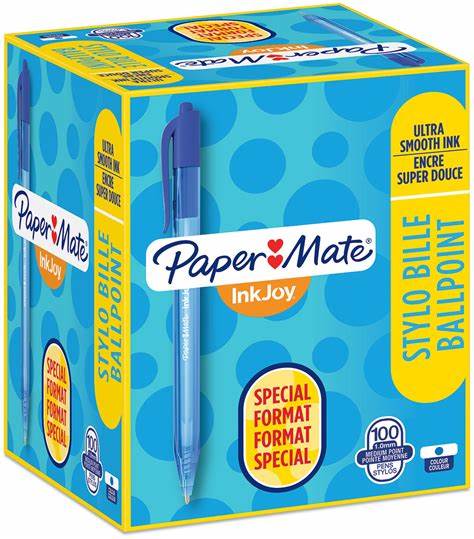
Ballpoint pens allow you to vary your line weight easily by adjusting pressure, which is essential for dynamic sketches. I have no preference for blue or black color, it is up to your personal preference.
BUYING TIP: When you find a ballpoint pen you like, buy them in bulk!
And carry one in your bag, one in your jacket, one with your sketchbook… So you are ready to draw anytime, anywhere!
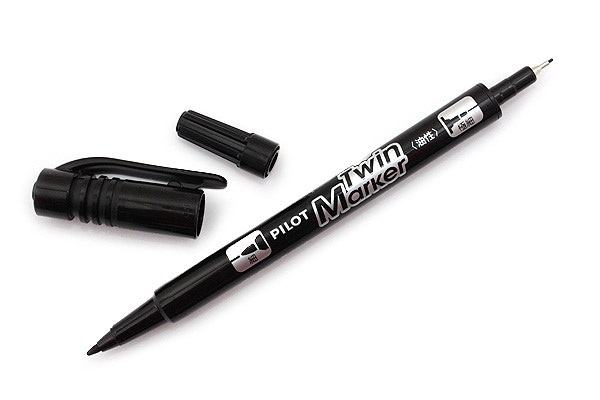
I will be using both red and black colors for the sketching demo.
The Red color will illustrate the common mistakes, then I will use the black marker to show you how to practice the right way, and even give you some practical exercises for you to practice now.
Ultimately, as I my friend Martijn say, don’t obsess over finding the “perfect” pen. The best pen is the one you have with you and feel comfortable using—focus on developing your skills and confidence, and let your tool support your creativity.
If you want to dive deeper into pen choices and see my top picks, check out my Top 7 Sketching Pens of the Year and Pen or Pencil? Choosing the Best Drawing Tool for Designers on my blog.
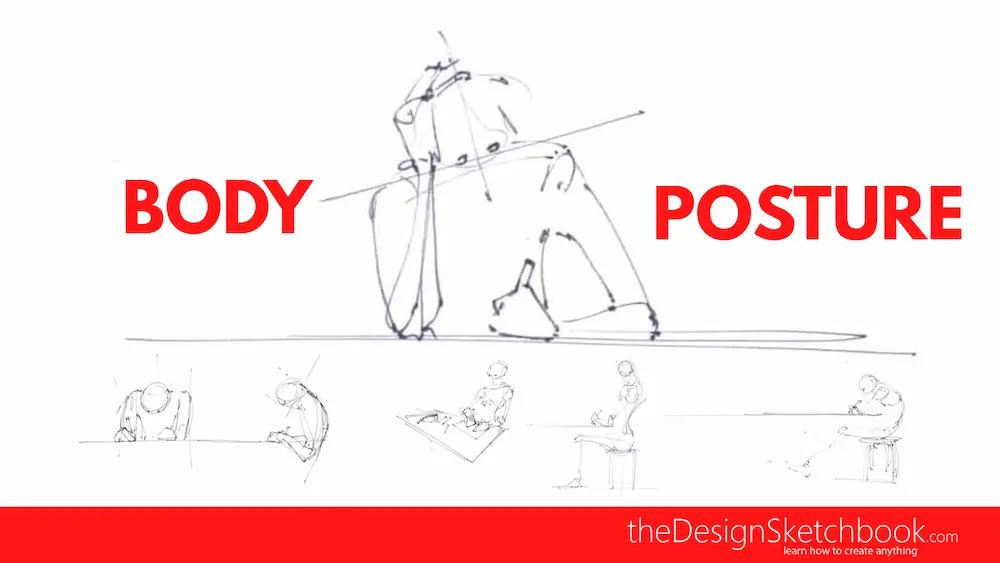
1. What is the Proper Body Posture for Sketching
Your body posture affects your mindset. The more you stay straight, the more power and focus you’ll have in your sketching. Sit comfortably, keep your back straight, and stretch before you start—just like warming up for a sport. This helps you sketch longer and stay focused.
1.1 Right Desk and Chair Height
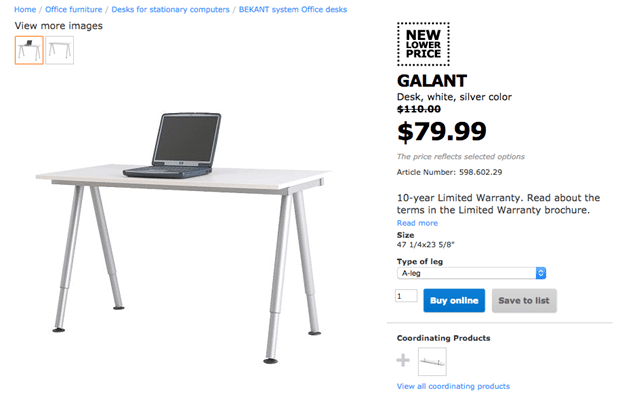
Proper body posture is essential for effective and enjoyable sketching. Sit with your back straight and your head slightly forward, which gives you a clear view of your entire work zone, including your paper and drawing tools. Your arms should be relaxed at your sides, and both feet should be flat on the floor.
Ideally, use a comfortable chair with adjustable height and a table at the right level to prevent hunching or stretching awkwardly. This desk setup allows you to draw for longer periods with less fatigue, maintain concentration, and produce more balanced, expressive sketches
1.2 Warm-up: Why you Should Stretch Your Body Before a Drawing Session
Just like athletes warm up before a game, artists benefit from stretching and warming up before sketching. Take a few minutes to stretch your back, shoulders, arms, and hands. This helps loosen tight muscles, reduces stiffness, and prepares your body for fluid movement.
Simple hand, wrist, and arm stretches, along with a few shoulder rolls, can make a big difference. Warming up not only prevents injury and fatigue but also sharpens your focus and gets your hand ready to translate ideas from your mind to the page.
Start each session with a few basic drawing exercises—like straight lines, circles, or swirls—to connect your mind and muscles and ease into a productive flow.
Related: For more on starting right, check out 7 Essential Video Tutorials Before Starting.
1.3 MISTAKE: Feel Tired? Avoid Slouching Your Body
Remember: “Your body posture affects your mindset. The more you stay straight, the more power and focus you’ll have in your sketching.”
One of the most common mistakes is slouching or letting your body collapse as you get tired during a drawing session.
Slouching, resting your head on your arm, or letting your whole body “fence off” the drawing zone restricts your movement and distorts your view, leading to smaller, less accurate sketches and even discomfort or pain over time.
Bad posture also leads to faster fatigue and can hurt your concentration, making it harder to maintain quality throughout your session.
2 Train both your Brain & Body’s Memory
Training both your brain and your body’s memory is key to becoming confident and intuitive in sketching. As I often say, “It’s not only memorizing things from the brain, but it’s also memorizing from your arm and body”
By practicing regularly, your mind learns the process and your hand builds muscle memory, so movements become natural and smooth over time. This combination helps you sketch faster, with more fluidity and emotion, and lets your creativity flow without overthinking every line.
3. How to Draw Confident Straight Lines
Drawing confident straight lines is a foundational skill in product design sketching, and it’s all about training both your hand and your mindset.
3.1 Avoid the Straight Lines Common Mistakes
The main issue why your lines are not straight is because you are rotating your hand from your wrist. Move your whole arm for medium and long lines, not just your wrist. Practice ghost drawing: rehearse the movement above the paper before you draw. This builds muscle memory and results in dynamic, controlled lines.
3.2 How to Draw Straight Lines with Confidence
The key is to avoid relying solely on your wrist or fingers—instead, use your whole arm for medium and long lines, keeping your wrist locked and moving from your elbow and shoulder. This allows for smoother, straighter lines and greater control
3.3 The Ghost Drawing Technique
A powerful technique to develop this skill is the ghost drawing method. Ghost drawing means simulating the movement of your line before you actually touch pen to paper. Hover your pen a few millimeters above the page and rehearse the motion several times, visualizing the invisible line you want to create. When you feel ready, gently let your pen touch the paper and draw the line in one confident, continuous motion.
This technique not only builds muscle memory but also helps overcome hesitation and perfectionism, making your lines more dynamic and precise.
3.4 Practice drawing straight lines turning your paper
Instead of twisting your wrist or arm, always turn your paper to find the most comfortable angle for your hand. This simple habit helps you draw longer, straighter lines with more control and less strain.
“Don’t hesitate to turn your paper, make the movement easy and natural for you.”
3.5 Learn and Master Drawing from 1 Angle: 45 degrees
Focus on mastering straight lines from a single, comfortable angle—typically around 45 degrees from your body. By consistently practicing at this angle, you develop muscle memory and accuracy, making your lines more dynamic and professional.
3.6 Turn your Paper to Draw Faster (Don’t turn your body)
Turning your paper isn’t just about comfort—it actually helps you draw faster. When your hand moves in its natural range, you can produce straight lines more quickly and with less hesitation. This speeds up your workflow and keeps your sketches fluid and energetic.
To rotate your paper smoothly, use your non-dominant hand to gently pivot the corner or edge, keeping your drawing hand relaxed and ready. You can even place a tissue or soft material under your paper for easier sliding. This little trick saves time and keeps your lines clean.
3.8 Practice your accuracy with the Star Lines Exercise
A great way to build precision is with the Star Lines Exercise: draw a central dot, then practice drawing straight lines radiating out like a star. Focus on hitting the target accurately each time. This exercise trains both your hand’s steadiness and your eye’s coordination, and is a favorite warm-up in my routine.
3.9 Draw Going Beyond to Tighten your Lines
When connecting two points, always draw your line slightly beyond the endpoint instead of stopping exactly at the mark. This “going beyond” technique helps tighten your lines, prevents unwanted curves at the ends, and gives your sketch a more professional, confident look.
Related: Learn more with How to Draw Straight Lines (Freehand)
4 How to Hold your Pen for Drawing
When I sketch, I often use the bottom surface of my hand—the little finger side and the heel of my palm—to gently rest on the paper. He allows me to draw with stability.
This contact acts like a tripod, giving me stability and control. It helps my hand glide smoothly across the page and keeps my movements steady, which is great for beginners building confidence and accuracy.
But I also love the freedom that comes from lifting my hand off the paper. When I raise my hand, I can move my whole arm and shoulder, allowing for broader, more dynamic strokes and expressive lines. This technique is perfect for sketching long lines, curves, or when I want to inject more energy and flow into my drawings.
I recommend starting with your hand supported for stability, then gradually experimenting with lifting your hand to discover the extra freedom and fluidity it brings as your skills grow. Both approaches are valuable—use your hand for stability when you need control, and lift it when you want to sketch with more movement and life.
5. Master Circles (and Ellipses)
Don’t look for the perfect circle from what you see on paper, but look for the nice movement. If you do the right movement, the circle will follow. Focus on smooth, fluid motion. Use ghost drawing to build momentum, then let your pen touch the paper lightly.
5.1 Common Mistakes
Many beginners struggle with circles that are out of shape, flat at the bottom, or always the same small size.
Another common issue is only succeeding once in a while and not questioning the method, which leads to frustration and wasted time. These mistakes usually come from drawing too slowly, using just your wrist, or pressing too hard.
Remember: don’t rest your elbow on the table, and don’t obsess over perfection—aim for a fluid, continuous motion.
5.2 How to Control your Pen Pressure with Stability
Control your pen pressure by keeping your grip relaxed and letting your hand glide lightly over the paper. Use the side of your hand or your pinky as a gentle support if you need extra stability, but avoid pressing down too hard.
Start with light pressure and increase it as you gain confidence in your movement. This approach helps you achieve smoother, more dynamic circles and prevents your lines from becoming stiff or shaky.
5.3 Practice Drawing Multiple Circles
Don’t just draw one circle and stop—practice drawing many circles in a row, side by side and in different sizes. This helps you build momentum and muscle memory, making each circle better than the last.
“Ghost draw” each circle a few times in the air before touching the paper, and let your hand find the rhythm. Over time, you’ll notice your circles becoming rounder, more consistent, and much more natural
Related: Explore this further in How to Draw Circles and Ellipses.
5.4 MiNDSHIFT: Don’t look for the Perfect Circle, but the Right Movement
I want you to make a mind shift: Do not look for drawing the perfect circle on paper, but aim to master the tight arm movement.
You’ll learn and improve much faster.
6 Avoid Perfectionism Syndrome
Avoid falling into the trap of perfectionism when you sketch. Many beginners think every line must be flawless, but this mindset only creates stress and slows your learning.
As I often say, “Being imperfect is totally fine—what matters is getting your ideas on paper and moving forward.” Embrace the process and let your sketches be a reflection of your growth, not a quest for perfection
6.1 Perfectionism is Anti-Productive
Perfectionism is not productive in design sketching. It encourages procrastination and wastes valuable time that could be spent experimenting and iterating on new ideas.
Trying to make every sketch perfect will actually hold you back. Perfectionism leads to hesitation, frustration, and sometimes even giving up before you finish.
Instead of aiming for perfect results, focus on speed, clarity, and expressing emotion in your sketches. This approach will help you build confidence, communicate your ideas more effectively, and enjoy the creative process a lot more.
7 Focus on your arm movement
When you sketch, do not focus on the pen nib itself—instead, pay attention to the movement of your arm and hand. As I often share, it’s like your arm is a printer: the motion comes first, and the pen just follows.
Beginners often watch the tip and press too hard, resulting in stiff, hesitant lines.
But if you shift your mindset and focus on the flow of your movement, your lines will become much smoother, more dynamic, and confident. Think of your hand as guiding the path, letting the pen naturally follow along. This approach helps you draw with more freedom and energy, making your sketches come alive.
8 Drawing as your Warm-up Ritual
Practicing sketching exercises as a warm-up is one of the best ways to kickstart your drawing session with confidence and flow. Just like athletes stretch before training, warming up with simple exercises—like straight lines, circles, and basic shapes—loosens your hand, wakes up your arm, and gets your mind in the right creative zone.
These quick drills help you connect your brain and muscle memory, so your first sketches of the day are less stiff and much more dynamic. As I always say, “The first sketches are often clumsy, but with a few minutes of warm-up, you’ll notice your lines become smoother and your ideas flow more easily.” Make it a daily habit, and you’ll see your skills and confidence grow session after session.
9 Draw Fast and Efficient to Communicate Professionally
Learning how to draw and communicate visually is all about being fast and efficient, not perfect.
The goal in product design sketching isn’t to create a masterpiece, but to quickly get your ideas out and make them clear for others to understand.
When you sketch, you’re not just drawing for yourself—you’re using a universal language to communicate with your team, clients, or anyone, no matter where they’re from. By practicing the right techniques step by step and focusing on speed, clarity, and emotion, you’ll be able to express your concepts much faster and with more impact than words alone.
This approach lets you move projects forward, share your creativity, and inspire others—because in design, clear visual communication is key to turning ideas into reality
10 BATTLE: Sketching 3D vs Illustration 2d
When I talk about sketching in 3D versus using 2D illustration techniques, I always emphasize the difference in mindset and purpose.
Many beginners approach sketching like illustration—thinking in flat, 2D terms, like when drawing a portrait by copying what they see, focusing on grids and proportions to reproduce an image. This is a 2D vision, which is great for illustration, but not what we want as product designers.
In product design sketching, our goal is to think and draw in 3D. We use construction lines, perspective, and transparency to visualize objects from any angle, not just copy what’s in front of us. This approach lets you quickly communicate ideas, modify forms, and present your designs in a way that feels real and tangible.
11 Draw from any Angle with a 3D Vision
When I talk about drawing from any angle with sketching, I emphasize that product designers need to think in 3D, not just copy what they see from a single viewpoint.
Thanks to the fundamentals of perspective and construction lines, you can visualize and sketch your object from any angle—even if you’ve only seen it from one side.
Most products are symmetrical, so once you understand their structure, you can rotate them in your mind and draw them freely in different perspectives. This 3D approach lets you quickly communicate your ideas, modify forms, and present your designs in a way that feels real and dynamic, instead of being limited to flat, 2D illustrations.
12 Get Results Faster with Feedback
When my students receive my feedback, they can learn much faster and more efficiently. By giving feedback in real time or shortly after they share their sketches, I help them immediately see what works and where to improve, so they can adjust and progress without getting stuck or developing bad habits.
This step-by-step guidance makes the learning process much smoother and more motivating, allowing each person to build confidence and move forward at their own pace. I’ve seen that with personalized feedback, students not only avoid repeating mistakes but also gain clarity on how to push their skills to the next level—so their progress becomes exponential, not just incremental.
13 Fast Sketching Benefits
Fast sketching is a game-changer for any designer or creative. When you sketch quickly, you capture ideas on the fly, letting your imagination flow freely without getting stuck on details or overthinking.
This speed helps you explore multiple concepts, iterate rapidly, and solve problems visually—making your design process much more efficient and dynamic. Fast sketching also boosts your confidence and hand-eye coordination, allowing you to communicate ideas clearly and keep up with the fast pace of real-world projects.
As I always say, “We want to be fast and efficient—industrial product designers need to create emotional sketches that attract and communicate.”
14 Draw your Lines with Emotion
Drawing lines with emotion is what brings your sketches to life and sets them apart. Instead of making cold, mechanical outlines, focus on the flow and energy of your lines. Let your hand express the feeling and character of the object you’re sketching.
Emotional lines are fluid and dynamic—they show the personality of your design and invite others to connect with your ideas. The more you infuse your sketches with emotion, the more engaging and memorable they become. Remember, “What makes the difference is who puts more emotion into their sketches—that’s what attracts people and makes them want to see more of your work.”
15 Sketch with Clarity and Creativity
Clarity and creativity go hand in hand in effective sketching.
Your goal isn’t to create a perfect drawing, but to communicate your ideas as clearly and creatively as possible.
Sketching with clarity ensures your ideas are understood, while creativity keeps your audience inspired and engaged. As I share in my workshops, “All this—speed, clarity, and emotion—serves your creativity and helps you communicate ideas clearly, with real impact.”
16 Think in 3D: Use Perspective in Sketching
What we want is to be fast and efficient. We are industrial product designers, and our aim is to create emotional sketches that attract and communicate. Learn to visualize objects in three dimensions using perspective lines and vanishing points. This skill allows you to sketch from any angle and makes your ideas clearer.
16.1 Start Drawing the Horizon Line (also called Eye-level)
Begin by drawing a straight, horizontal line across your page—this is your horizon line, also known as the eye-level.
The horizon line represents your viewer’s eye height and sets the reference for all perspective in your sketch. As I often explain, “The horizon line is your eye-level. It is the main line you see far away, like where the water meets the sky at the beach.” The position of your cube relative to this line will determine whether you see its top, bottom, or just its sides.
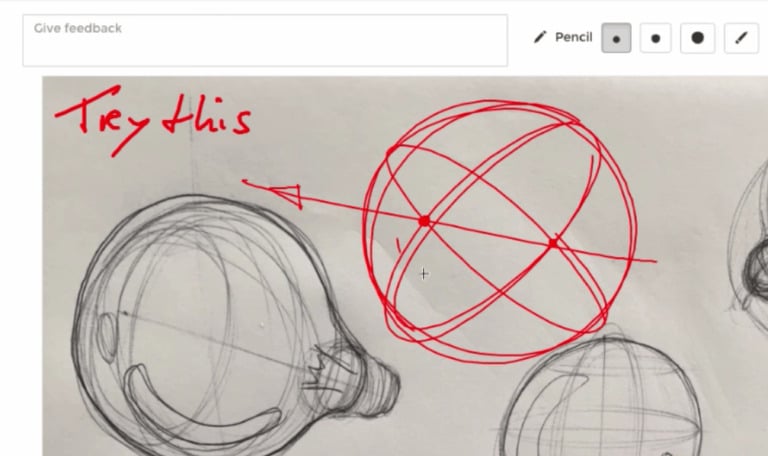
16.2 Draw the Cube with the Vanishing Points
Next, mark two points on the horizon line, one on the left and one on the right—these are your vanishing points.
Draw a vertical line between them to set the front edge of your cube. From the top and bottom of this vertical line, connect lines to each vanishing point. These converging lines will define the sides of your cube in perspective. Then, decide how wide you want each side to be and draw vertical lines between the converging lines.
Finally, close the back of the cube by connecting these new points back to the opposite vanishing points. This step-by-step method ensures your cube looks solid and three-dimensional
16.3 Try Again Above the Horizon Line
Now, repeat the process, but start your cube above the horizon line.
When you do this, you’ll notice you can see the bottom face of the cube—this is called a “worm’s eye view.” The construction steps are the same: start with a vertical line, connect to the vanishing points, and build the sides. This exercise helps you understand how the cube’s orientation changes depending on its position relative to your eye-level
16.4 Now You Can Draw a Cube from Any Angle!
Once you’re comfortable with this method, you can draw a cube anywhere—below, on, or above the horizon line—and from any angle.
Practicing cubes in different positions will train your 3D visualization skills and make it much easier to sketch any product or object with good proportions. As I always say, “If you know how to do this, you can get all these angles, and this is what’s going to help you see in three dimensions. After some practice, you’ll be able to do it freehand!”
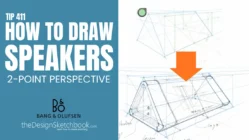
Related: Dive into How to Level Up Your Sketching in 3D with 2-Point Perspective.
17 LEARN THE “FAST-SKETCHING POWER TECHNIQUES”
The Fast-Sketching Power Technique are the shortcuts and mindset shifts I wish I’d known as a student—simple, practical steps that will help you move from flat, lifeless drawings to dynamic, 3D sketches that truly come alive.
Whether you’re a beginner or looking to level up, you’ll discover how to add volume, emotion, and storytelling to your sketches, all while saving time and making your ideas stand out. Grab your pen, follow along, and let’s dive into the fast-sketching power techniques that will transform the way you draw and present your designs.
18 Add Volume with Contour Lines
Adding contour lines is one of the fastest and most effective ways to bring volume and life to your sketches. Contour lines are imaginary lines that wrap around the surface of your object, showing its curves, edges, and even deformations.
Instead of spending time on detailed shading, you can use these lines to instantly communicate the 3D shape and structure of your design.
This technique is especially powerful for product designers who need to visualize and share ideas quickly, as it helps you and your audience instantly “see” the form in three dimensions.
19 Draw Cylindrical Forms Fast and Easy
When it comes to drawing cylindrical forms, the process is simple and efficient if you use the right steps. Start by sketching the main axis (the symmetry line), then draw ellipses at both ends to represent the top and bottom.
Connect these ellipses with straight lines to form the sides of the cylinder. To show volume and make your forms more dynamic, add contour lines that wrap around the cylinder—these can be straight or curved, depending on the shape and deformation you want to express.
20 Don’t Feel Guilty if You Can’t Draw.
Don’t feel guilty if you can’t draw.
You haven’t learned yet—that’s totally normal.
As I share in my workshops, it’s not about some natural gift or being born with talent; it’s about having the right information, practicing step by step, and building your confidence along the way.
If your sketches look clumsy or childlike at first, that’s just part of the learning process—I started the same way! What matters is your passion and dedication. Anyone can learn to sketch, no matter their starting point. So let go of any guilt or self-doubt from the past, and focus on enjoying your progress and creativity from today forward.
21 Fundamentals Fix your Mistakes
When I talk about fixing mistakes in your sketches, I always emphasize the importance of learning and practicing the fundamentals.
As I share in my live workshops, many beginners try to improve by just drawing more and more, but if you’re not studying the basics—like perspective, construction lines, and proportion—you’ll keep repeating the same errors and feel stuck.
The real progress happens when you understand the rules behind what you’re drawing. Once you know the fundamentals, you can spot when something looks off, go back to the basics, and correct it right away.
As I say, “When you get experience, you will draw something and say, ‘Hey, something’s wrong,’ and then you go back to the fundamentals and correct it.” This step-by-step approach not only helps you fix mistakes but also builds your confidence and intuition as a designer.
22 Bring Realism with These 2 Fast Techniques
A small modification—adding a slight angle or double line—can give your sketch warmth and realism. You go from a cold geometric shape to something tangible.
Soften corners, add grooves, and double lines to indicate part separations. These details make your sketches feel more like real products.
22.1 Add Realism with Rounded Edges
Adding rounded edges to your sketches instantly brings a sense of realism and tactile quality to your designs. Sharp, perfect corners often look cold and mechanical, while subtle curves and fillets suggest a product you can touch and hold.
To draw rounded edges, add small angles at each edge to soften them. Your volume becomes warmer and tangible instantaneously. It gives like a “Real Feel”, not just a cold geometrical form anymore.
22.2 How to Draw Grooves to Bring Realism
Grooves are the small gaps or seams between parts of a product, like where two pieces fit together or where a button sits.
Drawing grooves effectively adds depth and detail that make your sketches look professional and believable. Instead of a single line, draw two parallel lines close together to represent the groove’s edges.
To enhance realism, shade the inside of the groove with darker lines or quick hatching, creating the illusion of depth. Play with line weight around the groove to make it stand out and catch the viewer’s eye. This simple trick instantly elevates your sketches, making them pop with tactile detail and convincing form.
23 Use Line Weight for Emphasis
Avoid the monoline. Practice as many pen pressures as possible.
Start light, then bold the lines when you’re confident. Vary your line weight to create depth and focus. This brings clarity and emotion to your sketches.
Related: See How to Draw Hatching and Rise Your Speed of Sketching for more on line weight and dynamic shading.
24 Animate Your Sketches for Impact
The human eye is attracted by movement.
Add dynamic elements—arrows, motion lines, or exaggerated perspectives—to make your sketches come alive. A lively sketch tells a story and grabs attention, making your ideas stand out.
Related: Read about How to Start Drawing from Imagination Using Perspective for more on dynamic sketching.
25 Compose Your Sketches Like a Storyteller
You are a storyteller if you’re a designer—you’re not just doing a shape of your product, you have to tell a story.
When you create a product, you want people to have a story to live around it, to use it. You’re creating life experience. Designer is not only about the product, it’s about life experience.
When you create a product, you want people to live an experience. Use some viewpoints that allow your audience to better understand your product and feel attracted to it.
25.1 Designers are Story-Tellers
As designers, our sketches and presentations aren’t just about showing forms—they’re about inviting people into a story, creating emotion, and helping others imagine how a product fits into real life.
Related: For composition inspiration, see 36 Sketching Tips from the 7-Meter Sneakers Sketch Challenge.
26 You don’t need fast drawing movement
You don’t necessarily need to draw with a fast pen movement. What really matters is having a regular, controlled motion—speed is not the goal, especially when you’re starting out.
As I explain, “To get dynamic lines, you do NOT have to draw with a fast movement of hand or arm. As long as your movement is regular, it’s fine.”
In fact, trying to force speed can lead to mistakes and frustration. Focus instead on building good habits, understanding the techniques, and letting your hand move at a comfortable, steady pace. With practice, your speed will naturally improve, but quality and control always come first.
27 Draw Thumbnails
When I talk about thumbnails, I always emphasize how powerful and essential they are for creative exploration and planning your sketches. Thumbnails are quick, small, and loose sketches that let you generate many ideas fast without worrying about details or perfection.
As I say, “Draw your thumbnails without caring much for details. Ignore or simplify them. Focus on drawing the main shapes with fluid lines.”
This technique is incredible for generating ideas at the start of a design project and helps you visualize a scene or product in no time. The goal is to capture the overall mood and composition, not to make a finished or realistic drawing.
Thumbnails let your creativity flow, help you compare options, and save time by allowing you to pick the best ideas to develop further. The phase of detailing comes later—start with thumbnails to make your process dynamic and efficient.
28 Embrace Fast and Dirty Sketching for Idea Generation
When I talk about idea generation, I always encourage you to embrace fast and dirty sketching—what I like to call “ugly doodles.” You don’t need to make perfect or beautiful drawings at this stage.
The goal is to get your ideas down on paper quickly, without worrying about perspective or details. This approach lets you explore many variations, customize your concepts on the fly, and see what works best—all within a few seconds per sketch.
By sketching fast and rough, you free your creativity and avoid getting stuck on making things look polished. It’s about capturing the essence of your idea before it disappears from your mind.
Later, you can select your best concepts and refine them with more detail and precision. Remember, “fast and dirty” sketches are a powerful way to unlock new ideas, iterate rapidly, and keep your design process fun and productive.
Related: Discover the 90 Design Tip-a-Day Challenge to keep your creative flow going.
29 Remember WHY you want to become a Designer
To overcome difficulties as a designer, I want you to remember WHY you want to become a designer in the first place. Your “why” is your personal source of energy and motivation—it’s what keeps you going when things get tough, when you feel stuck, or when you doubt your progress.
Whenever you face challenges, setbacks, or moments of frustration, reconnect with your original passion and purpose. Ask yourself what made you fall in love with design, what excites you about creating, and what kind of impact you want to make. Holding onto your “why” gives you the strength to push through obstacles, stay focused on your goals, and enjoy the journey—even when it gets hard.
30 Follow your Dream to Become a Designer
As I share with my students, “As a designer, you are going to have a real influence on others. If I can help you bring your ideas to life, then you can help even more people by creating amazing products that make the world a better place.”
Design is a universal language that allows you to communicate, solve problems, and inspire change anywhere you go. By dedicating yourself to thoughtful, human-centered design, you’re not only expressing your creativity—you’re contributing to a future where design improves well-being, brings people together, and creates opportunities for everyone to thrive.
My Favorite Quotes to Keep You Motivated
“If you do the right movement, the circle will follow. Don’t look for the perfect circle—look for the nice movement.”
“Your creative spark is a gift. Make sketching a part of your daily life and let it inspire you.”
“Anyone can sketch. It’s just a matter of knowing how to do it, exposure, and dedication.”
“Design is about creating by iteration.”
“Sketching is a universal language. With it, you can communicate ideas anywhere in the world.”
Final Thoughts
As we reach the end of this journey together, I want to thank you for your passion, curiosity, and willingness to grow as a designer.
Remember, learning how to sketch is not as difficult as it seems when you take it step by step, focusing on the basics and building your confidence with each line you draw. Don’t feel guilty if you couldn’t sketch before—no one is born knowing how; it’s all about learning the right methods and practicing with dedication.
Every sketch you make, even the clumsy ones, is a step forward. Embrace imperfection, iterate, and let your creativity guide you. Sketching is a universal language that opens doors, connects you with people around the world, and gives you the power to share your ideas clearly and with emotion. As a designer, you’re not just creating products—you’re creating experiences and helping others live in a better world.
Keep your “why” close to your heart, stay motivated through challenges, and never stop sketching. Dream big, sketch often, and let your ideas shape the future.
Thank you for being part of this creative adventure—here’s to the countless sketches and stories yet to come!
Take care,
Chou-Tac
Explore more tips, free resources, and tutorials at The Design Sketchbook.
Main Timestamps – Bring Your Sketch Alive! Workshop
00:00 – Introduction & Sound Check
00:13 – Getting to Know the Audience
01:09 – Sharing Where Viewers Are From & Sketching Dreams
03:07 – Importance of Passion in Sketching
04:12 – Audience Motivation: Why Learn to Sketch?
06:37 – Starting the Workshop: Interactive Approach
07:15 – Launching the New Online Course Announcement
08:46 – The Real Challenge for Beginners: Confidence
10:00 – Quick Review: Straight Lines, Posture, Circles, Perspective
12:32 – Body Posture for Sketching
14:35 – Warming Up Before Sketching
15:38 – How to Draw Straight Lines: Common Mistakes & Tips
17:49 – Using the Whole Arm for Confident Lines
19:45 – Ghost Drawing Technique Explained
21:33 – Turning the Paper for Better Lines
22:32 – Straight Line Practice Exercises
24:07 – Hand Support and Stability Tips
25:36 – Drawing Circles: Movement Over Perfection
27:09 – Focus on Movement, Not the Nib
29:00 – Warm-Up Exercises for Sketching Sessions
30:08 – Difference Between Illustration and Product Design Sketching
33:02 – Thinking in 3D: Drawing from Imagination
36:00 – Adding Emotion to Sketches
38:37 – Quick Introduction to Perspective Drawing
43:48 – Fast Power Techniques for Impactful Sketches
45:01 – Power Technique #1: Contour Lines for Volume
49:02 – Practicing 3D Forms with Random Shapes
51:33 – Drawing Cylinders and Ellipses in 3D
55:01 – Exponential Progress: Practice and Mindset
57:00 – Power Technique #2: Adding Realism with Rounded Edges
01:01:13 – Power Technique #3: Drawing Grooves and Gaps
01:04:00 – Training Your Observation Skills
01:05:32 – Power Technique #4: Line Weight and Pen Pressure
01:09:54 – Power Technique #5: Adding Animation and Movement
01:13:14 – Making Sketches Inviting and Storytelling
01:16:35 – Final Thoughts: Making Your Sketches Alive
LEARN MORE FROM BEGINNER TUTORIALS!


[…] comics… these are also great ways to learn the fundamentals of drawing since all of it is connected. You can even try drawing products in different styles, or maybe […]